Blanco Bungalow Kitchen Reno: Week 6
Hi everyone! It’s week 6 of our kitchen remodel, and I’m already over it haha. No, not really, I’m fine, it’s just having our construction worker begin work in the evening and work all night while our bedroom is on the other side of that plastic sheet has not been fun. We’re making it work, but also very ready to be done!
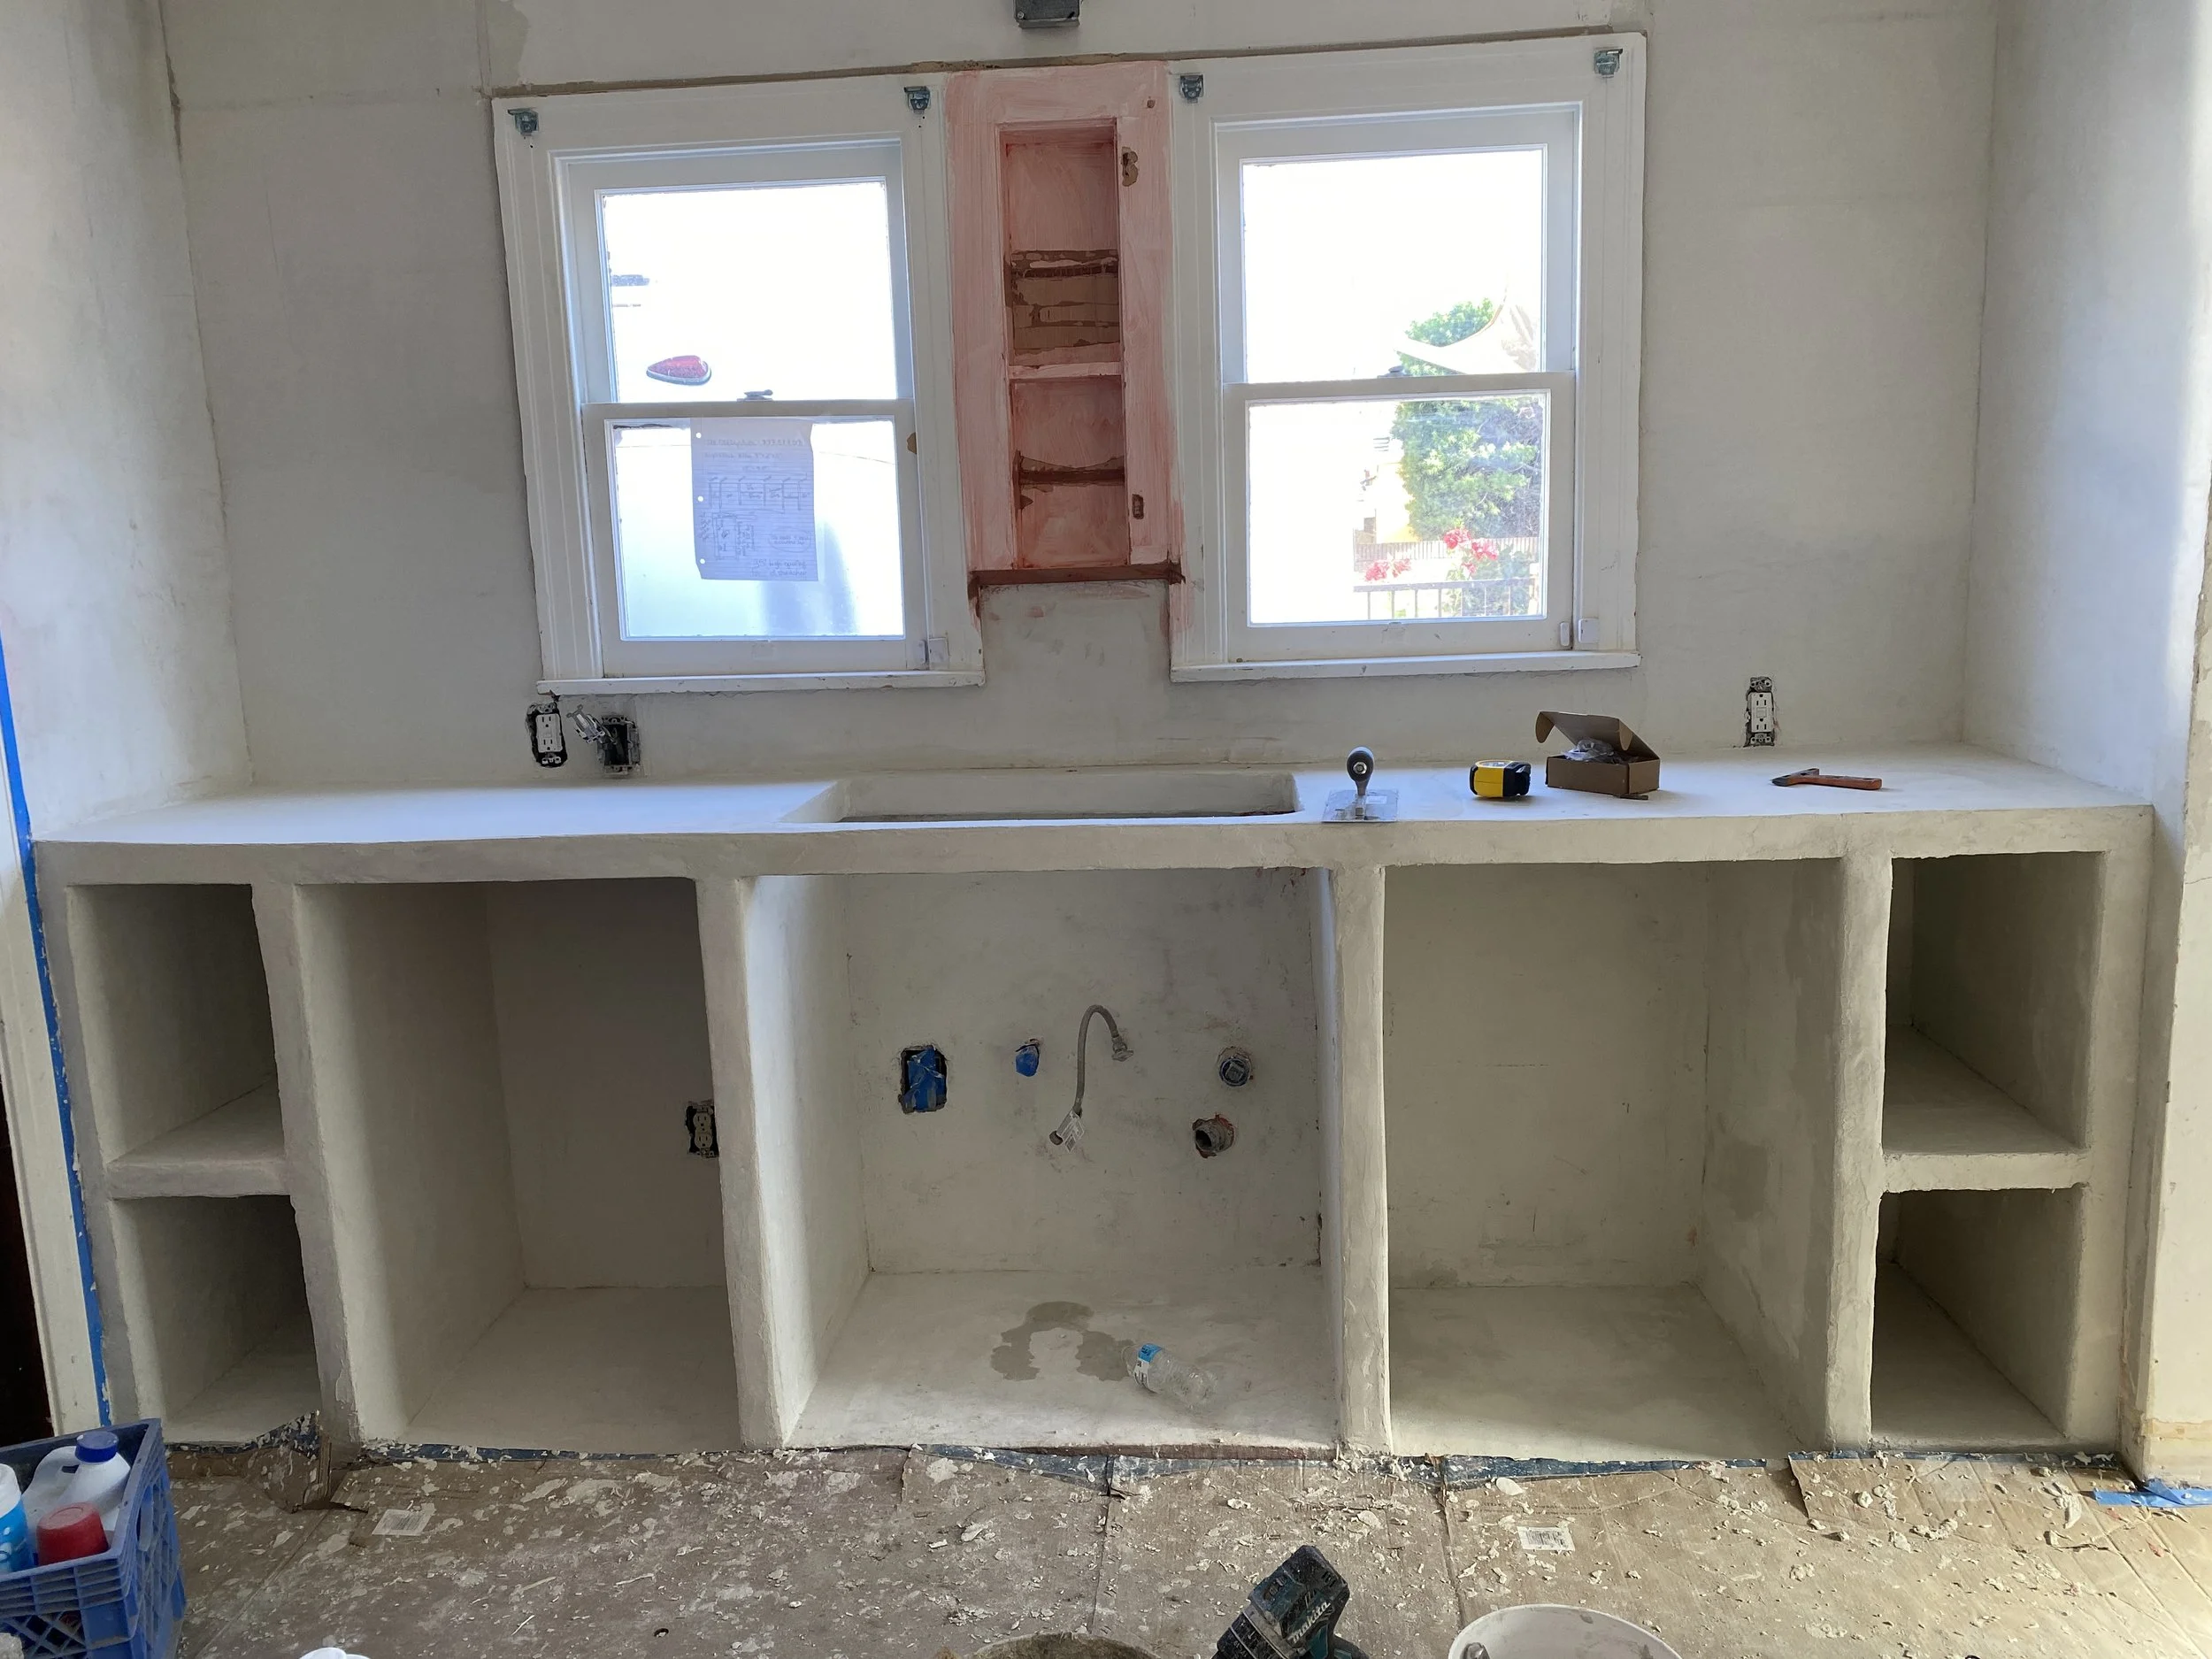
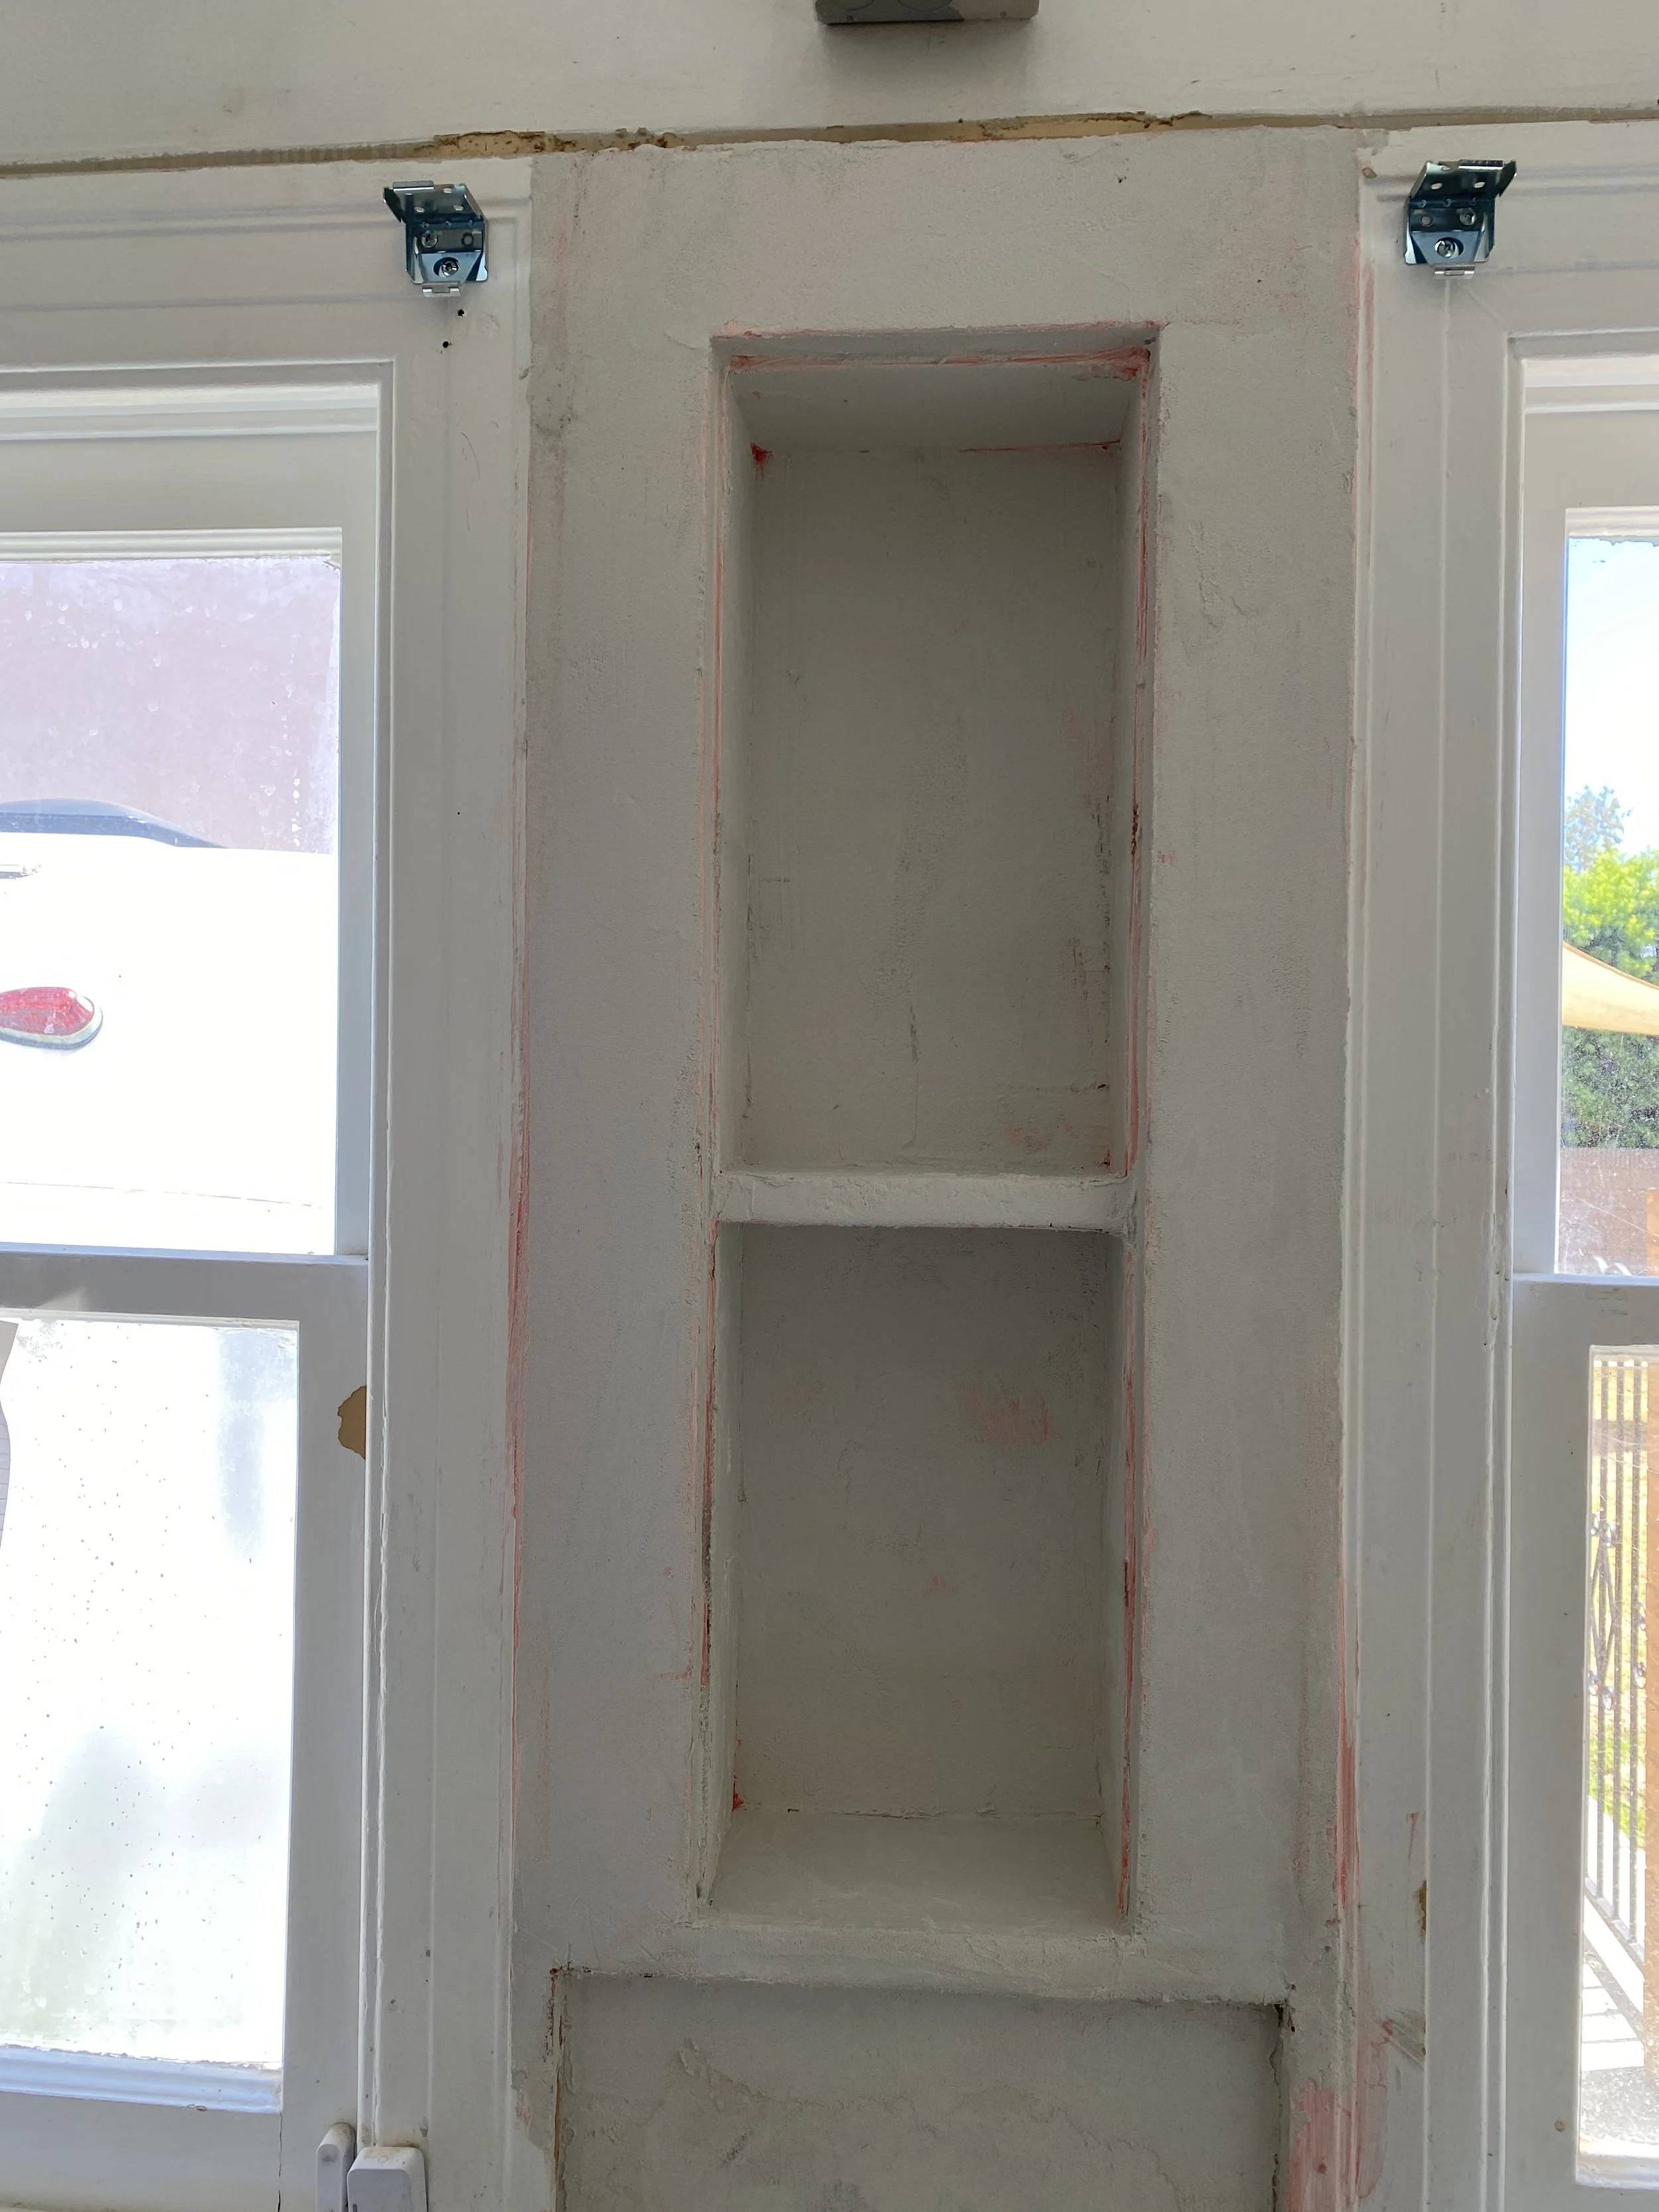
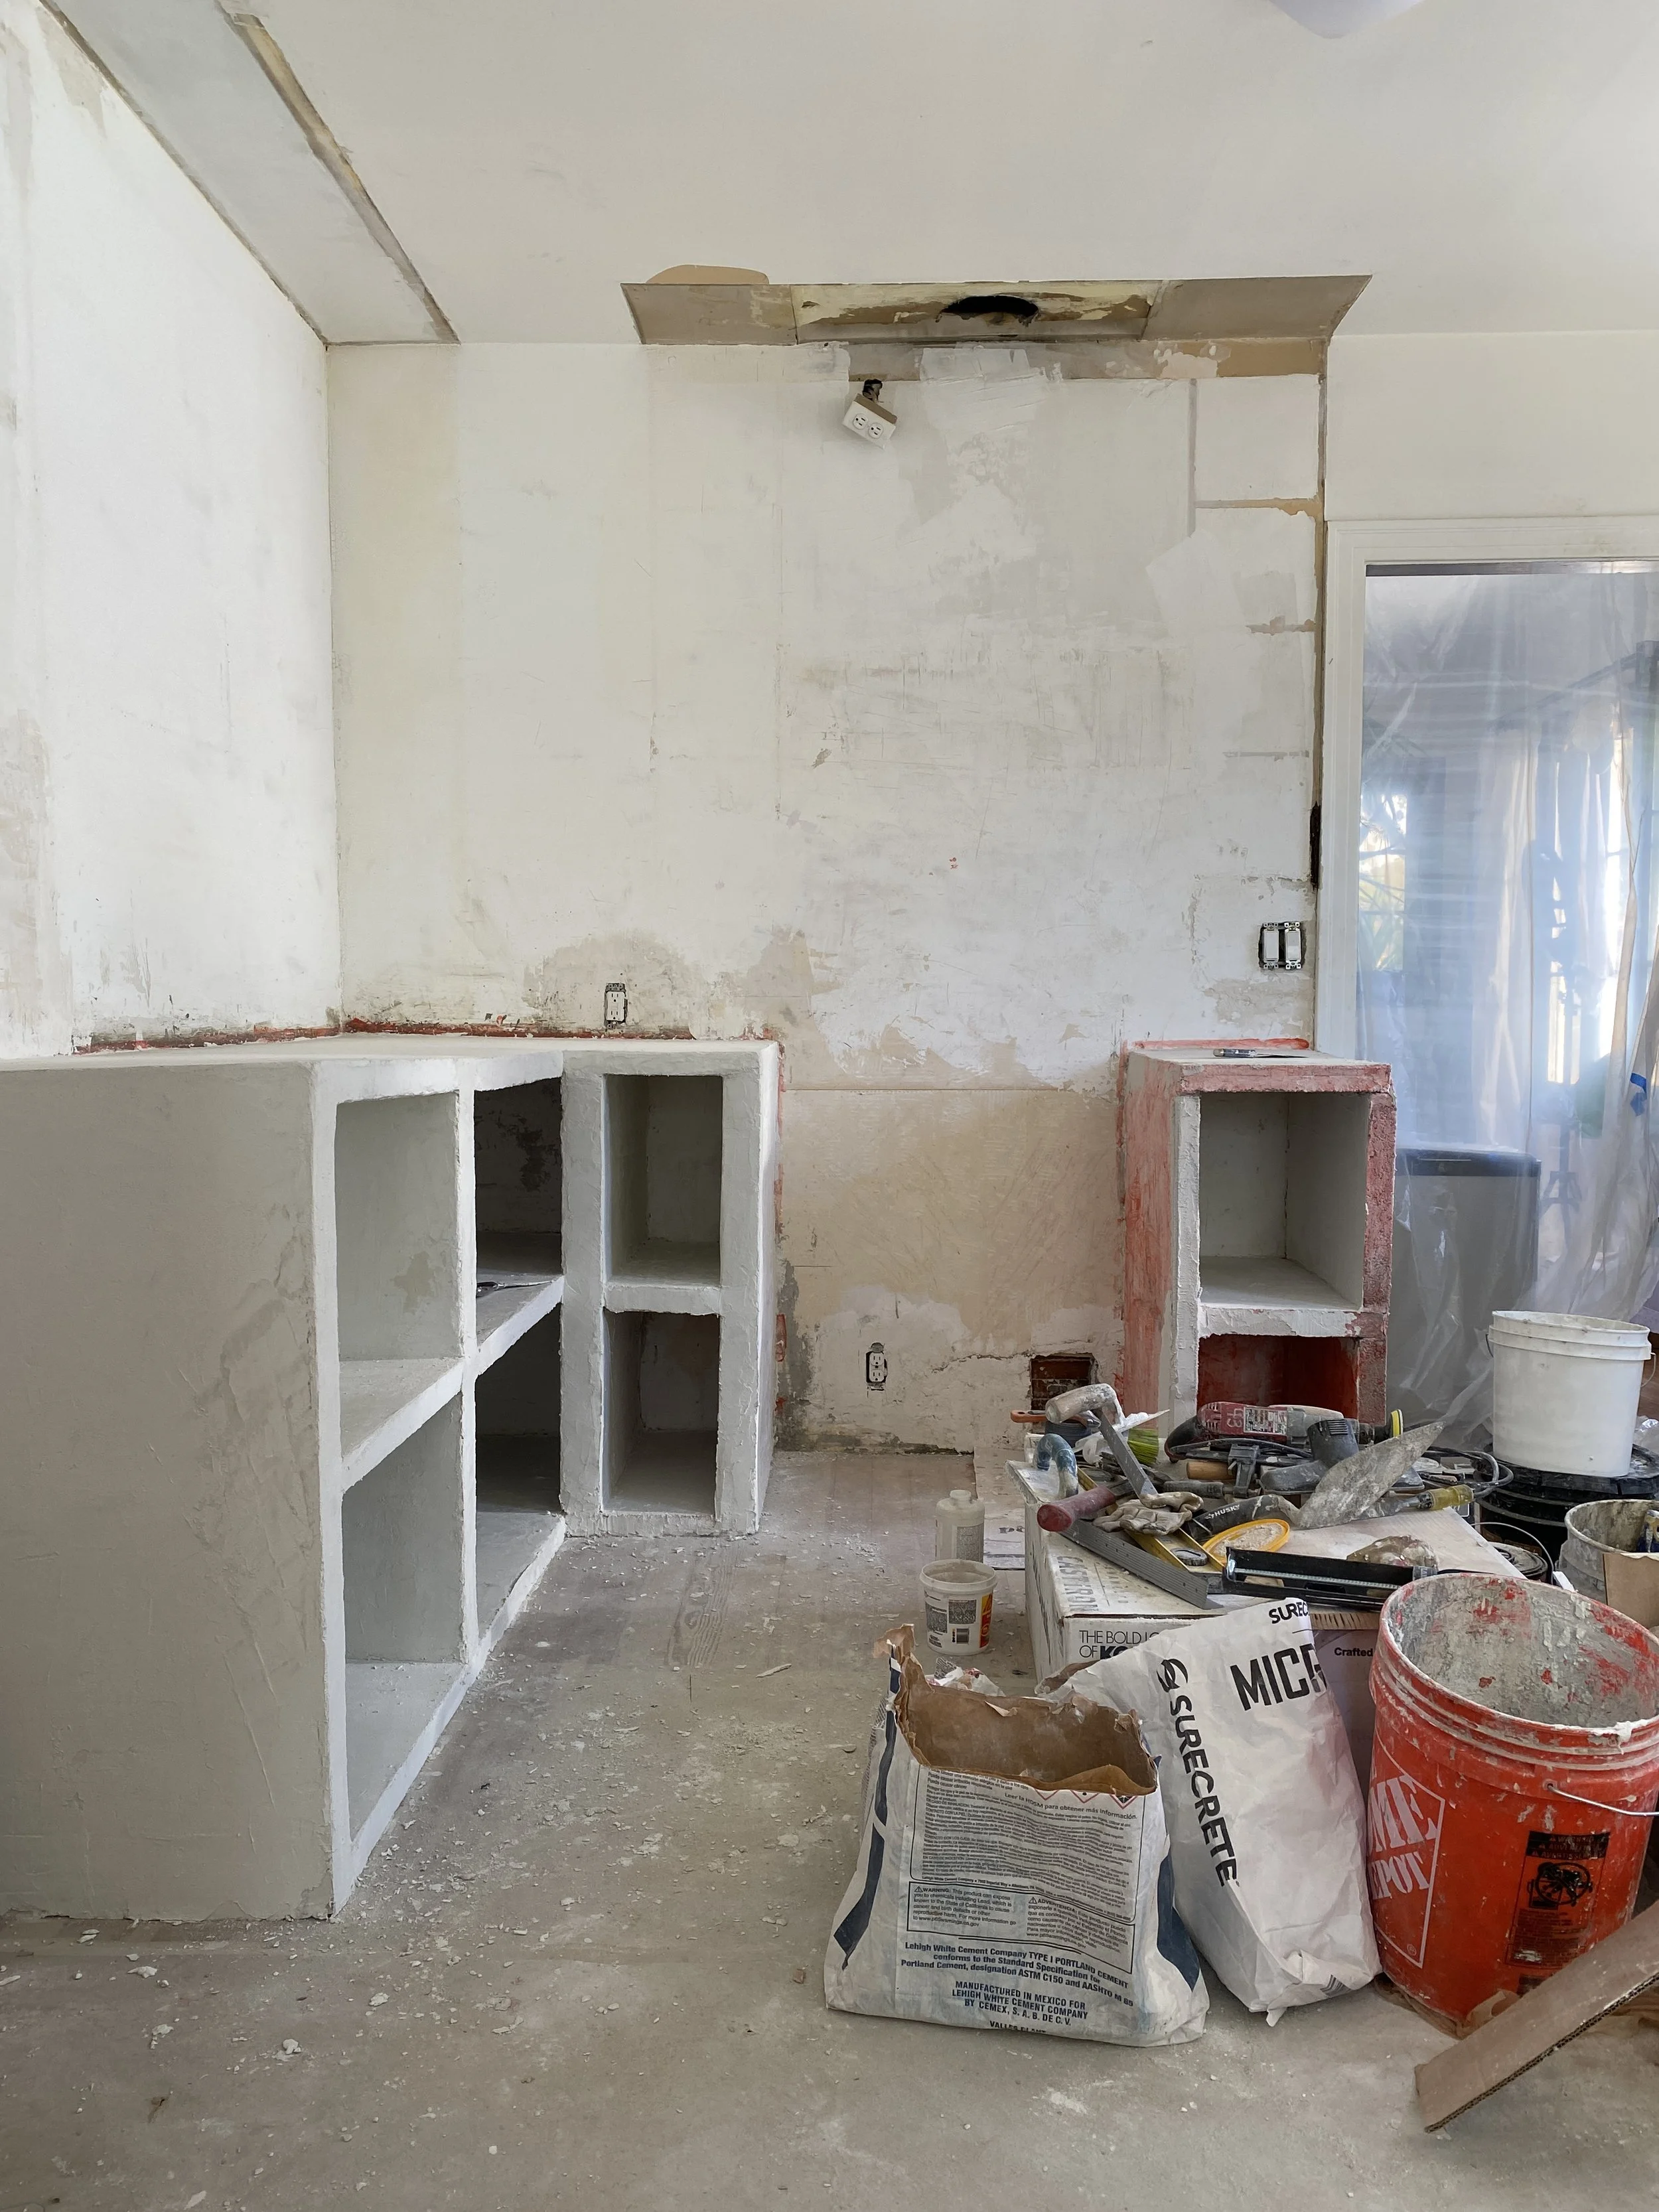
So as you can see where the windows are, we cut off the frames because they didn’t match the design, and the new KOHLER FAUCET would hit the windowsill and wouldn’t leave enough clearance. I also wanted to keep the cute shelving detail between the windows from the original kitchen.
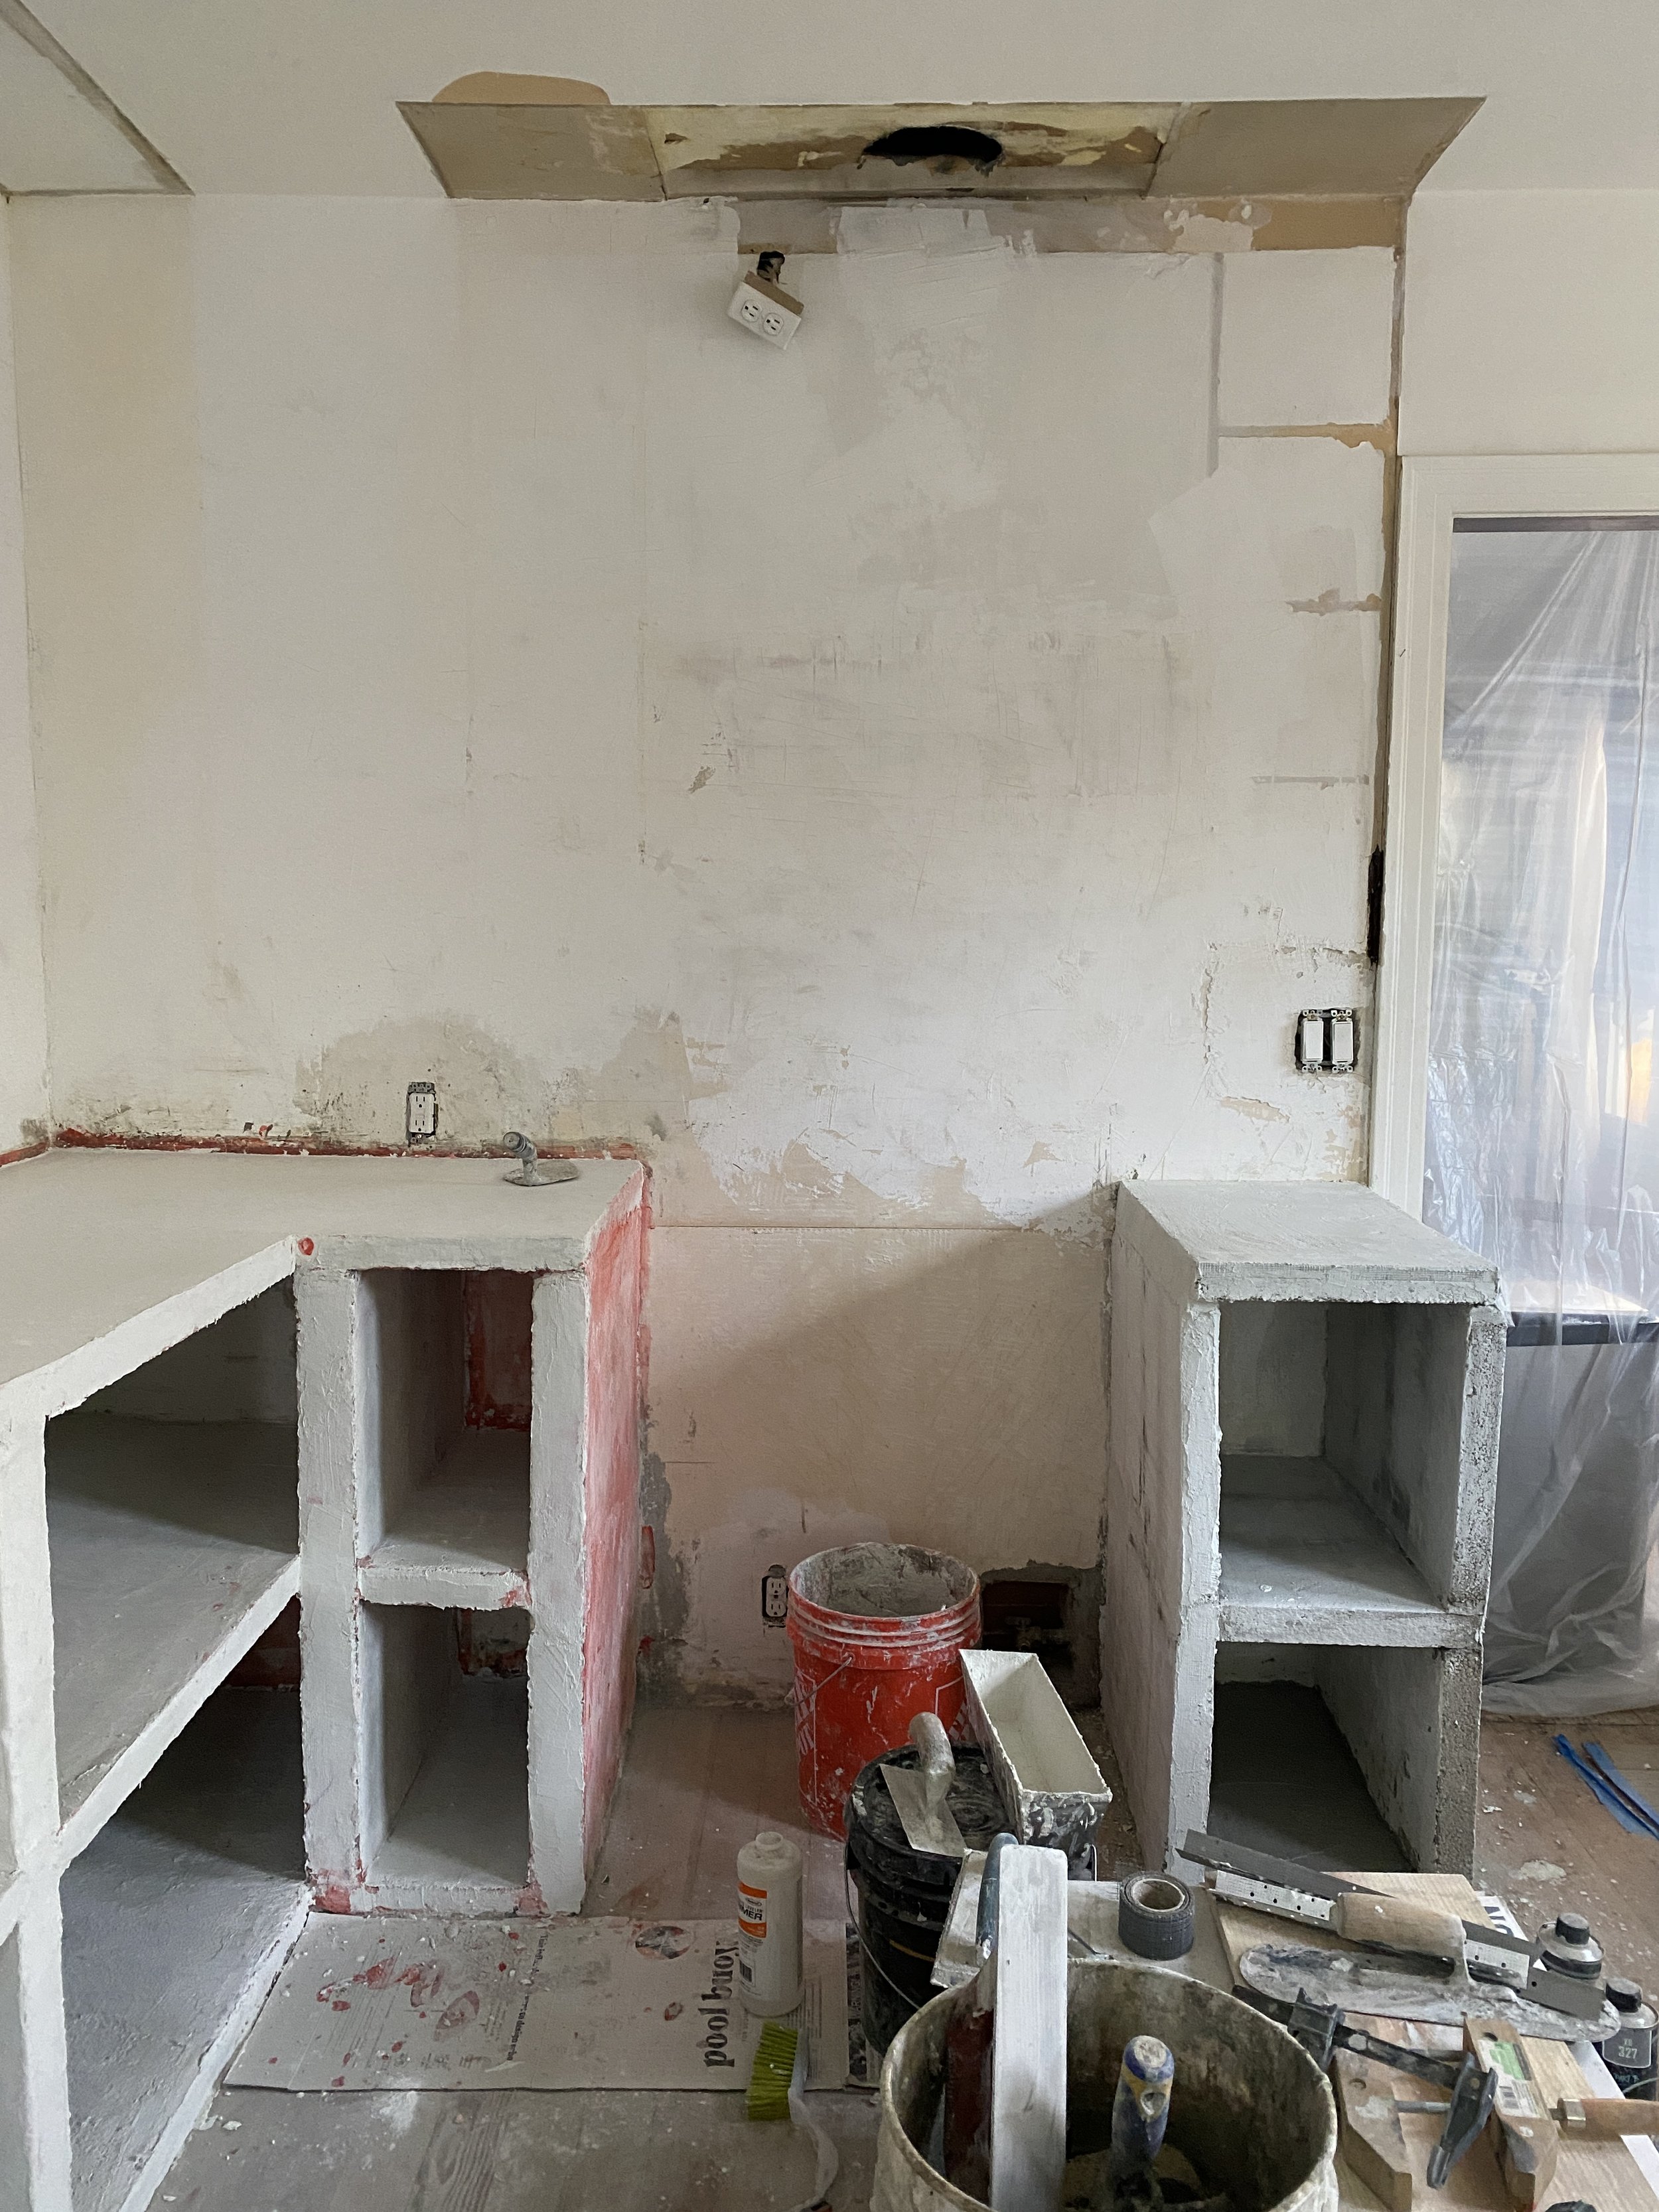
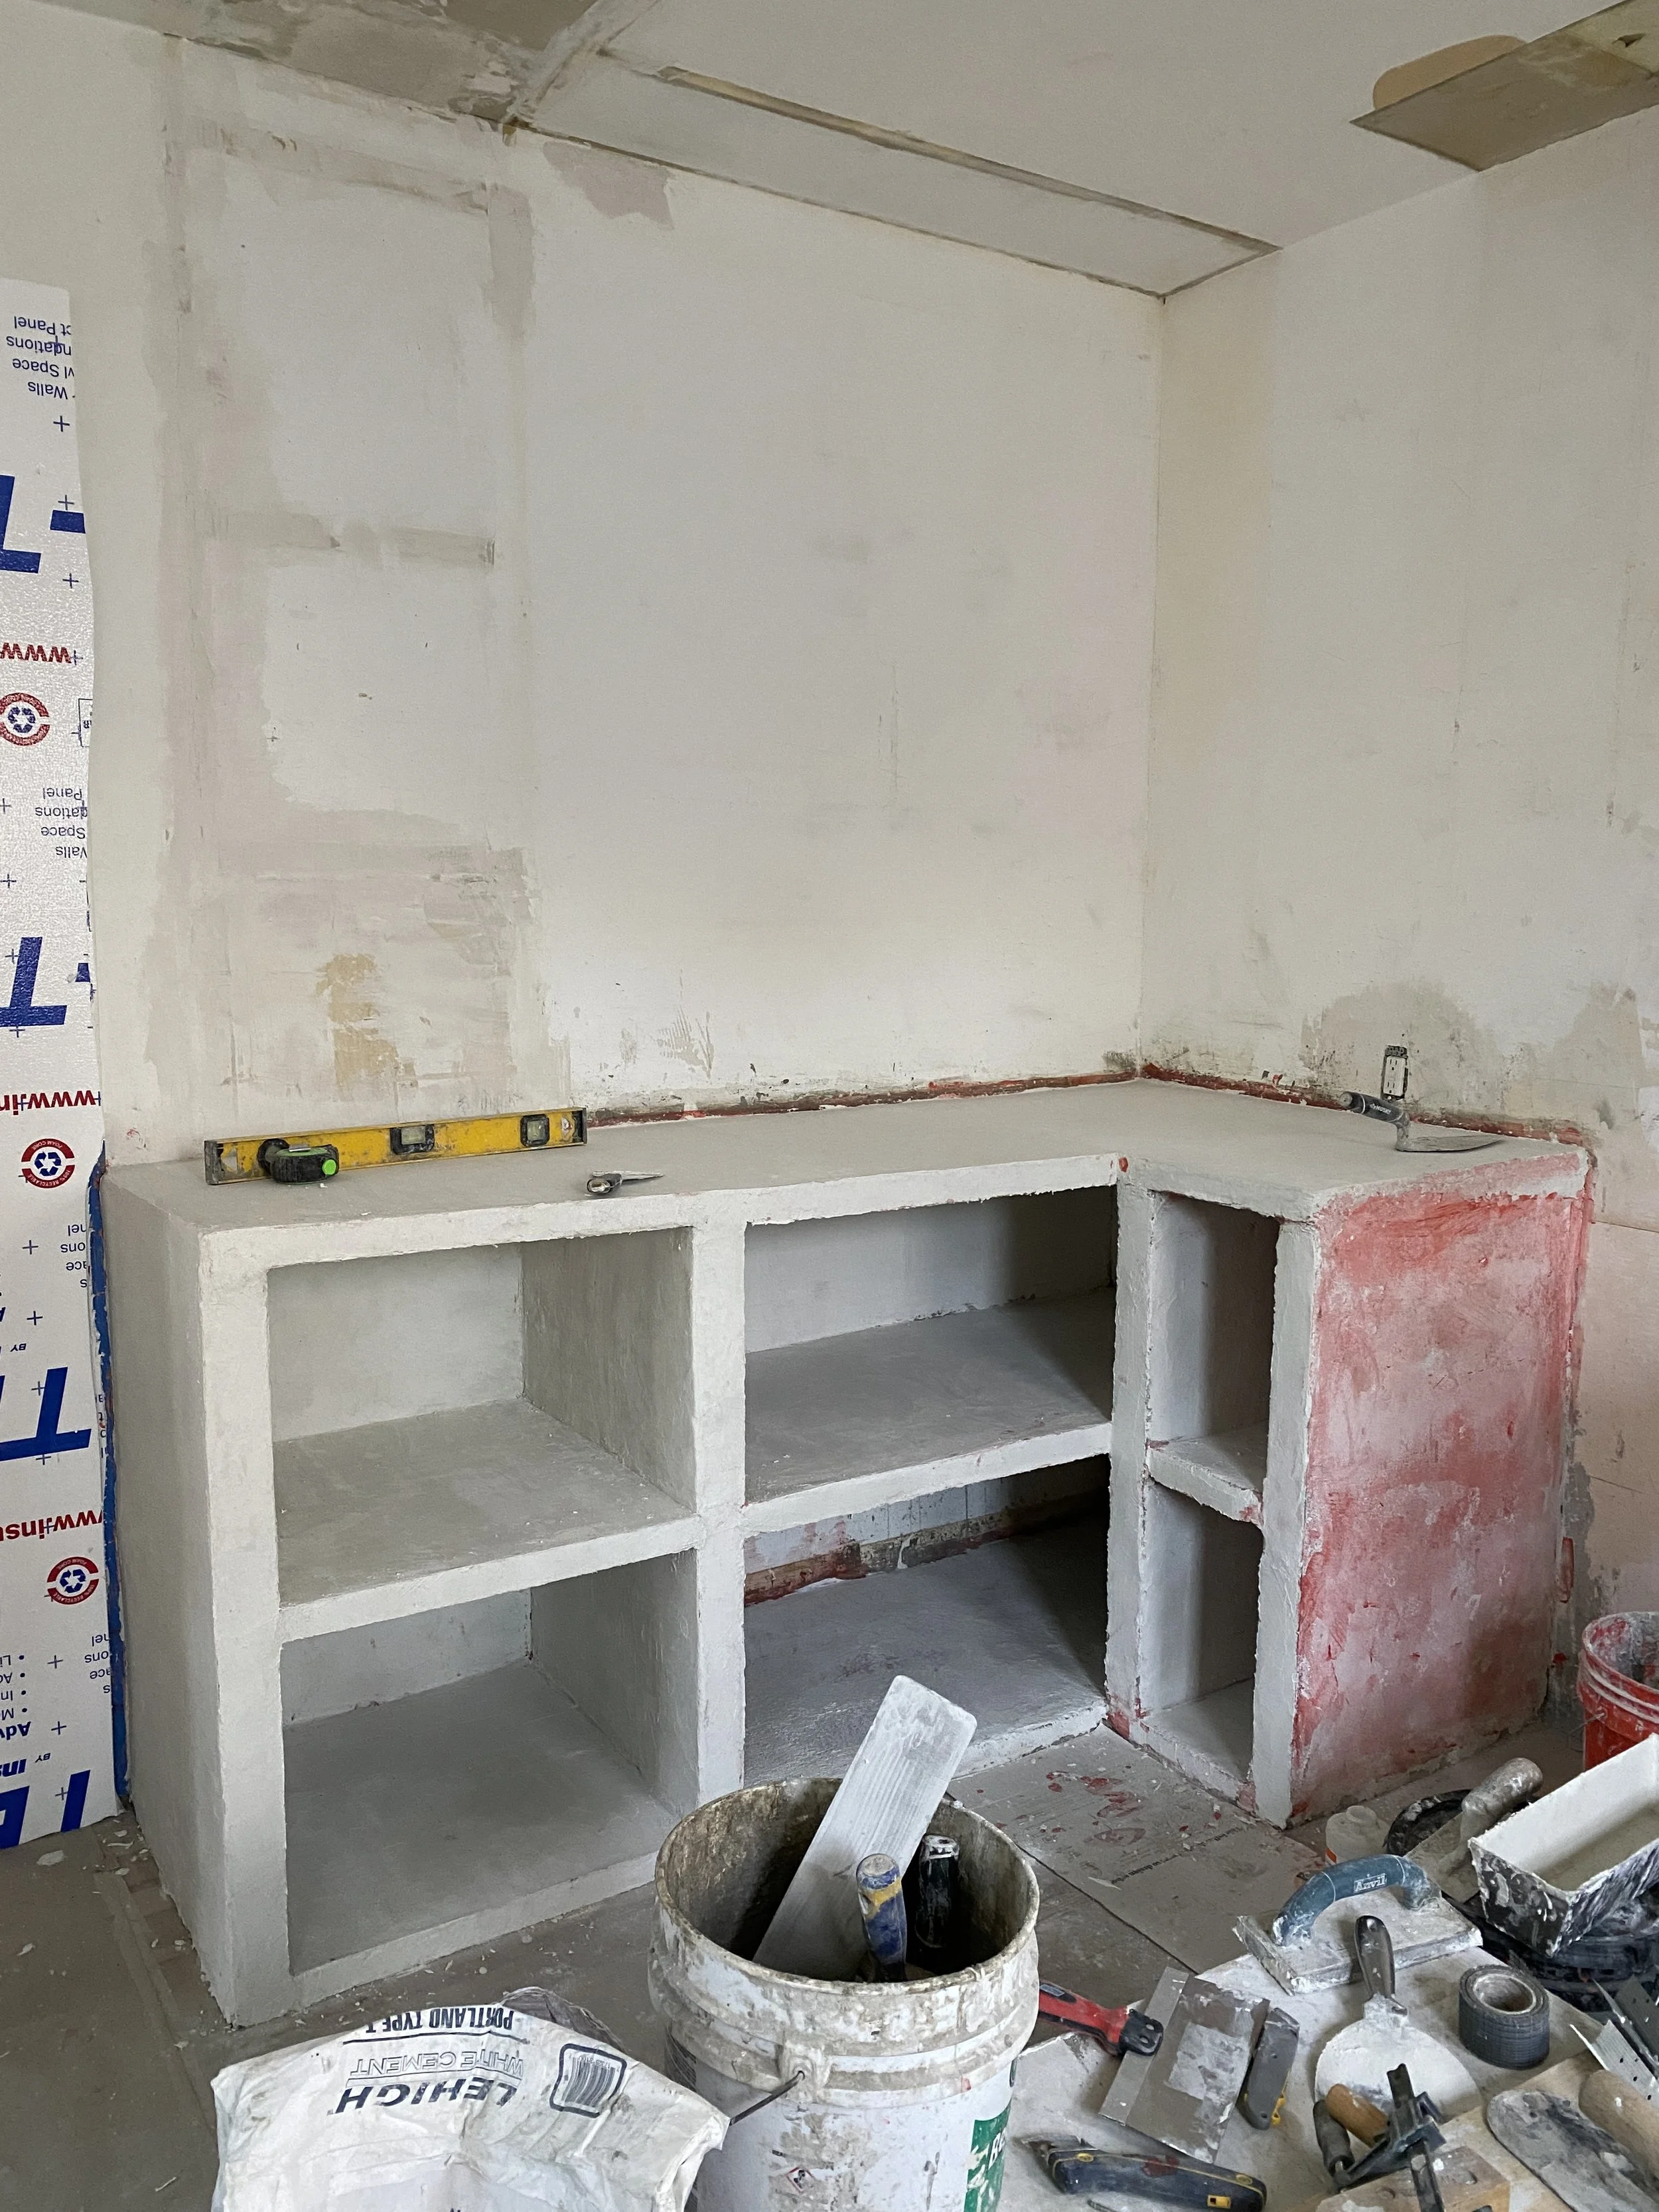
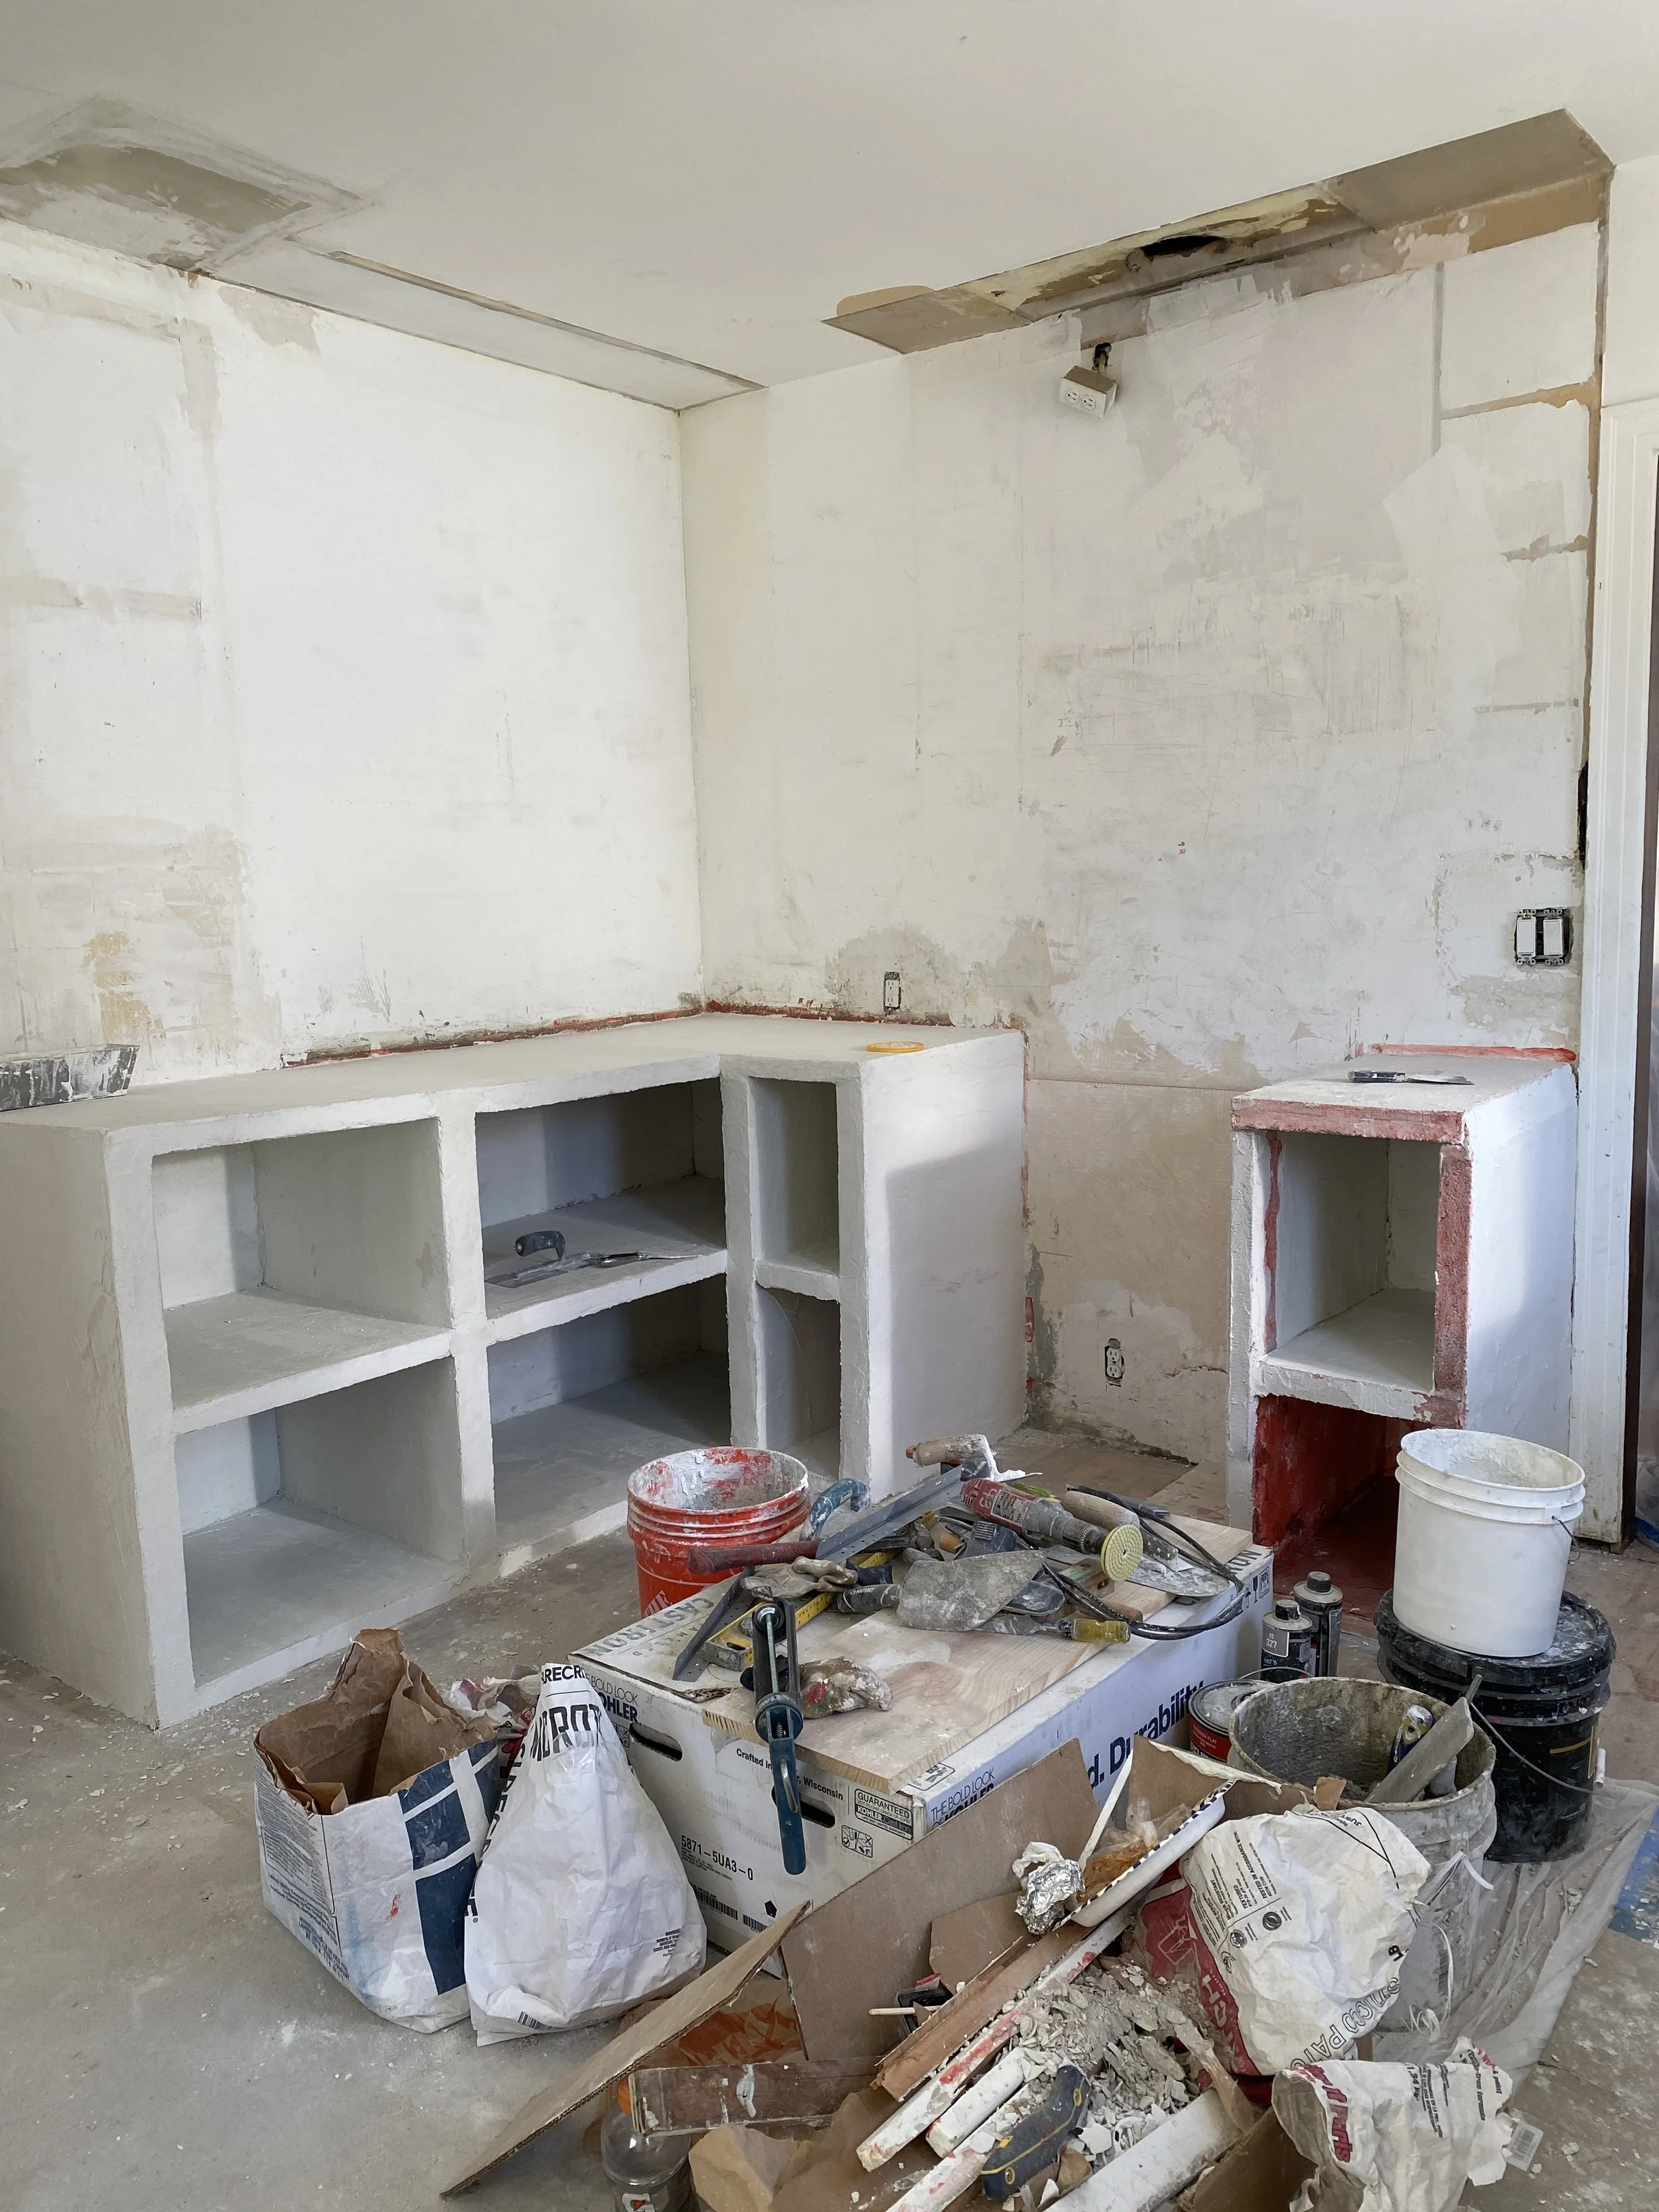
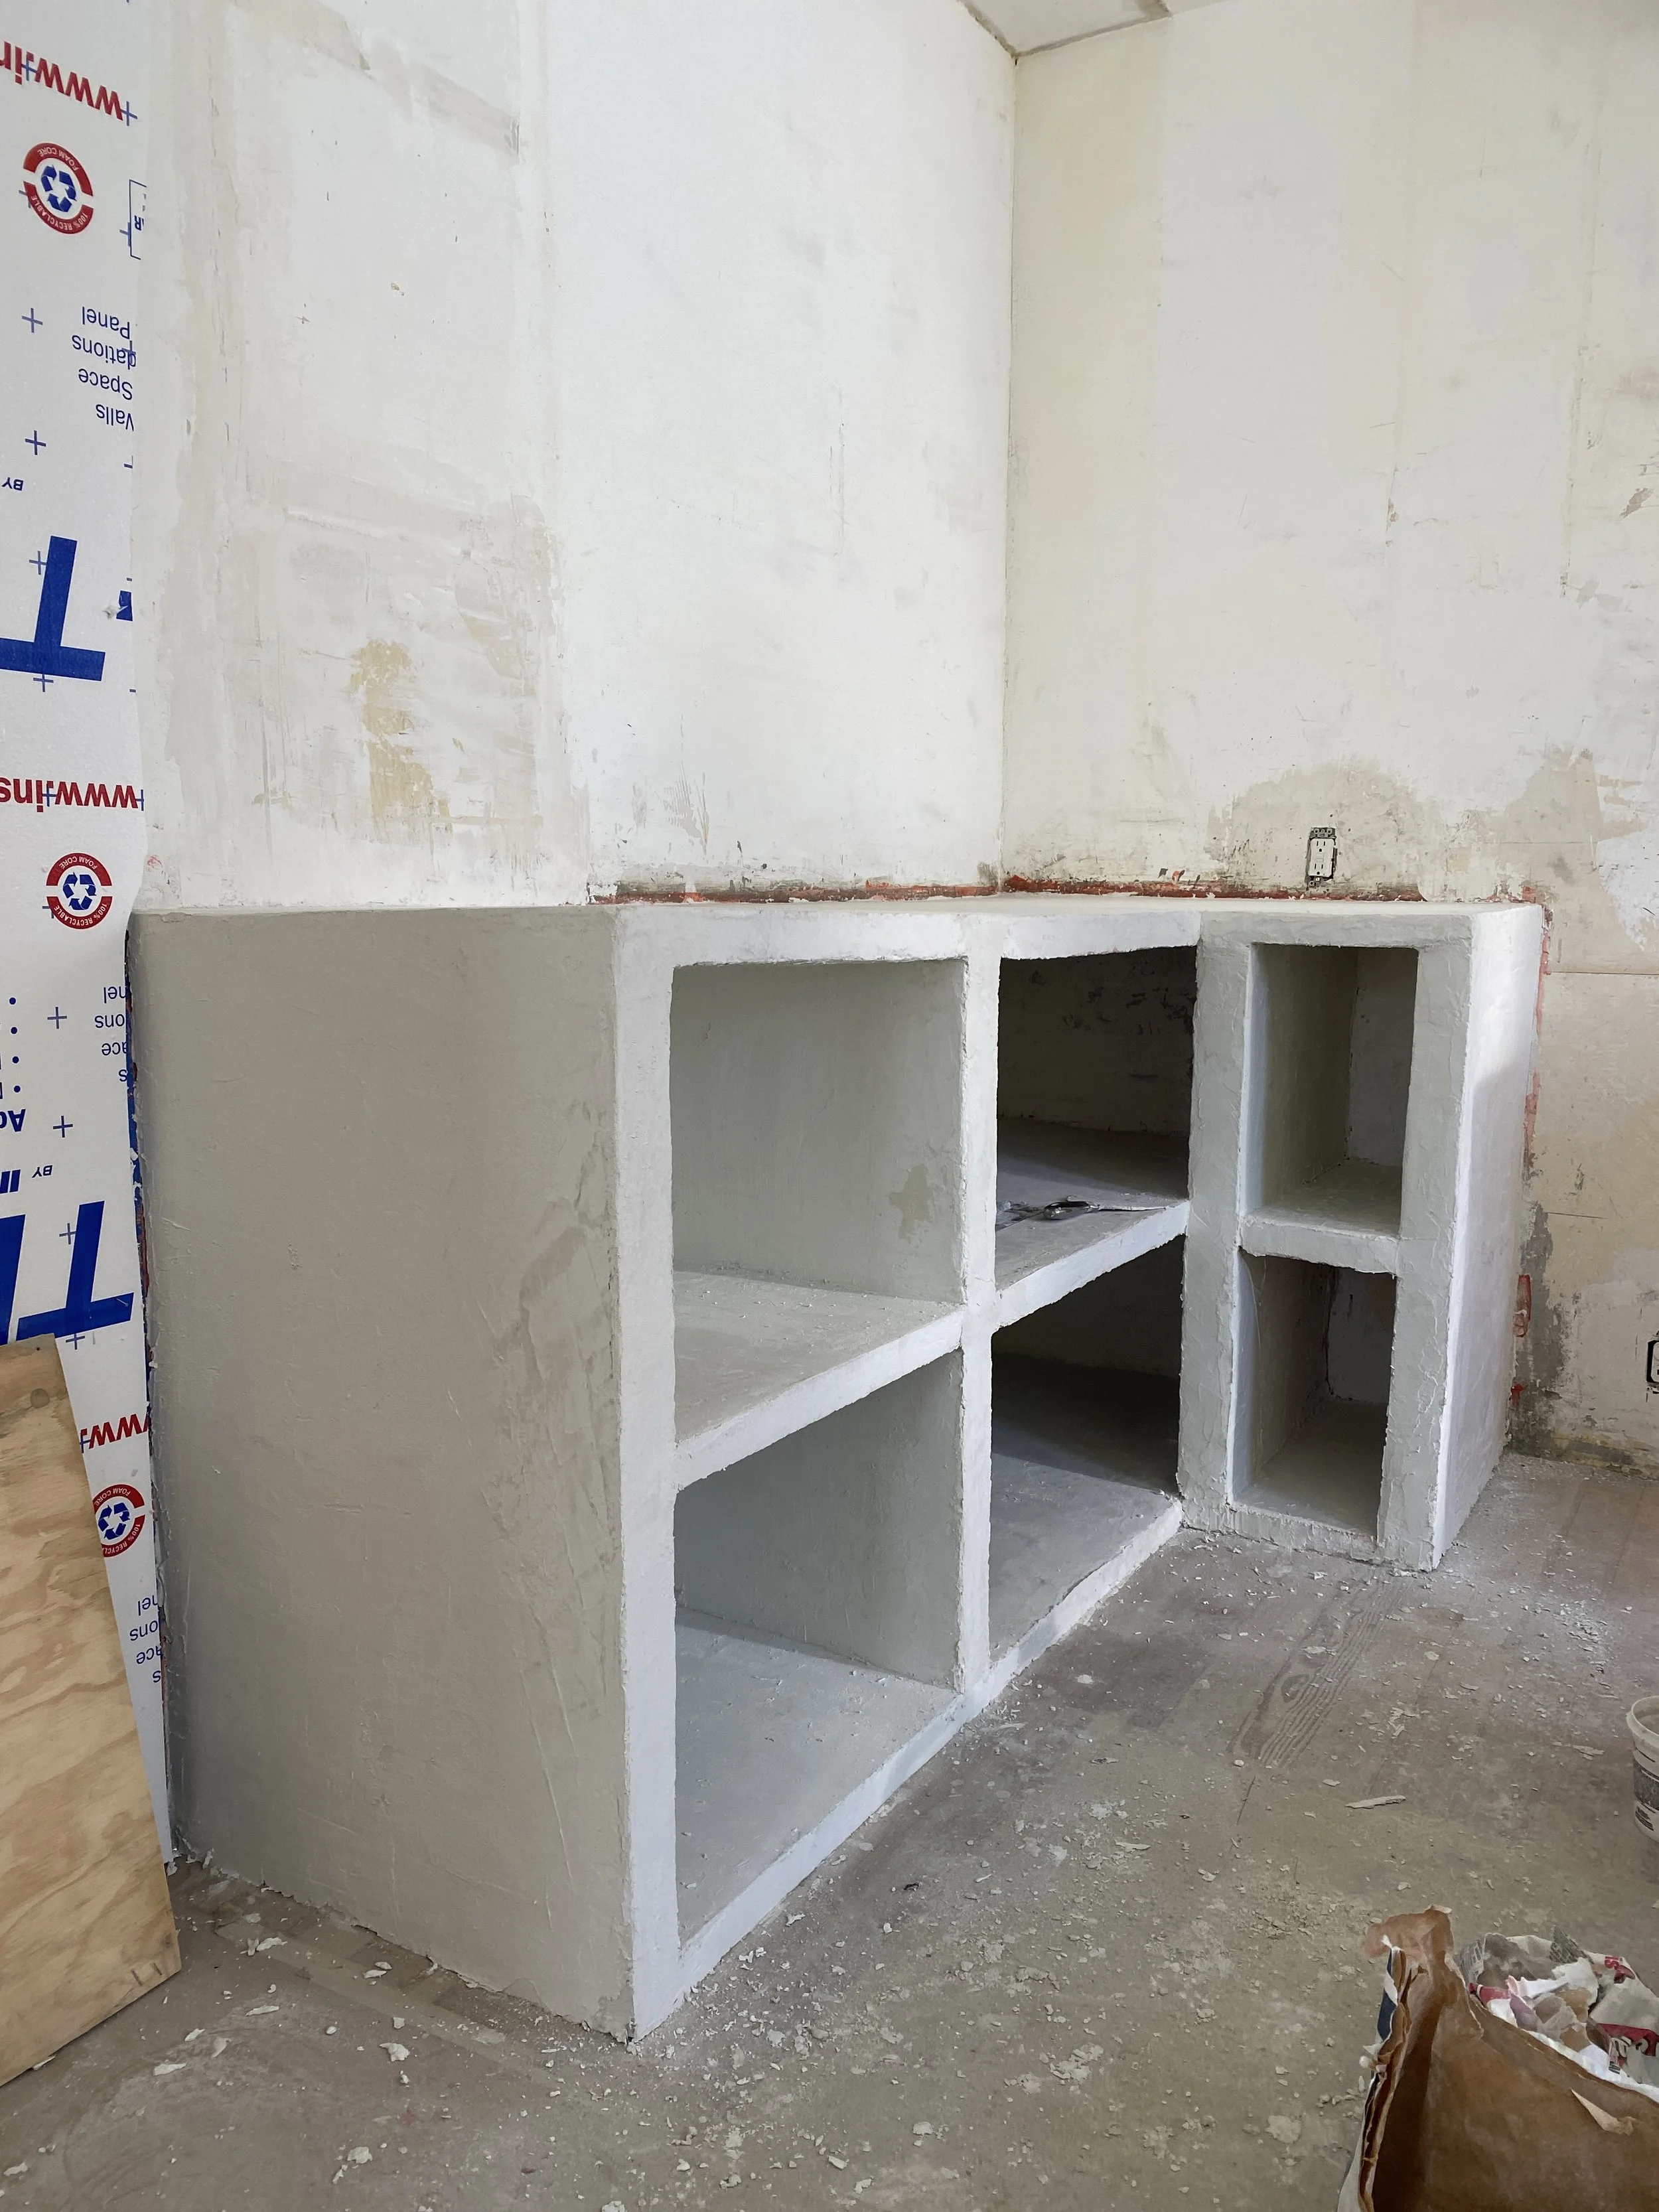
Badro has started building the shelves within the cabinets. I know this may look a bit messy and hectic, but I honestly love how organic it all is. I can’t wait to see the finished product.
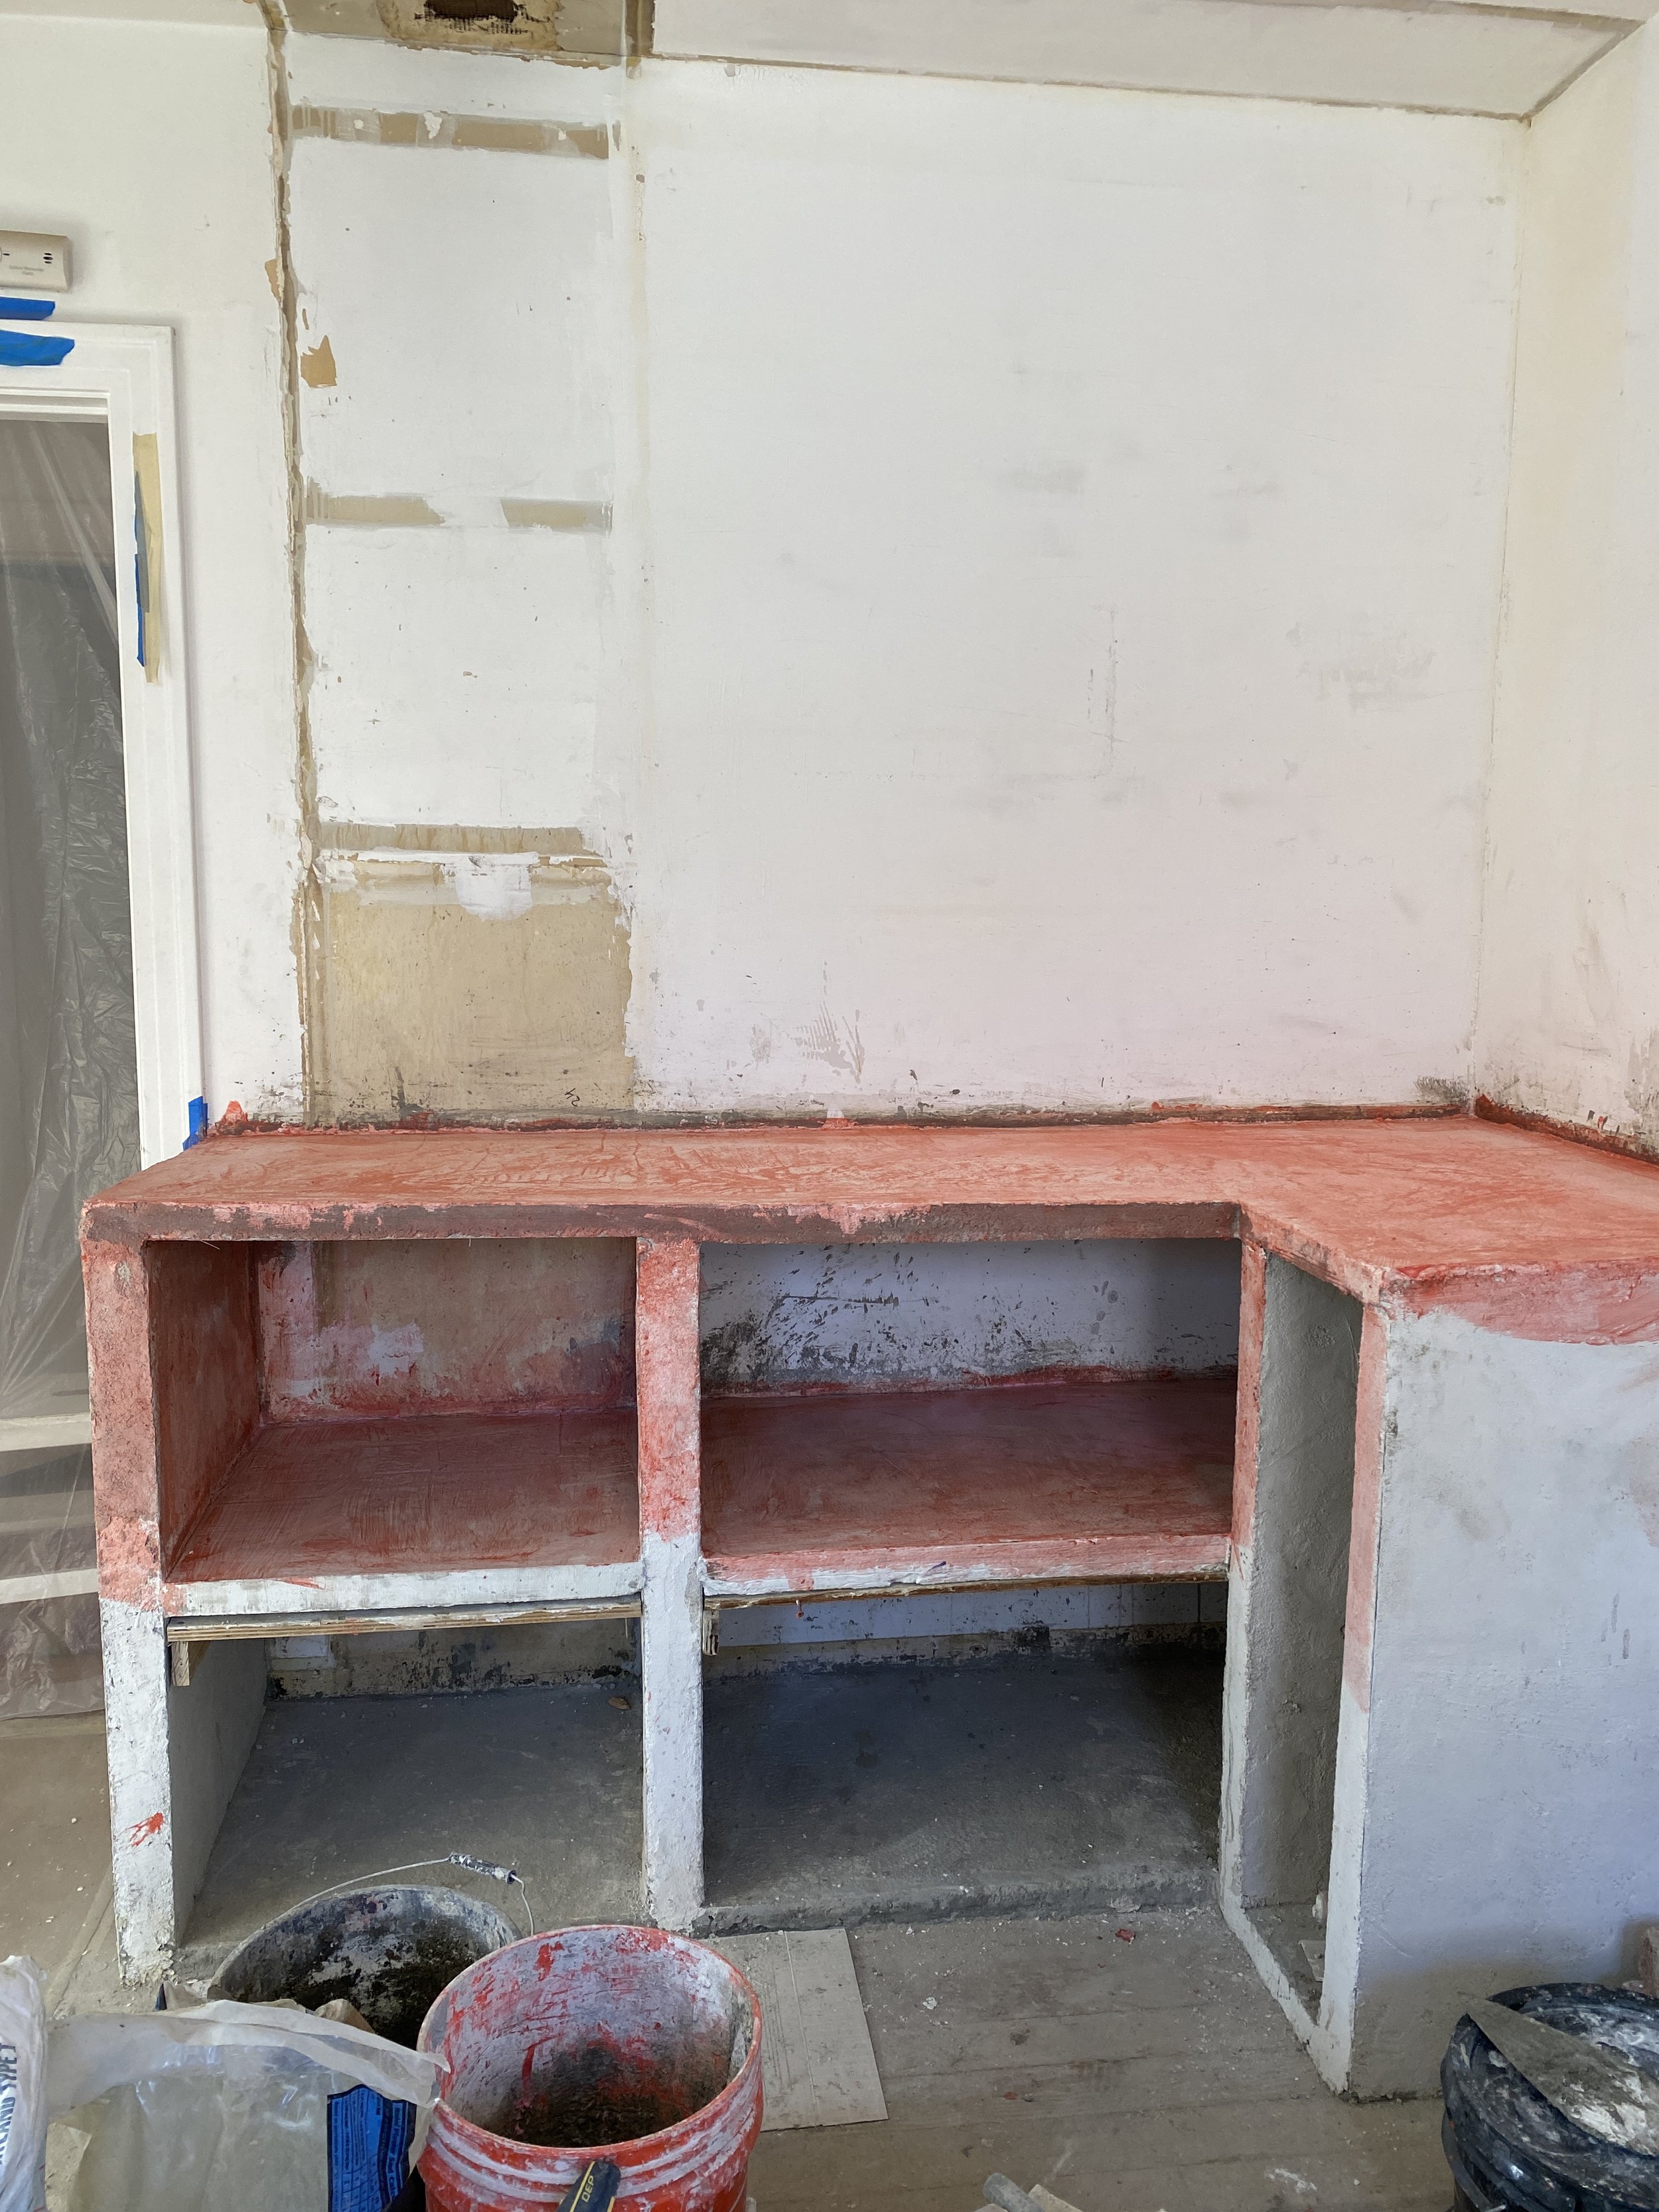
He’s also started painting on the elastoshield on the countertop.

We’ve measured out the perfect space for our new SAMSUNG BESPOKE range. And now we’re building the side cabinet. In the original kitchen, the stove sat in the same place, but there wasn’t ever a built in cabinet here, so we had an Ikea cart. The kitchen will feel so much more complete once this is added, and also provide more counter space for prepping and storage.
This time, Bardo stacked the middle shelf because the spacing worked out, which made it easier and quicker to build.
We also cut out the gas line in the wall so it can be flush. The previous gas line stuck out about 6 inches from the wall and the stove which drove me nuts, so I’m so excited to have the new range fit in perfectly.

As I mentioned before, we cut off the framing around the tiny cupboard between the windows because there wasn’t enough clearance for the KOHLER faucet. It probably would have made more sense to replace the windows and put in a big one, but we’re on a budget and I love the old windows.
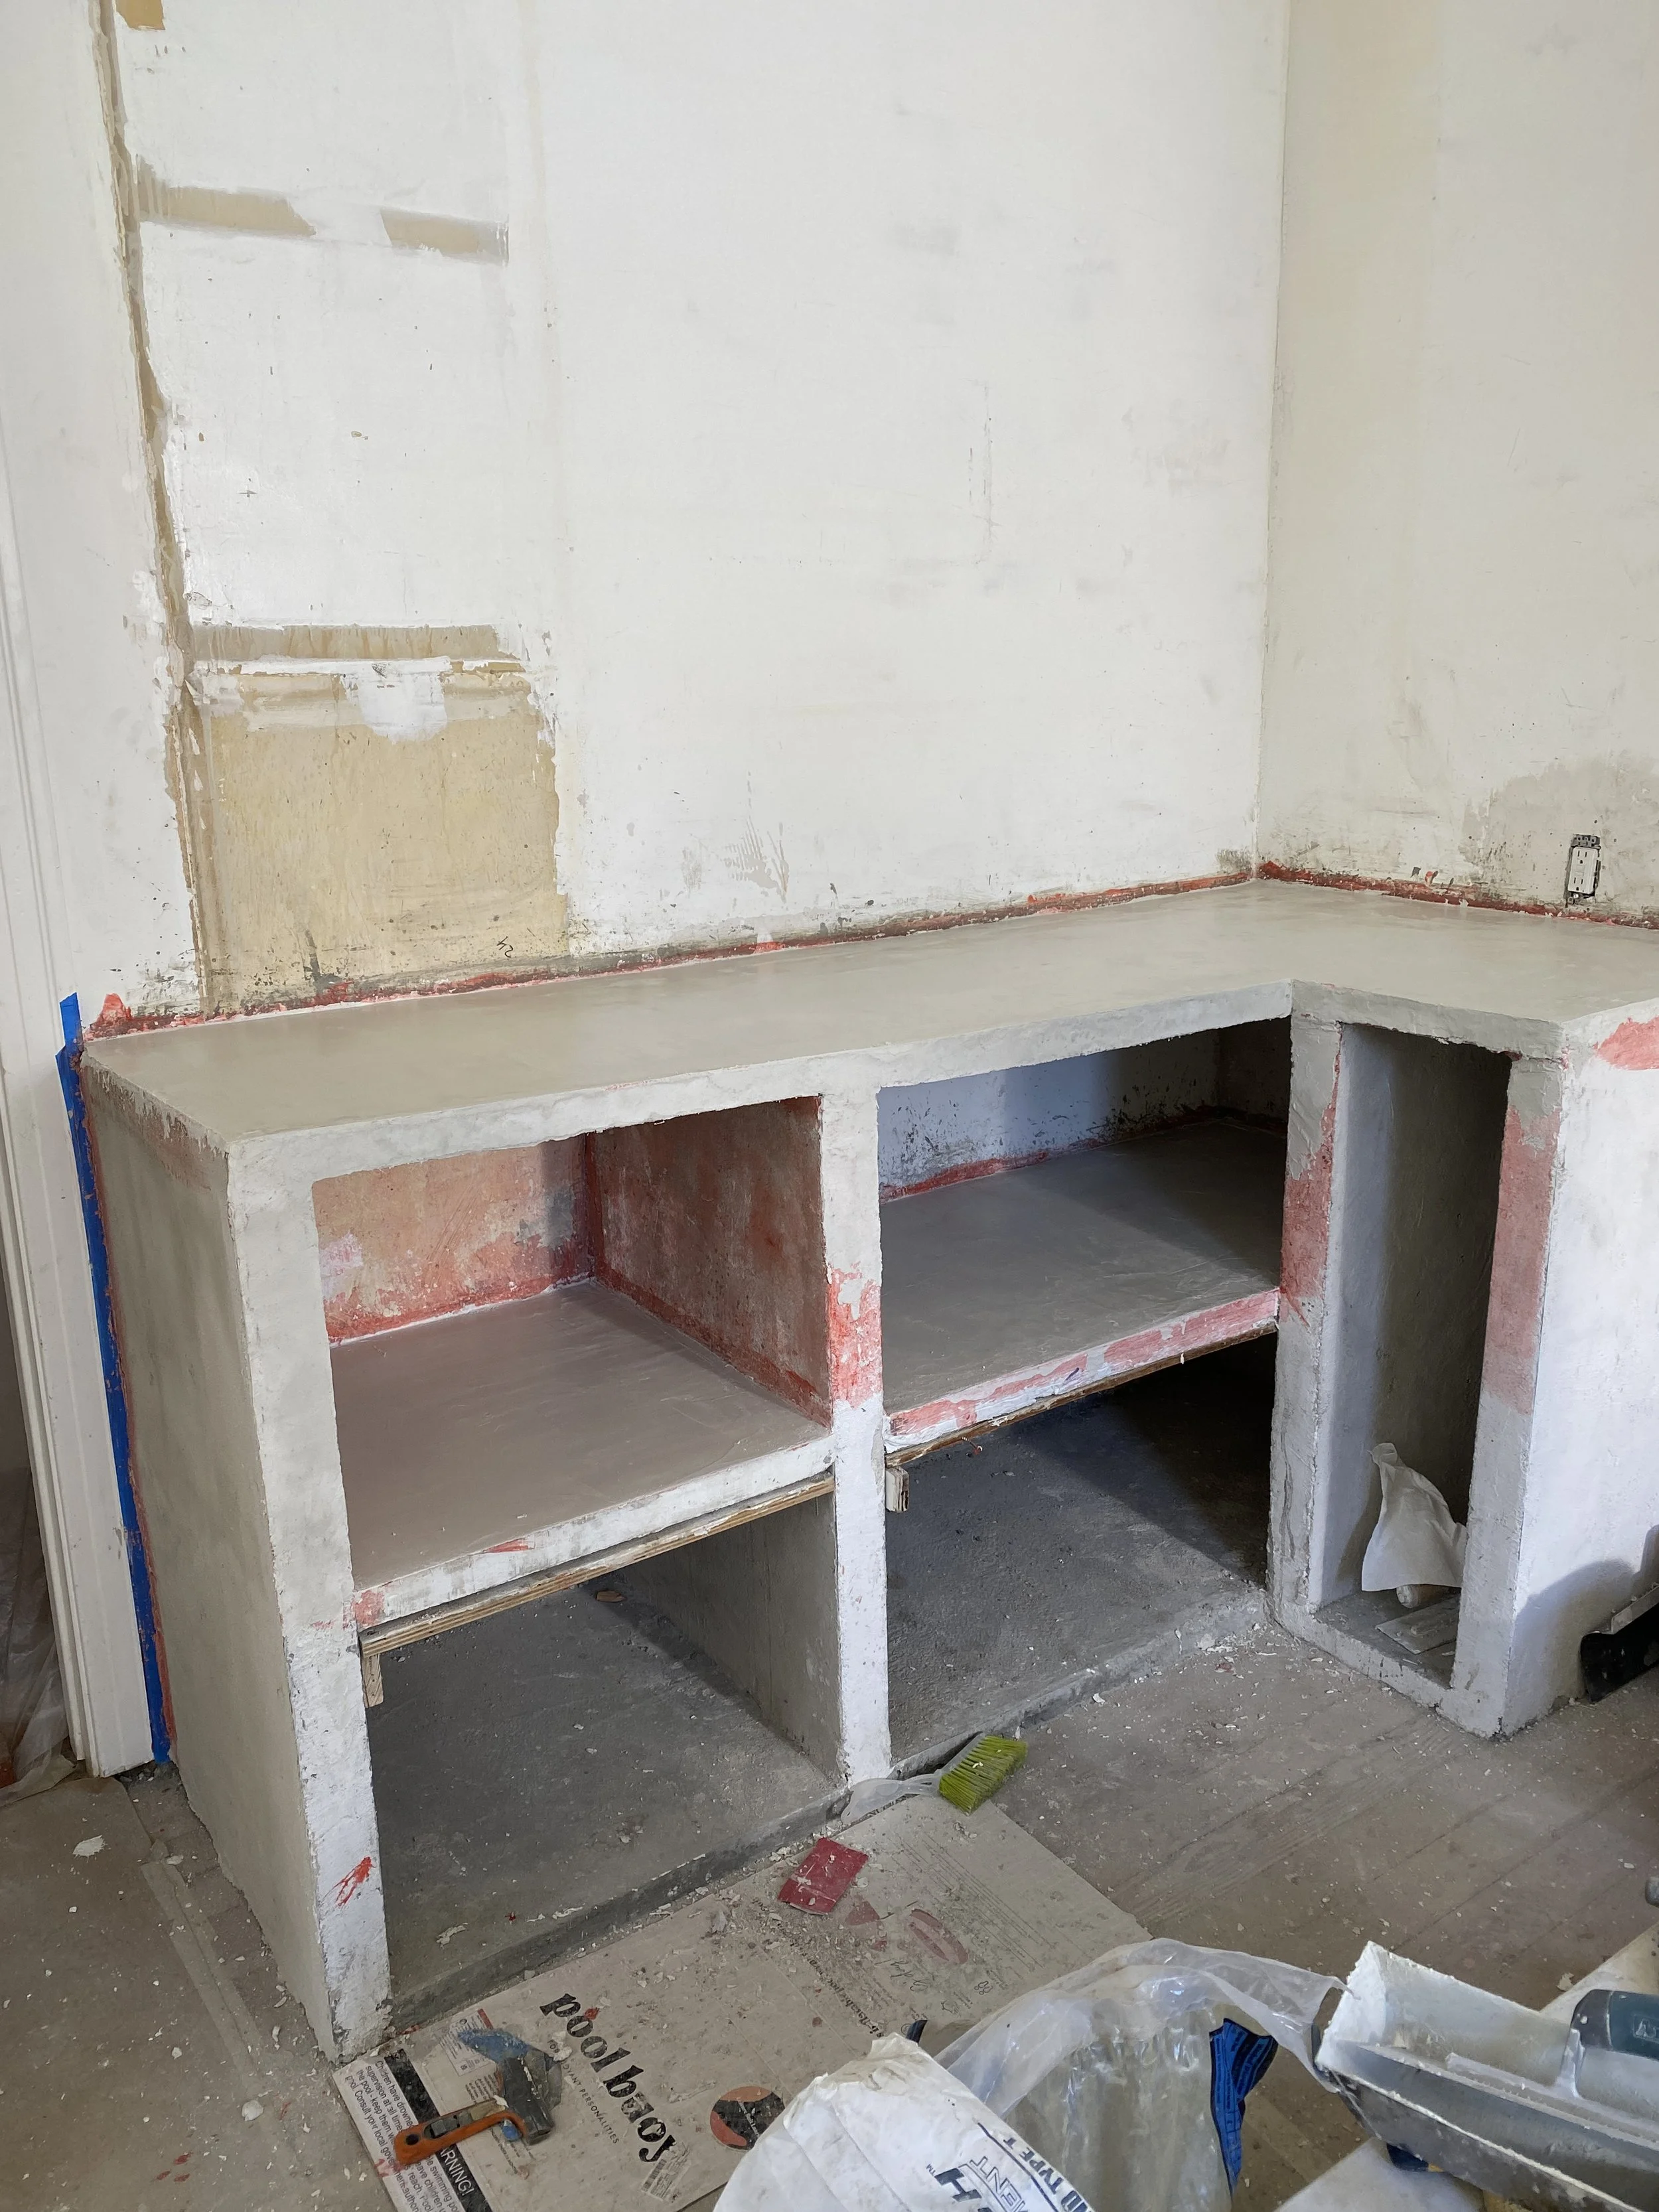
We added a layer of elastoshield, and now we’re adding microcement on top.
Wow! The kitchen is finally starting to take shape! Don’t you love how the plug for the old hood is literally hanging out of the wall?
No fire hazard, lol, and just discovered this when we took the old hood and cabinet down.
The electrical wiring in this house has always freaked me out and I’m so happy we are re-doing it all, and this just proves my point.
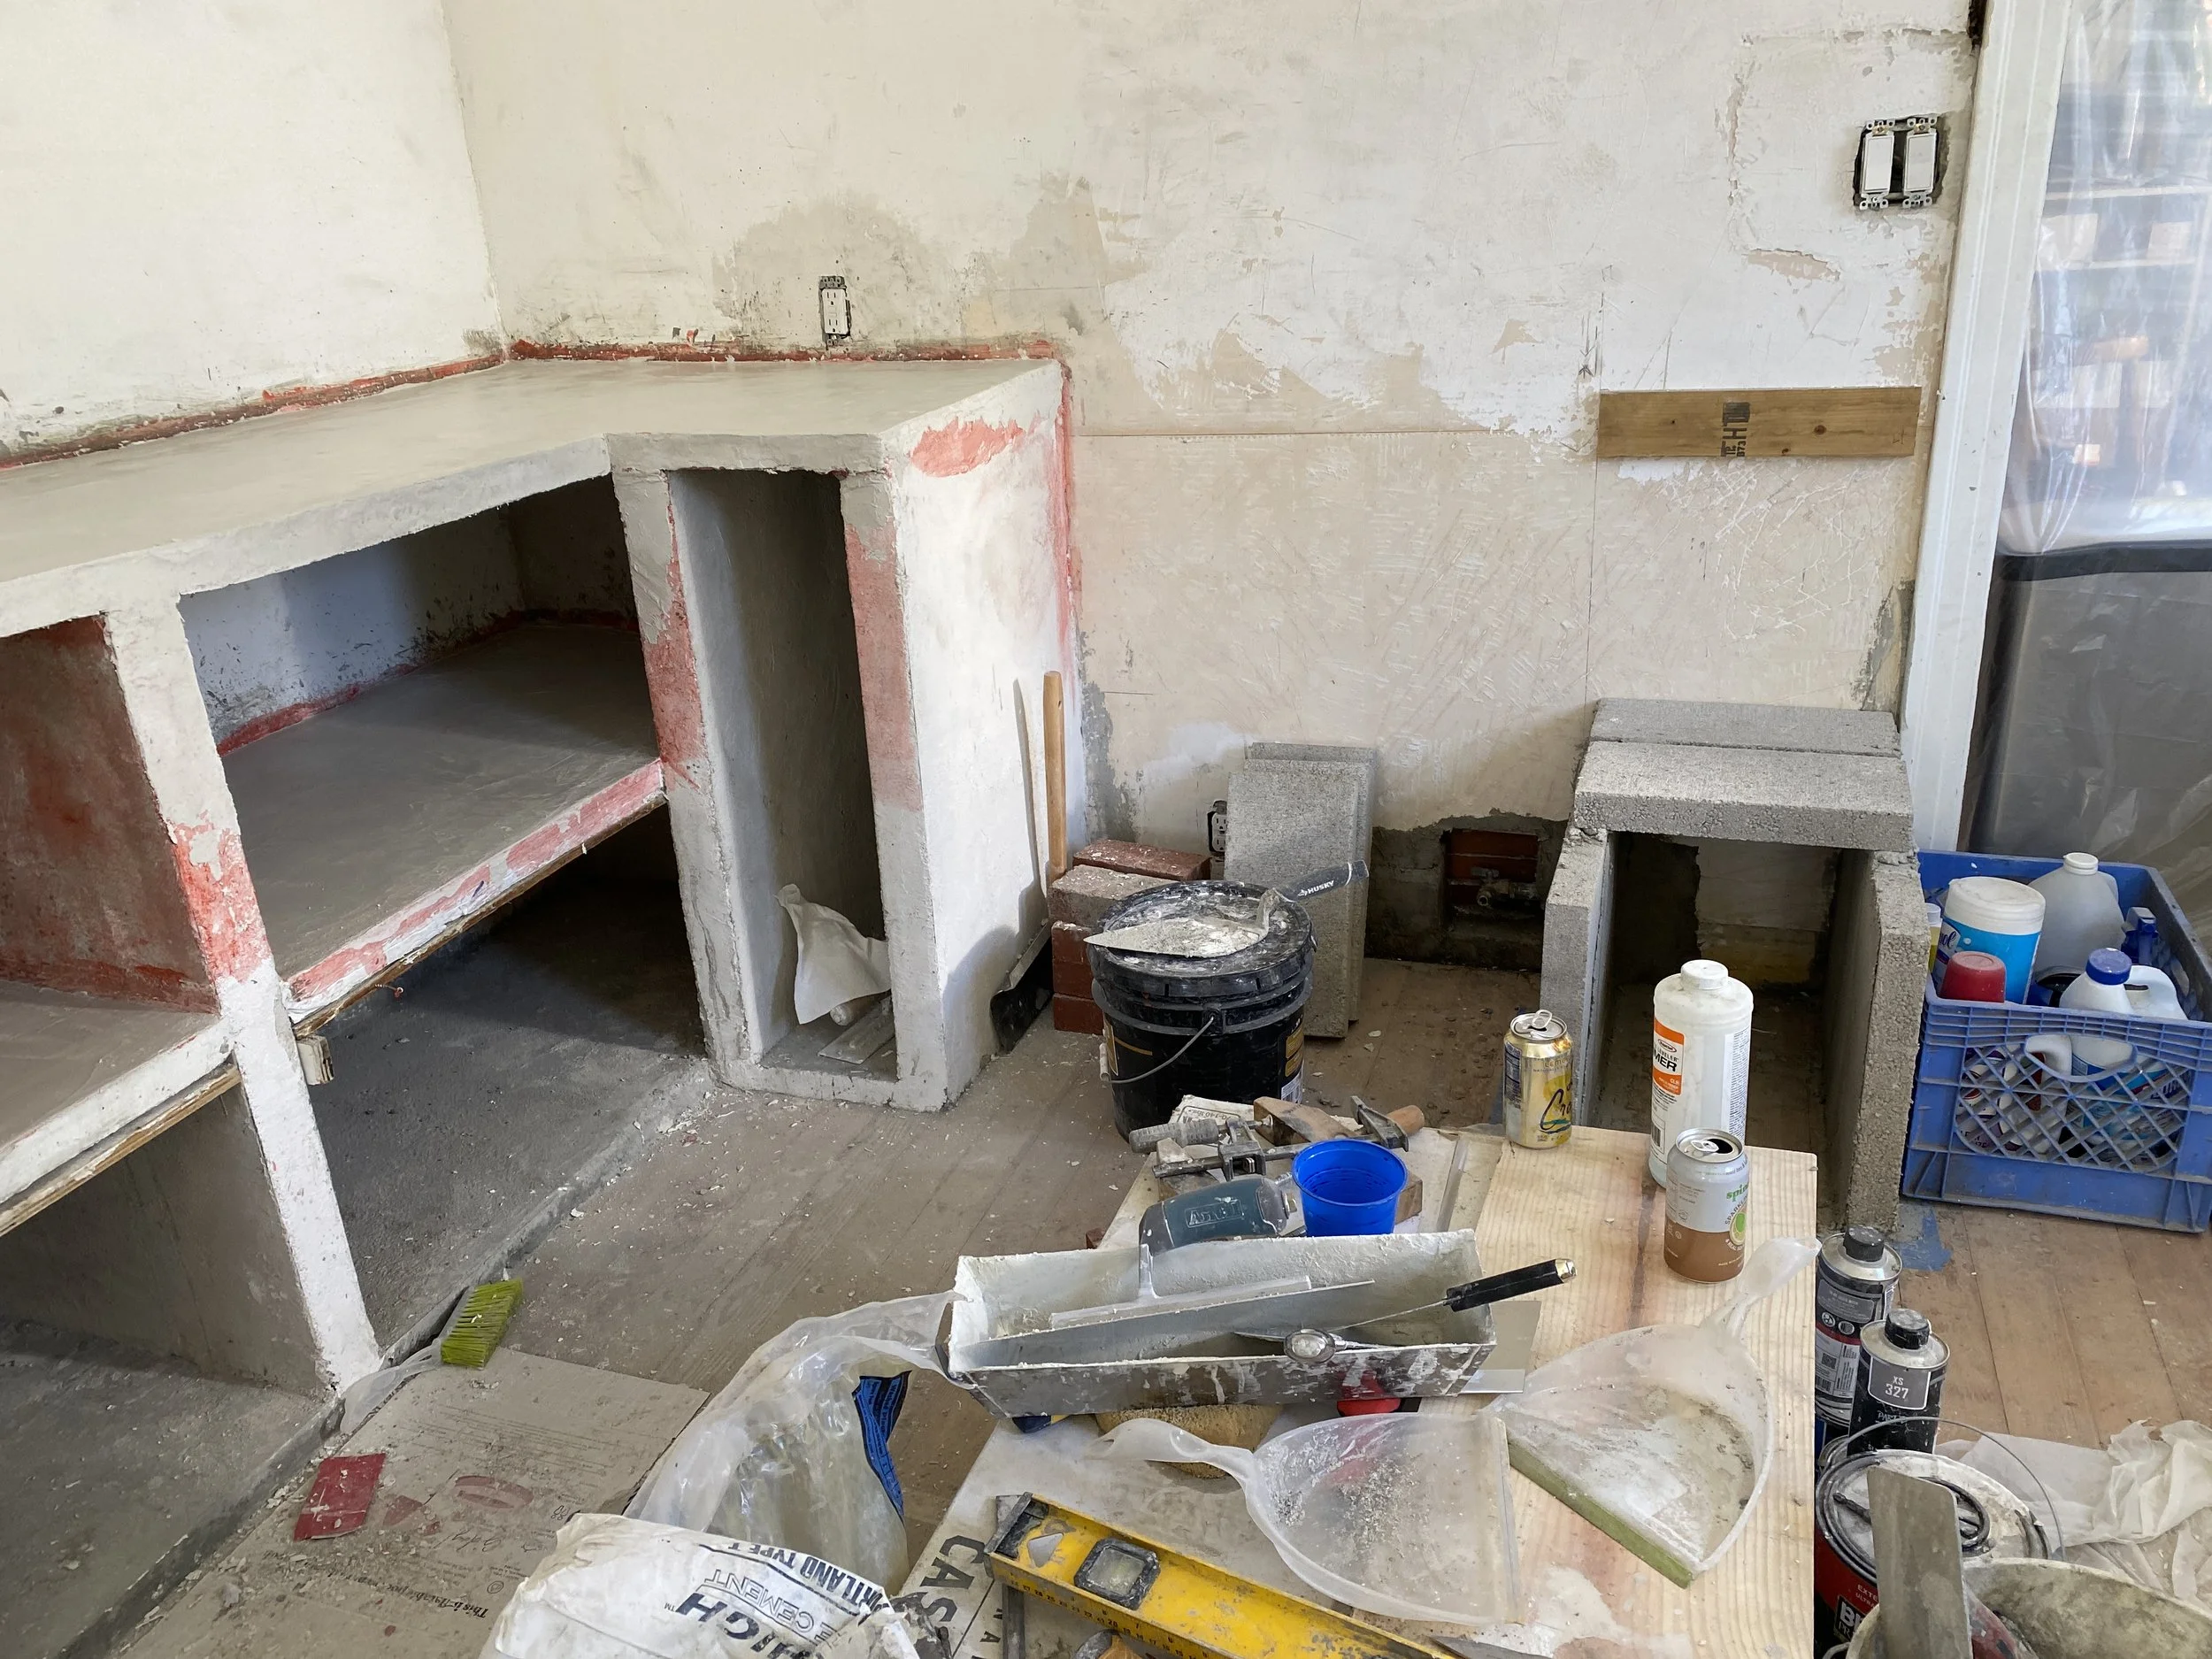
There’s also quite a bit of patchwork to do on the walls and ceilings, so we’re starting on that in between micro-cement cabinet coats.
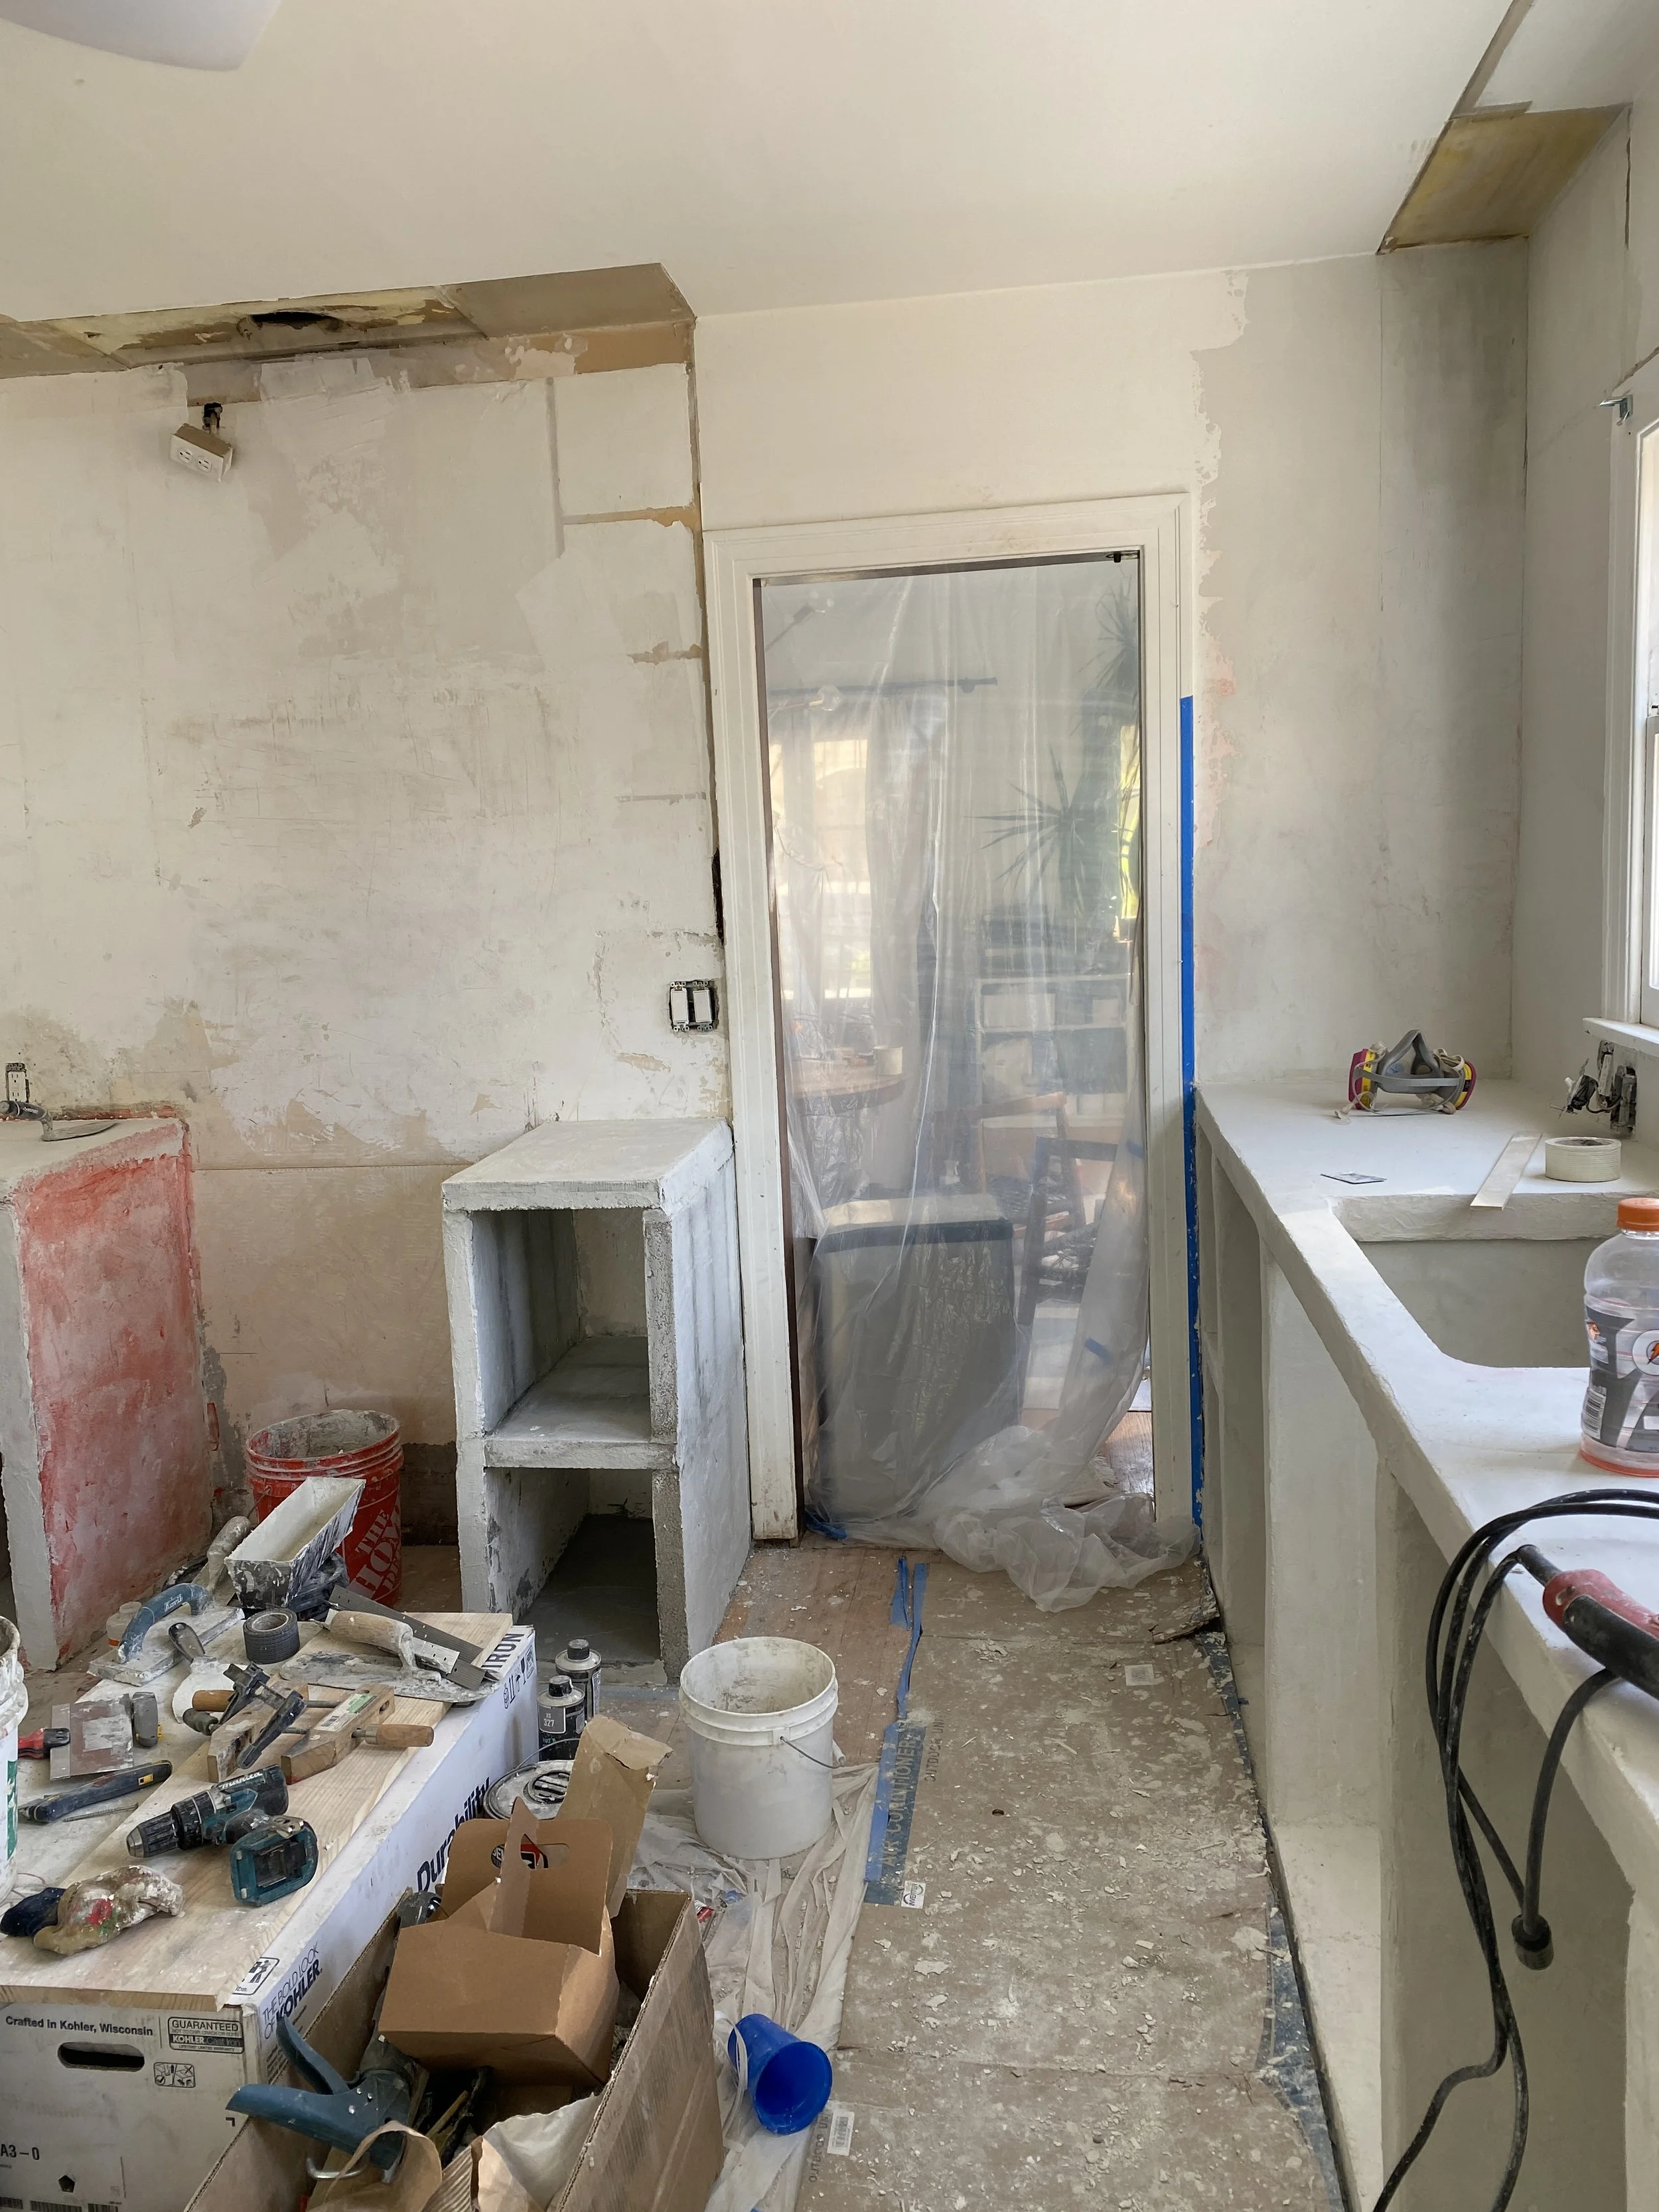
The micro-cement is going up on the walls on the kitchen side. And if you can spy through the plastic sheeting in the doorway, you’ll see our temporary kitchen in the dining room. I swear all I do these days is wipe new layers of dust off everything in the rest of the house. We try to keep it at bay with the plastic sheeting, but it’s inevitable. Its everywhere!

I’m LOVING the microcement walls. The rest of the home has plastered walls and ceillings, and now that I’m seeing the texture on the kitchen walls, I want to limewash the bathroom and breakfast nook. It adds such a richness to each room, I’m obsessed!

I’d also love to take off the old door framing where the dining room door was, but Strader would say I’m just creating more work:)
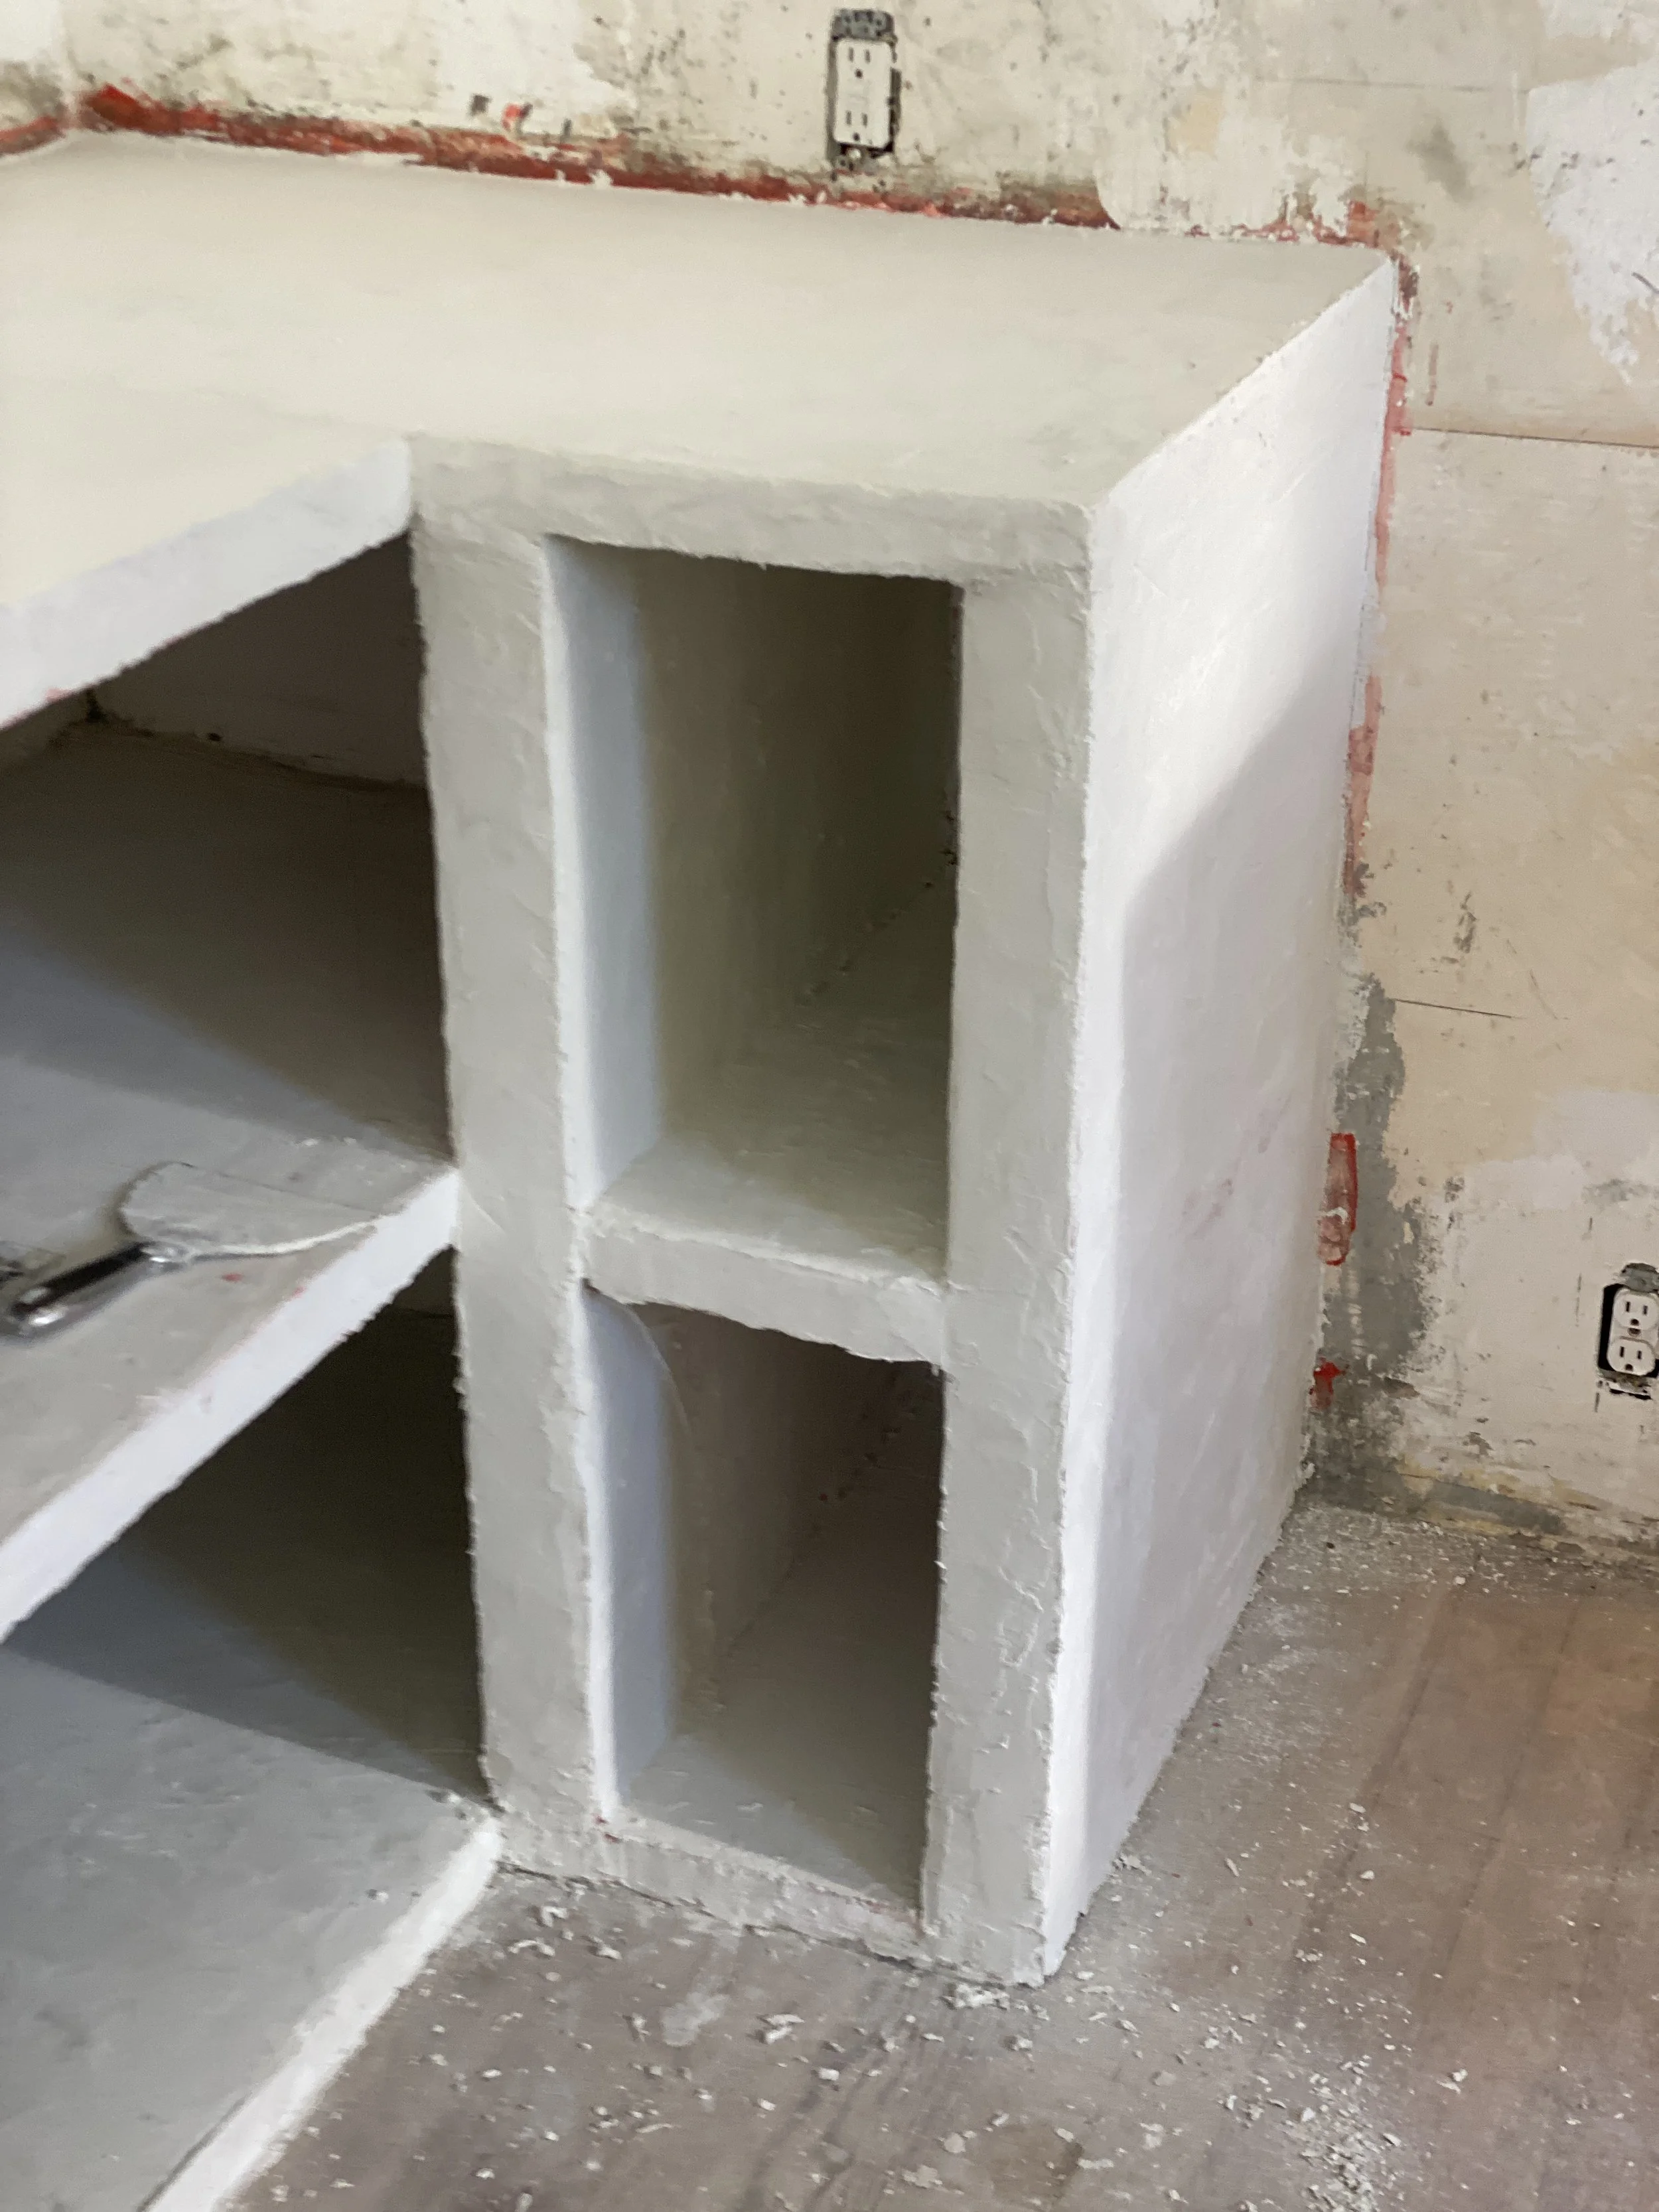
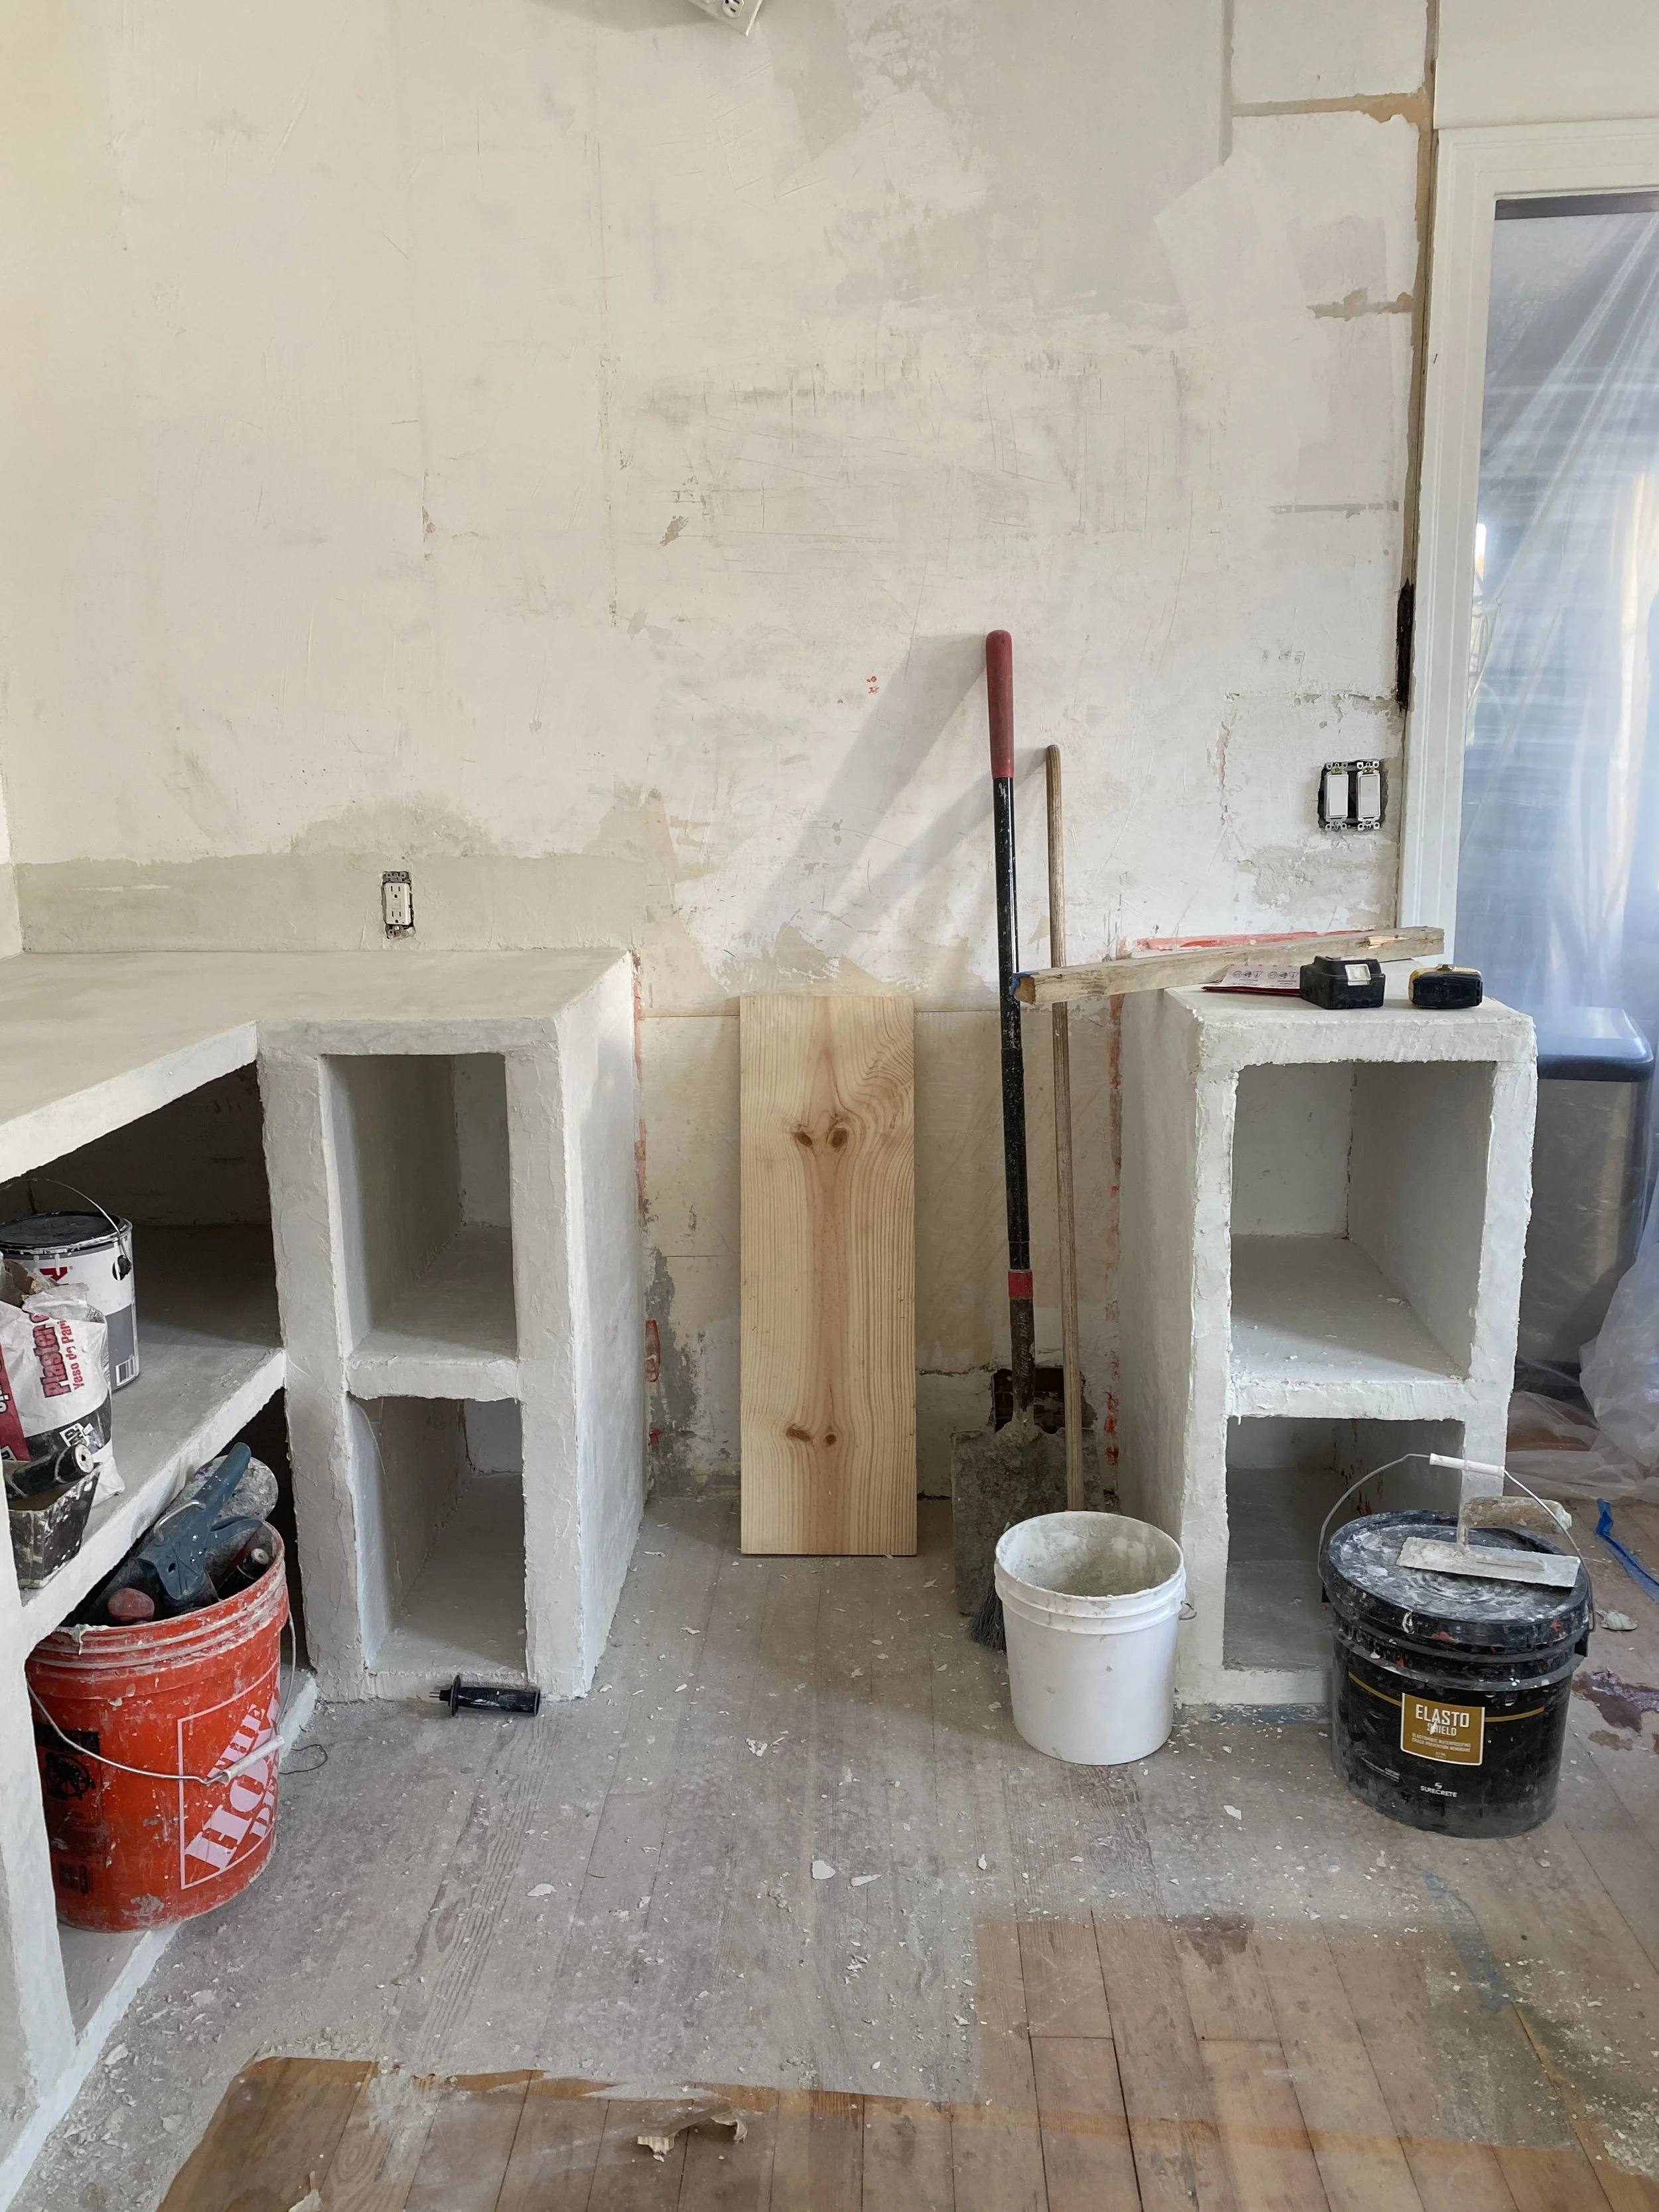
And as you can see, the right hand side cabinet is now getting micro-cement after getting the elasto-shield. It’s all such a process of layers, and sanding, and layers and smoothing.
Step by step, we’ll get there.
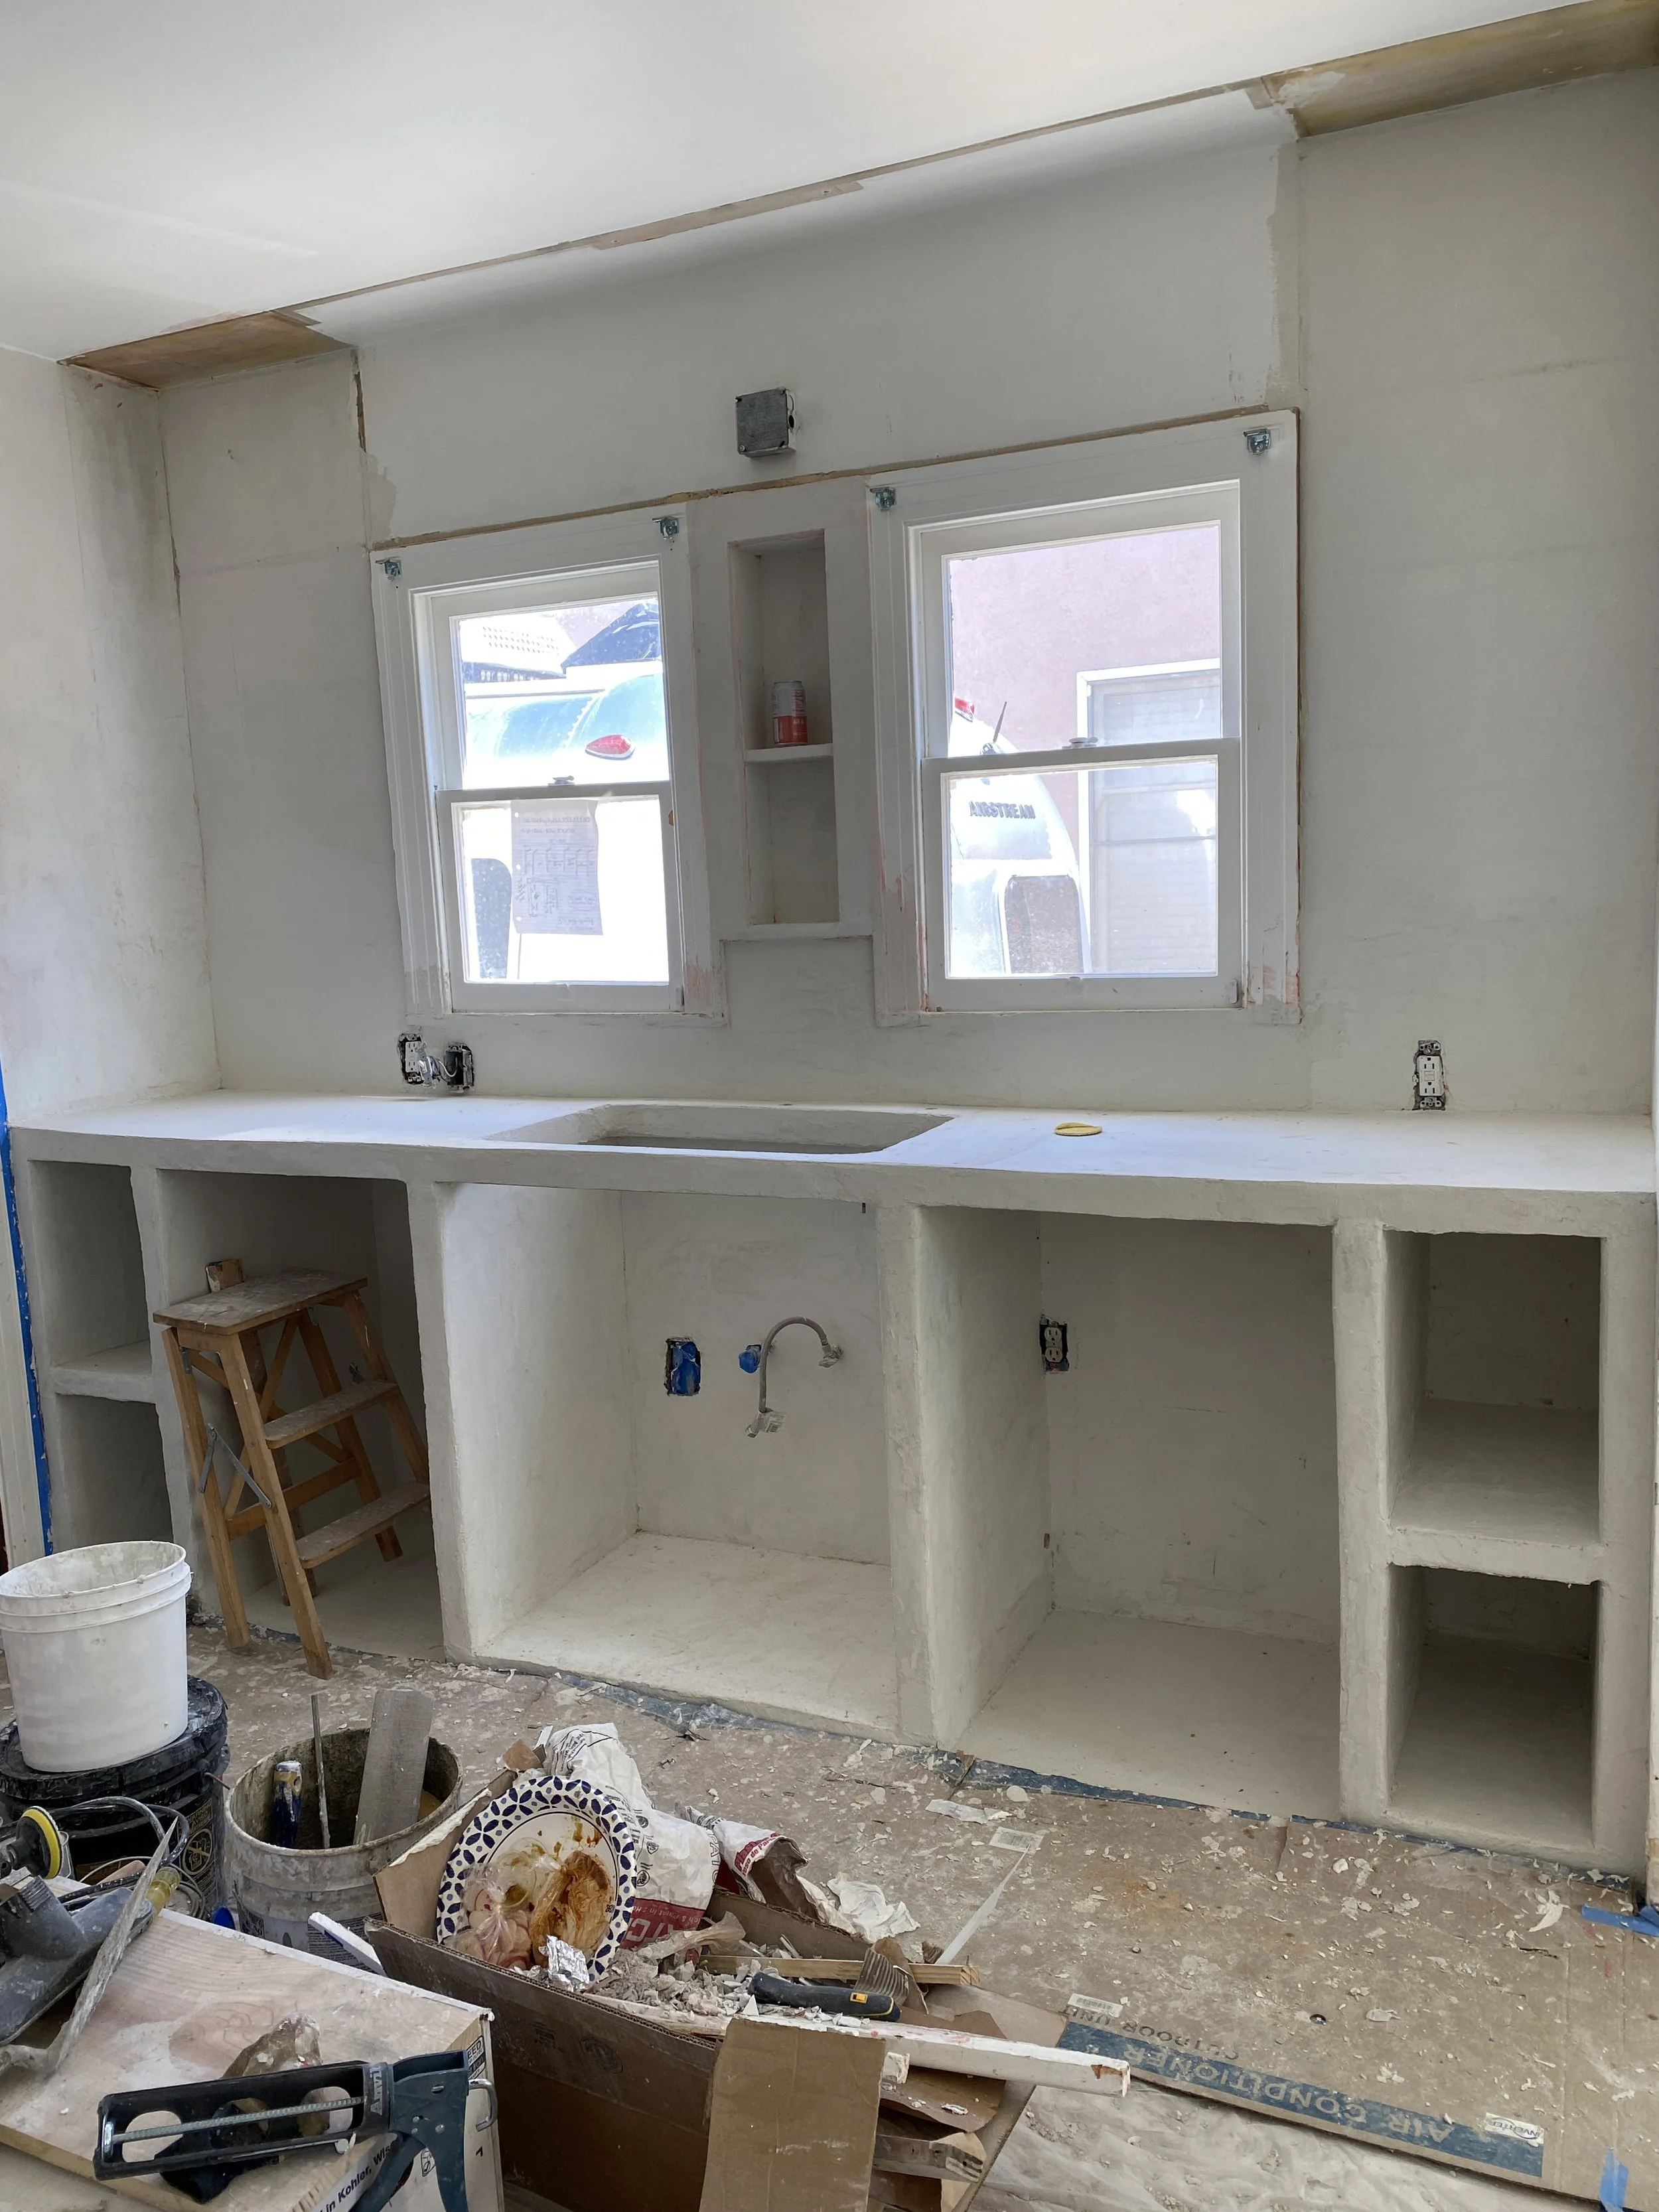
There’s always something that gets lost in translation, and remember how I said we had to cut off the ledge on the mini cabinet between the windows? Well, Bardo went ahead and cut off the windowsills because they were in the way of the water filtration faucet. However, I wish we could have just taken off the entire inside frame piece and replaced it with a thinner one, but he cut off just the bottom and left the sides and the top. I’m not sure if you can see what I mean in the photos, but I really dislike the window frames, but they outvoted me, so the weird frame and missing ledge stay.
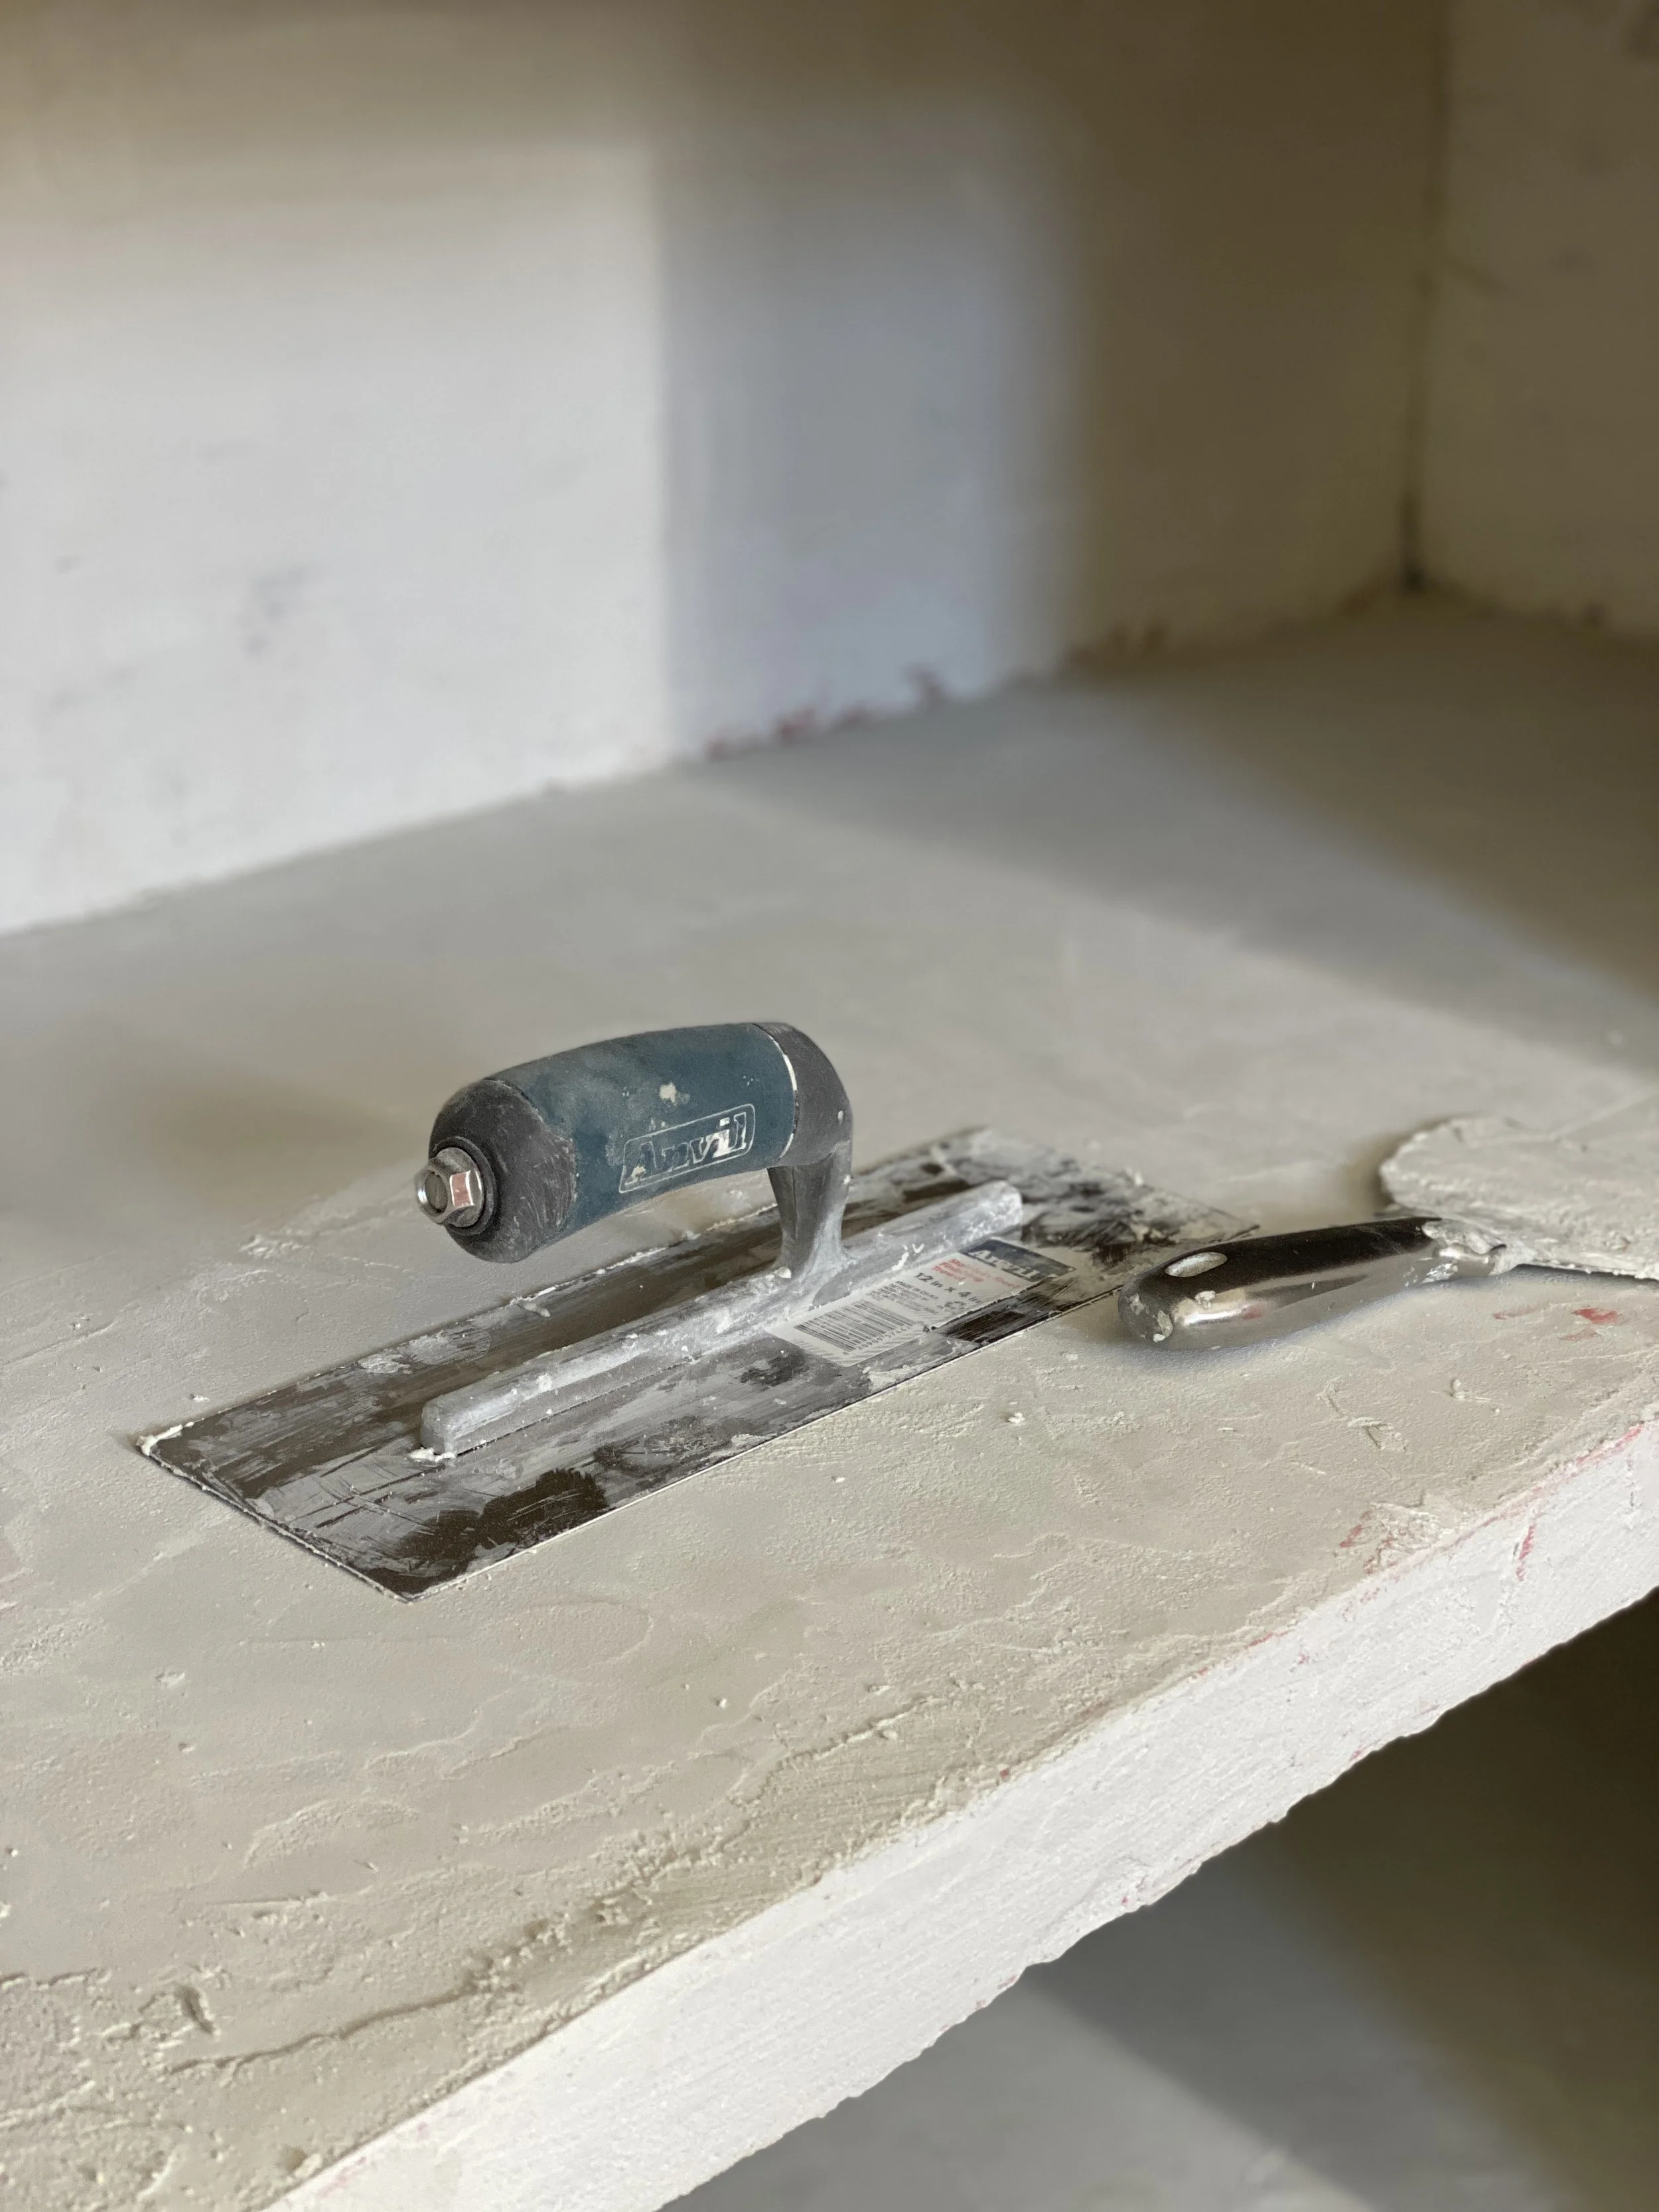
Bardo tries to get the microcement as smooth as possible with each layer with the trowel, but he still has to sand it with the electric sander between coats.
This side is really coming together!
And again, our cabinets are far from perfect, with imperfect edges and widths, but I love it this way. I wanted a very earthy, organic, and unique kitchen, and I think that’s what we’ll end up with.
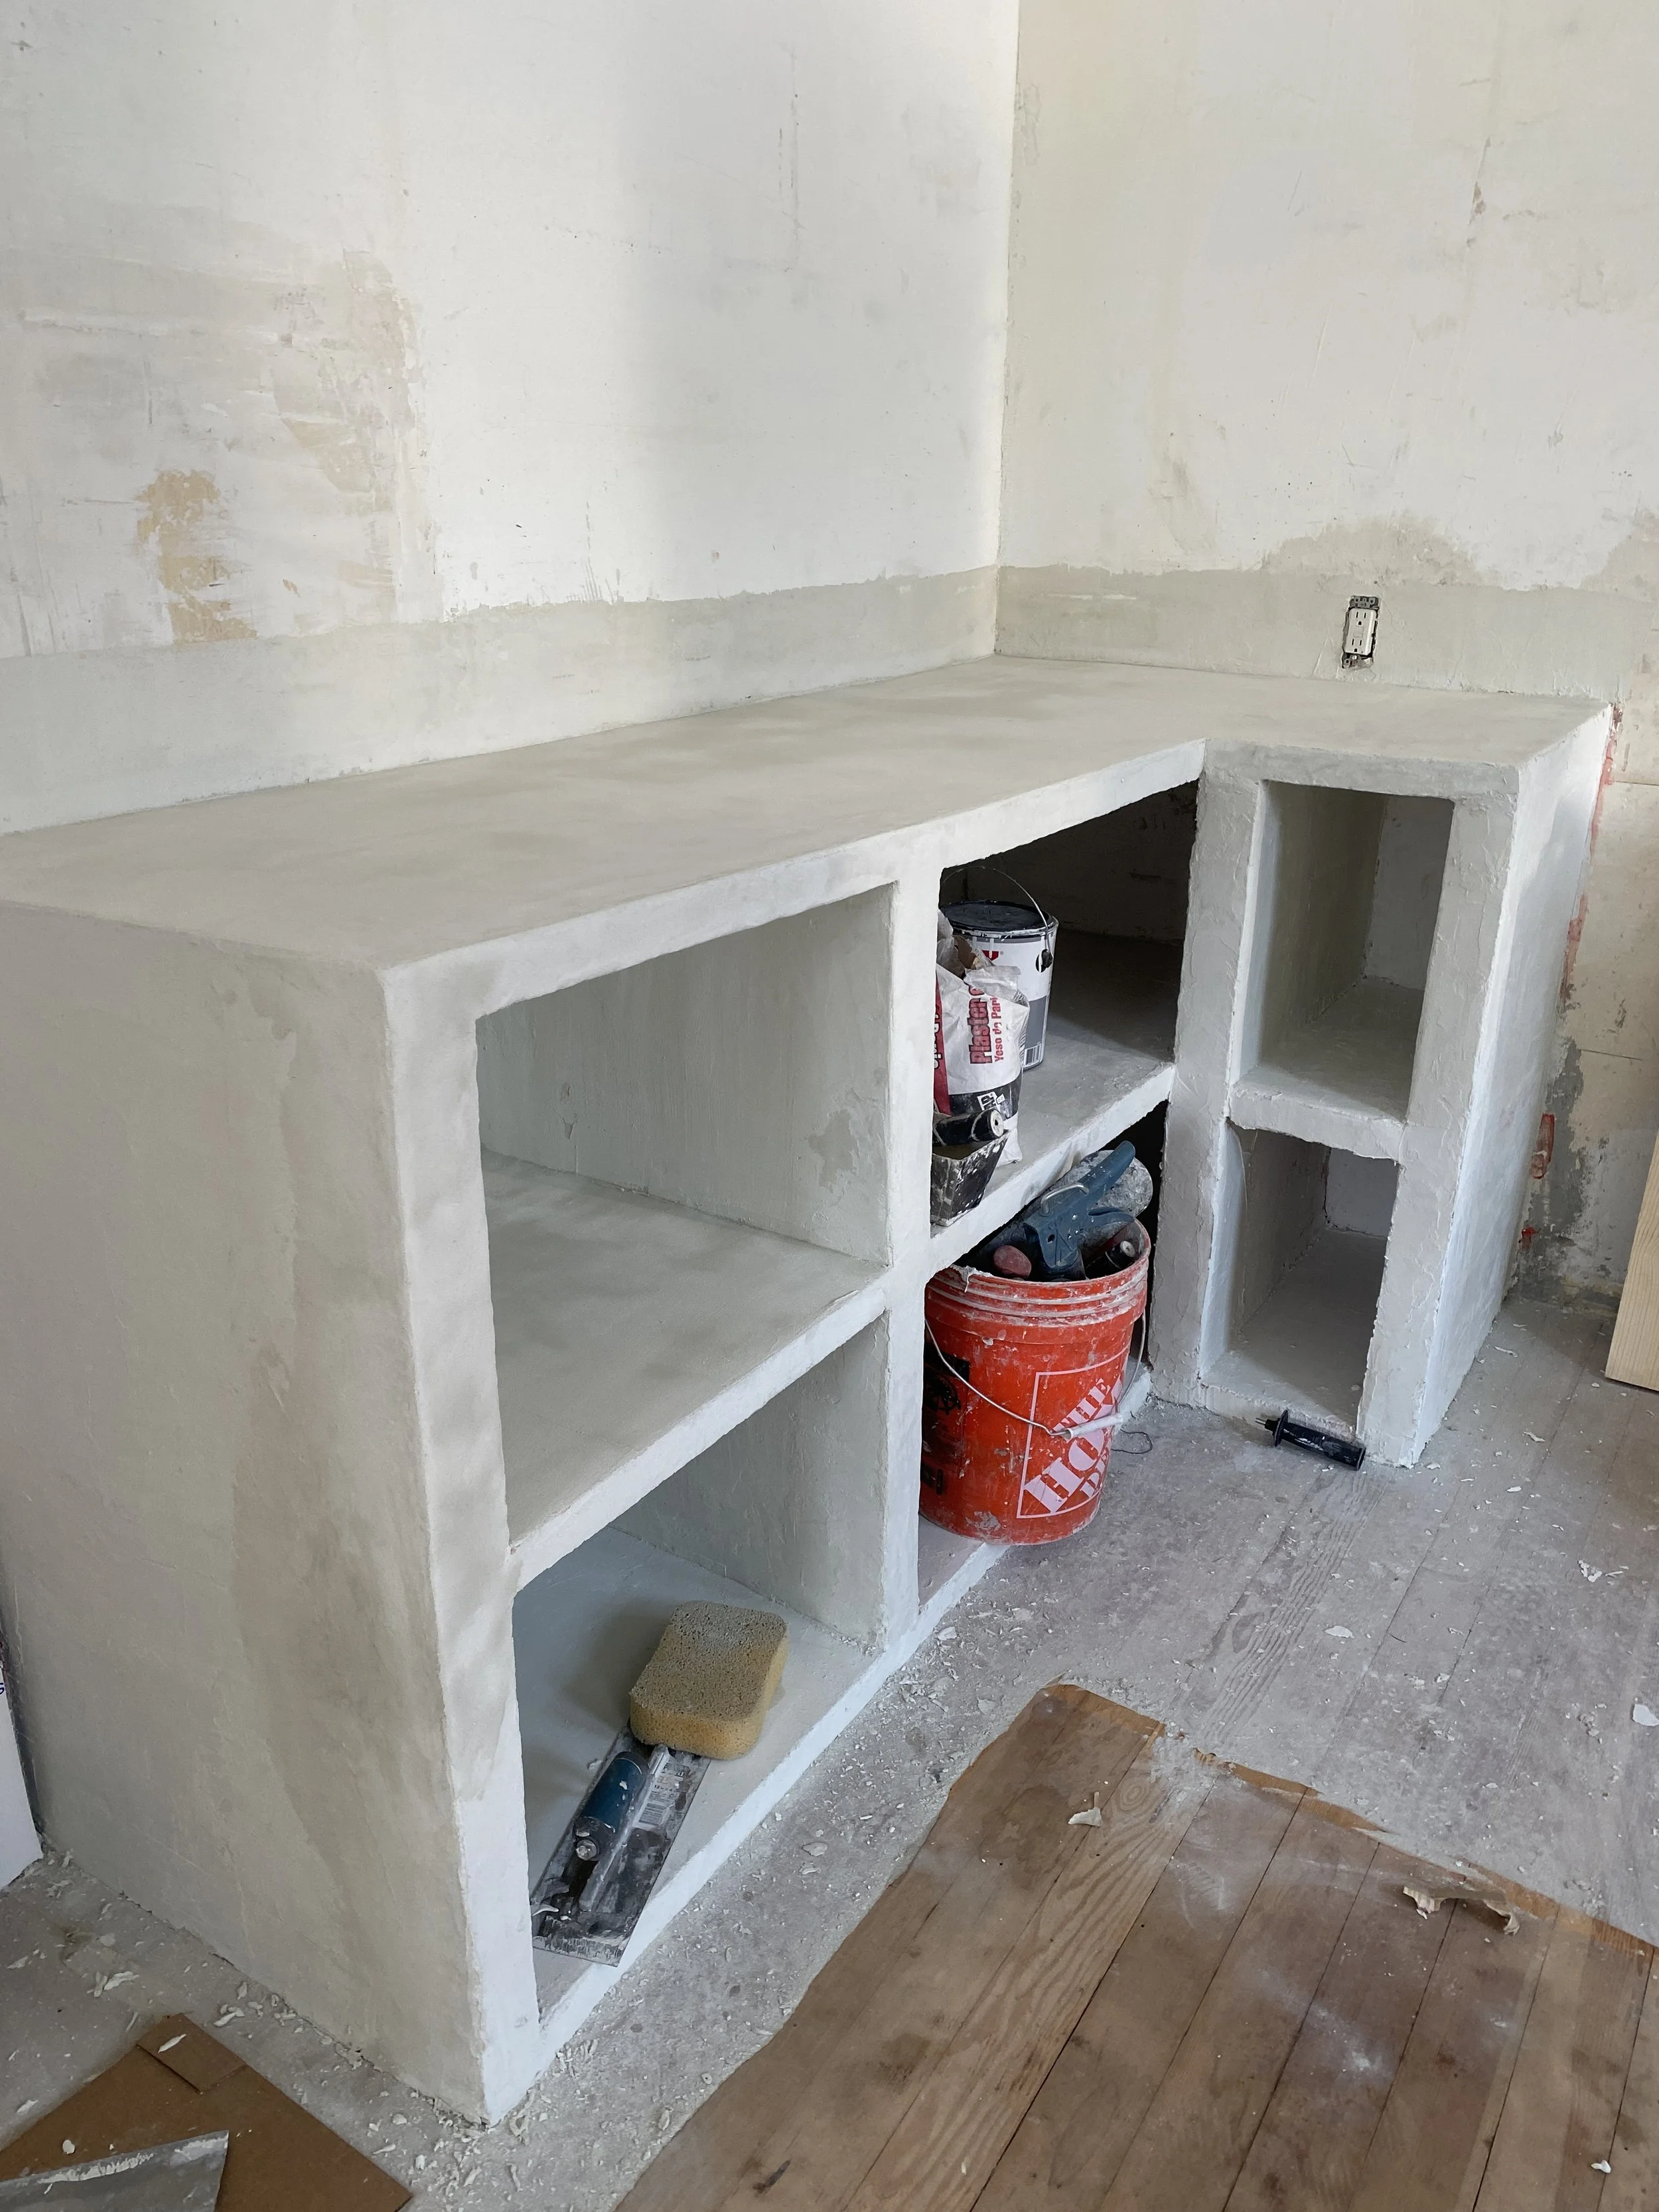
Another layer of microcement! Getting smoother, getting closer!
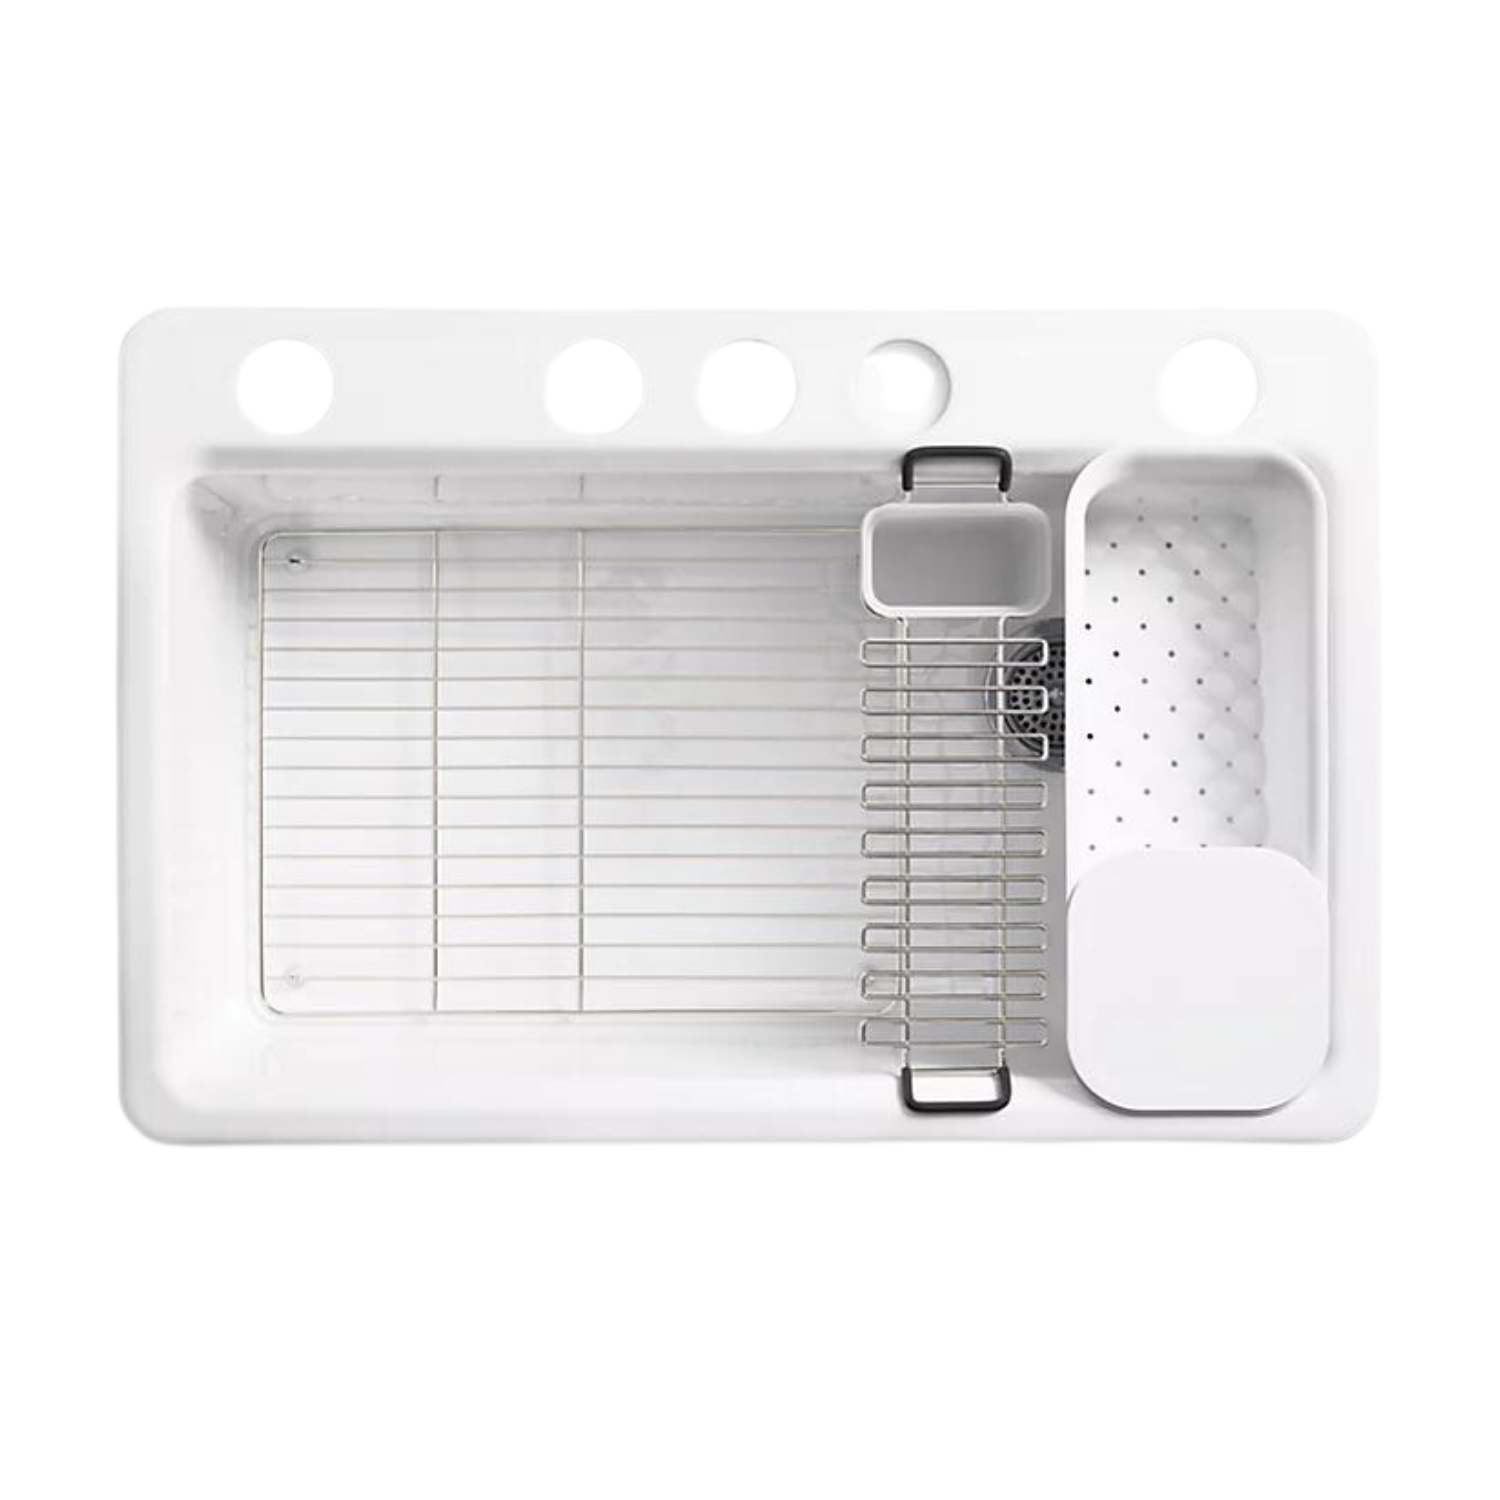
Oh my gosh, and finally my sink is about to be installed!!!
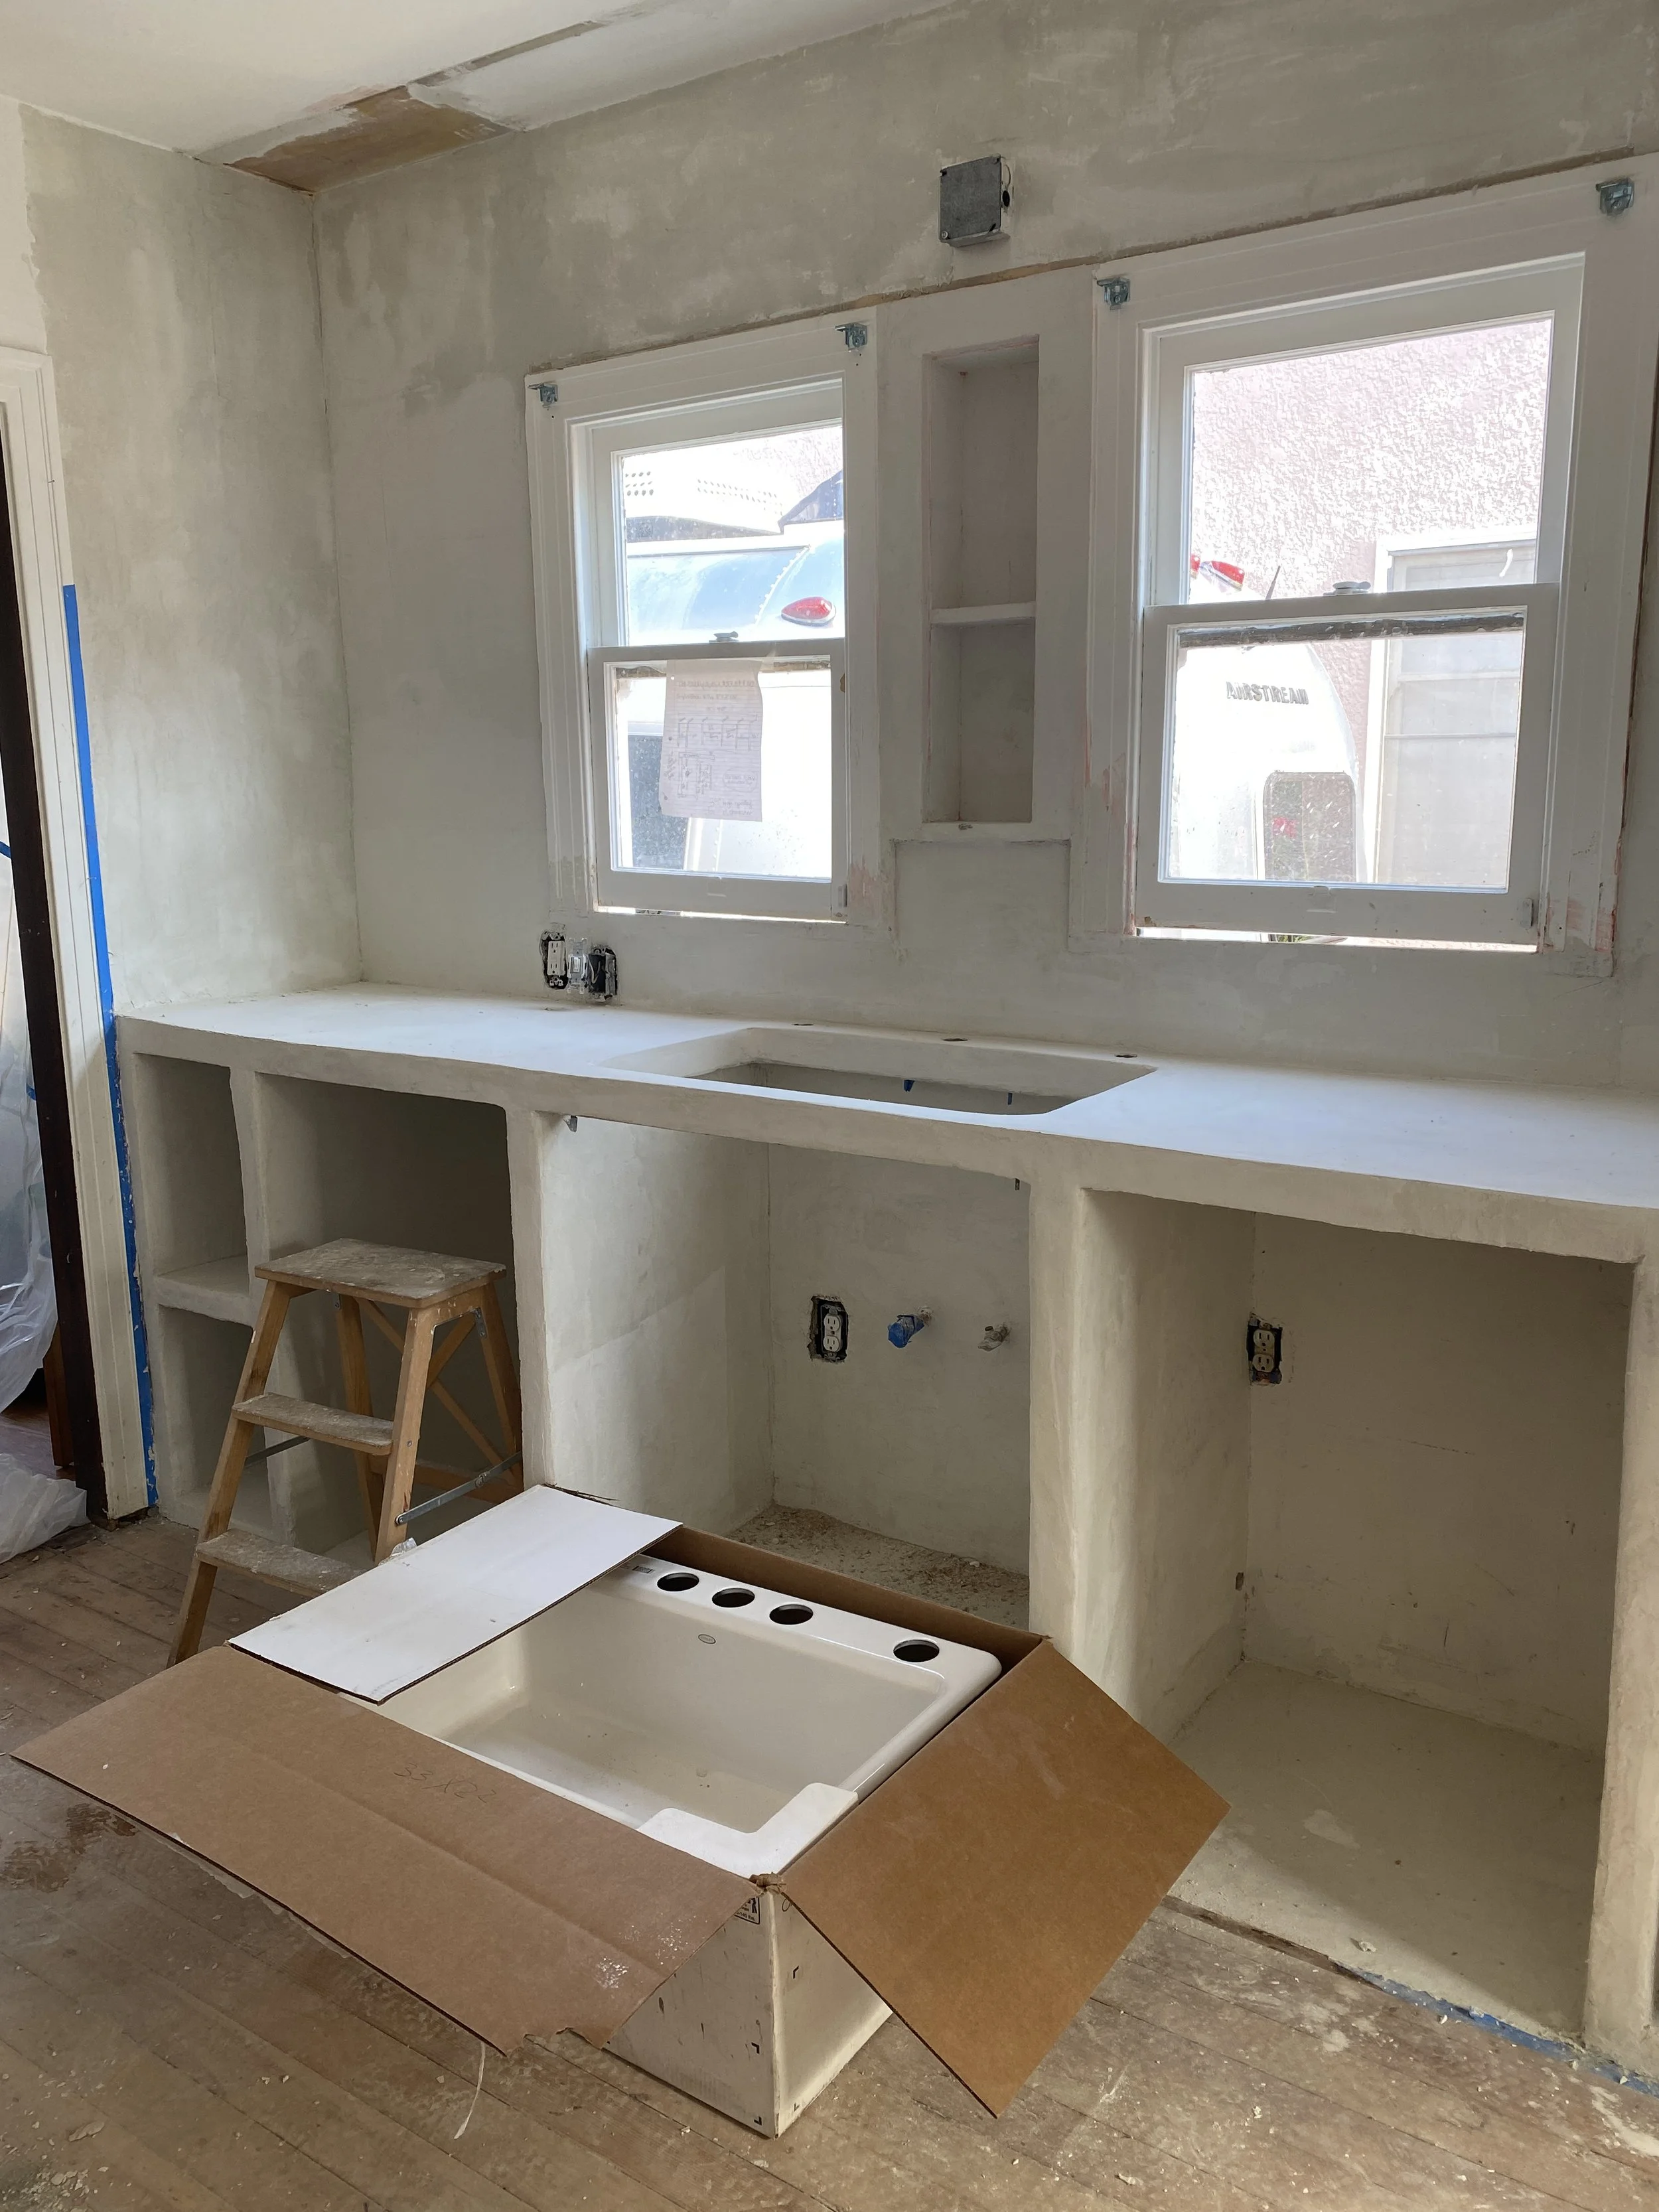
I forgot to mention that my design also included a wider sink area. Previously, the space only allowed for a 24” sink, but I chose to widen the space to allow for a 33” sink.
Originally I thought I wanted a double sink, but after polling my Instagram followers, the vote was unanimous that double sinks suck! Over 90% voted for a single basin sink. So I went with the Kohler Riverby Cast Iron Sink from Ferguson. I’m so happy with the model I chose, it comes with a base rack, organizers, and drying racks. And, thanks to all of your amazing advice, I also went with the side drain.
I can’t wait to use my new sink!

SHOP THE PROJECT


So that’s a wrap for Week Six! Stay tuned for next week…
***Sink gifted from Kohler & Ferguson
This post contains affilliate links which means I may receive a small kickback if you purchase a product from this page. All ideas and opinions are 100% my own, and I never endorse a product that I don’t personally use and love. Thank you for supporting Blanco Bungalow!