Blanco Bungalow Kitchen Renovation: Week 2
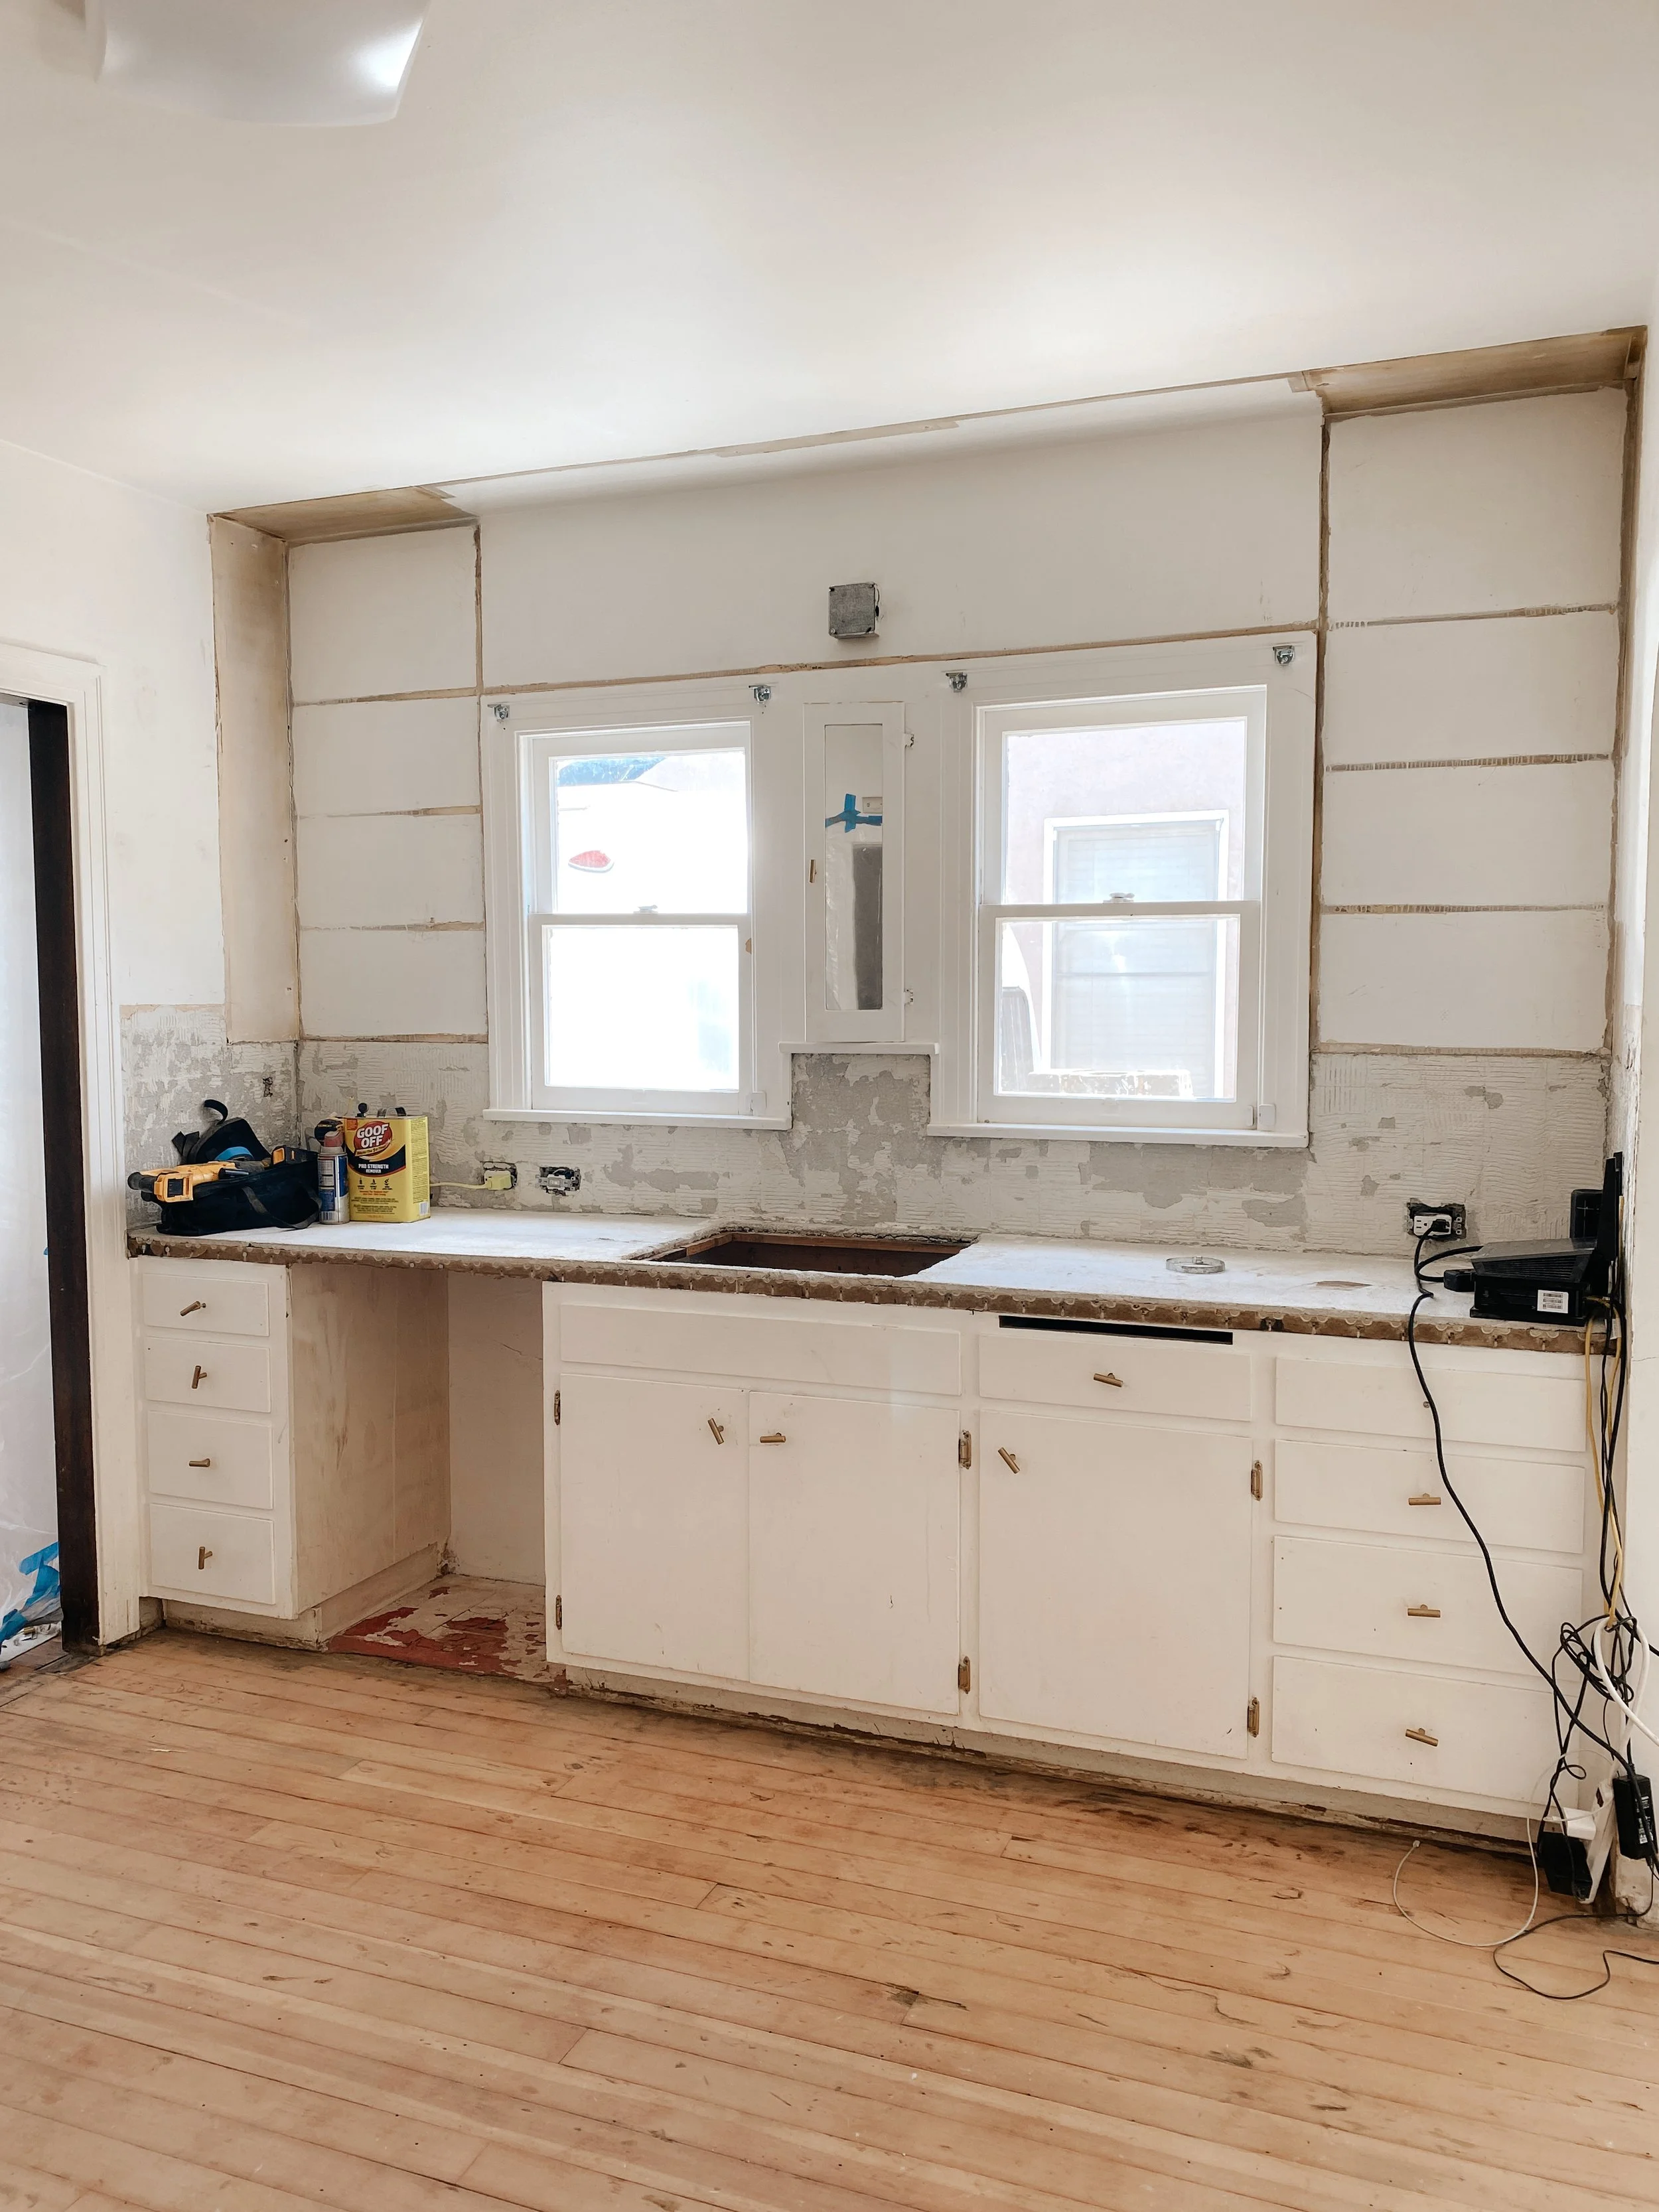
Okay folks, it’s Week 2 of our Spanish Bungalow Kitchen Renovation, and we’re starting over from scratch! Well kind of:) My original plan was to save the existing kitchen cabinets and plaster over them. Looking back though, I really don’t know what I was thinking. You’ve probably seen those incredible kitchens in Mexico that are seamless open concept concrete units that are fully built in and custom. If you’re not sure what I’m referencing, you can see my inspiration HERE. I searched high and low across the internet for tutorials and I couldn’t find a single video or article to teach me how they were built. There are multiple youtube videos on how to pour concrete countertops, but as for the full unit, meaning the same material used for the cabinets as wells as the countertops, a Solid DIY instructional video was yet to be found.
I also learned a very important lesson during my DIY Youtube search. Just because it’s on Youtube, doesn’t mean it works. The first video I found was this seemingly very knowledgeable guy who had a series of very professionally made videos. The first one, he demonstrated how he’d plastered his bathroom using Tadelakt from Limestrong. The second video was titled, “Tadelakt Alternative”, where he plastered his entire kitchen, still using Limestrong products, but he used Limestron Build instead of Limestrong Tadelakt. He didn’t show how he built the cabinet bases, only showed how to mix the limestrong plaster and how to seal the counter tops. So after watching his videos, I felt very confident that I had a plan. I would purchase the same plaster products from Limestrong, and the same sealer and call it a day. Right? WRONG.
I reached out to Limestrong initially via instagram to ask some questions and clarify which Limestrong products would work for our kitchen. They replied rather abruptly that none of their products were suitable for kitchen cabinets or kitchen counters whatsoever. This was incredibly frustrating because I had literally watched every tutorial video Limestrong had, as well as any kind of plaster video I could find on Youtube, and I desperately wanted to understand why. Especially since this guy I watched on Youtube had created such a beautiful kitchen using their products, only to be told no. I didn’t know if it was because plaster would stain, like from a glass of red wine, or if it simply wasn’t durable enough. So after a few days of feeling stuck, I decided to reach out to Limestrong once more to try to get some clarification. I can’t even tell you how frustrating their response was. She basically refused to give me a reason why. Just referenced her instagram message and said no, they can’t be used in a kitchen. So here I was, back at square one.
After my plaster frustration had passed, I refused to give up on figuring this out. Once I determined that plaster was not an option, I started researching concrete and micro-cement. After yet another long night and another deep dive down the Youtube rabbit hole, I finally figured it out. I found some pretty incredible videos of men in sarongs building concrete kitchens in the dirt by hand. Granted there were no words (or fancy text to give me exact directions), but I started to get some ideas. Why don’t we demo the existing cabinets, and build new cabinets out of cement blocks or CMU? We could basically put them together like building blocks (similar to our outdoor stucco projects) and micro-cement over them. Therefore, creating the modular open concept Mexican kitchen I was trying to achieve from the beginning.
Below is a pic of my elevation sketch for the cement block cabinets on the sink wall.
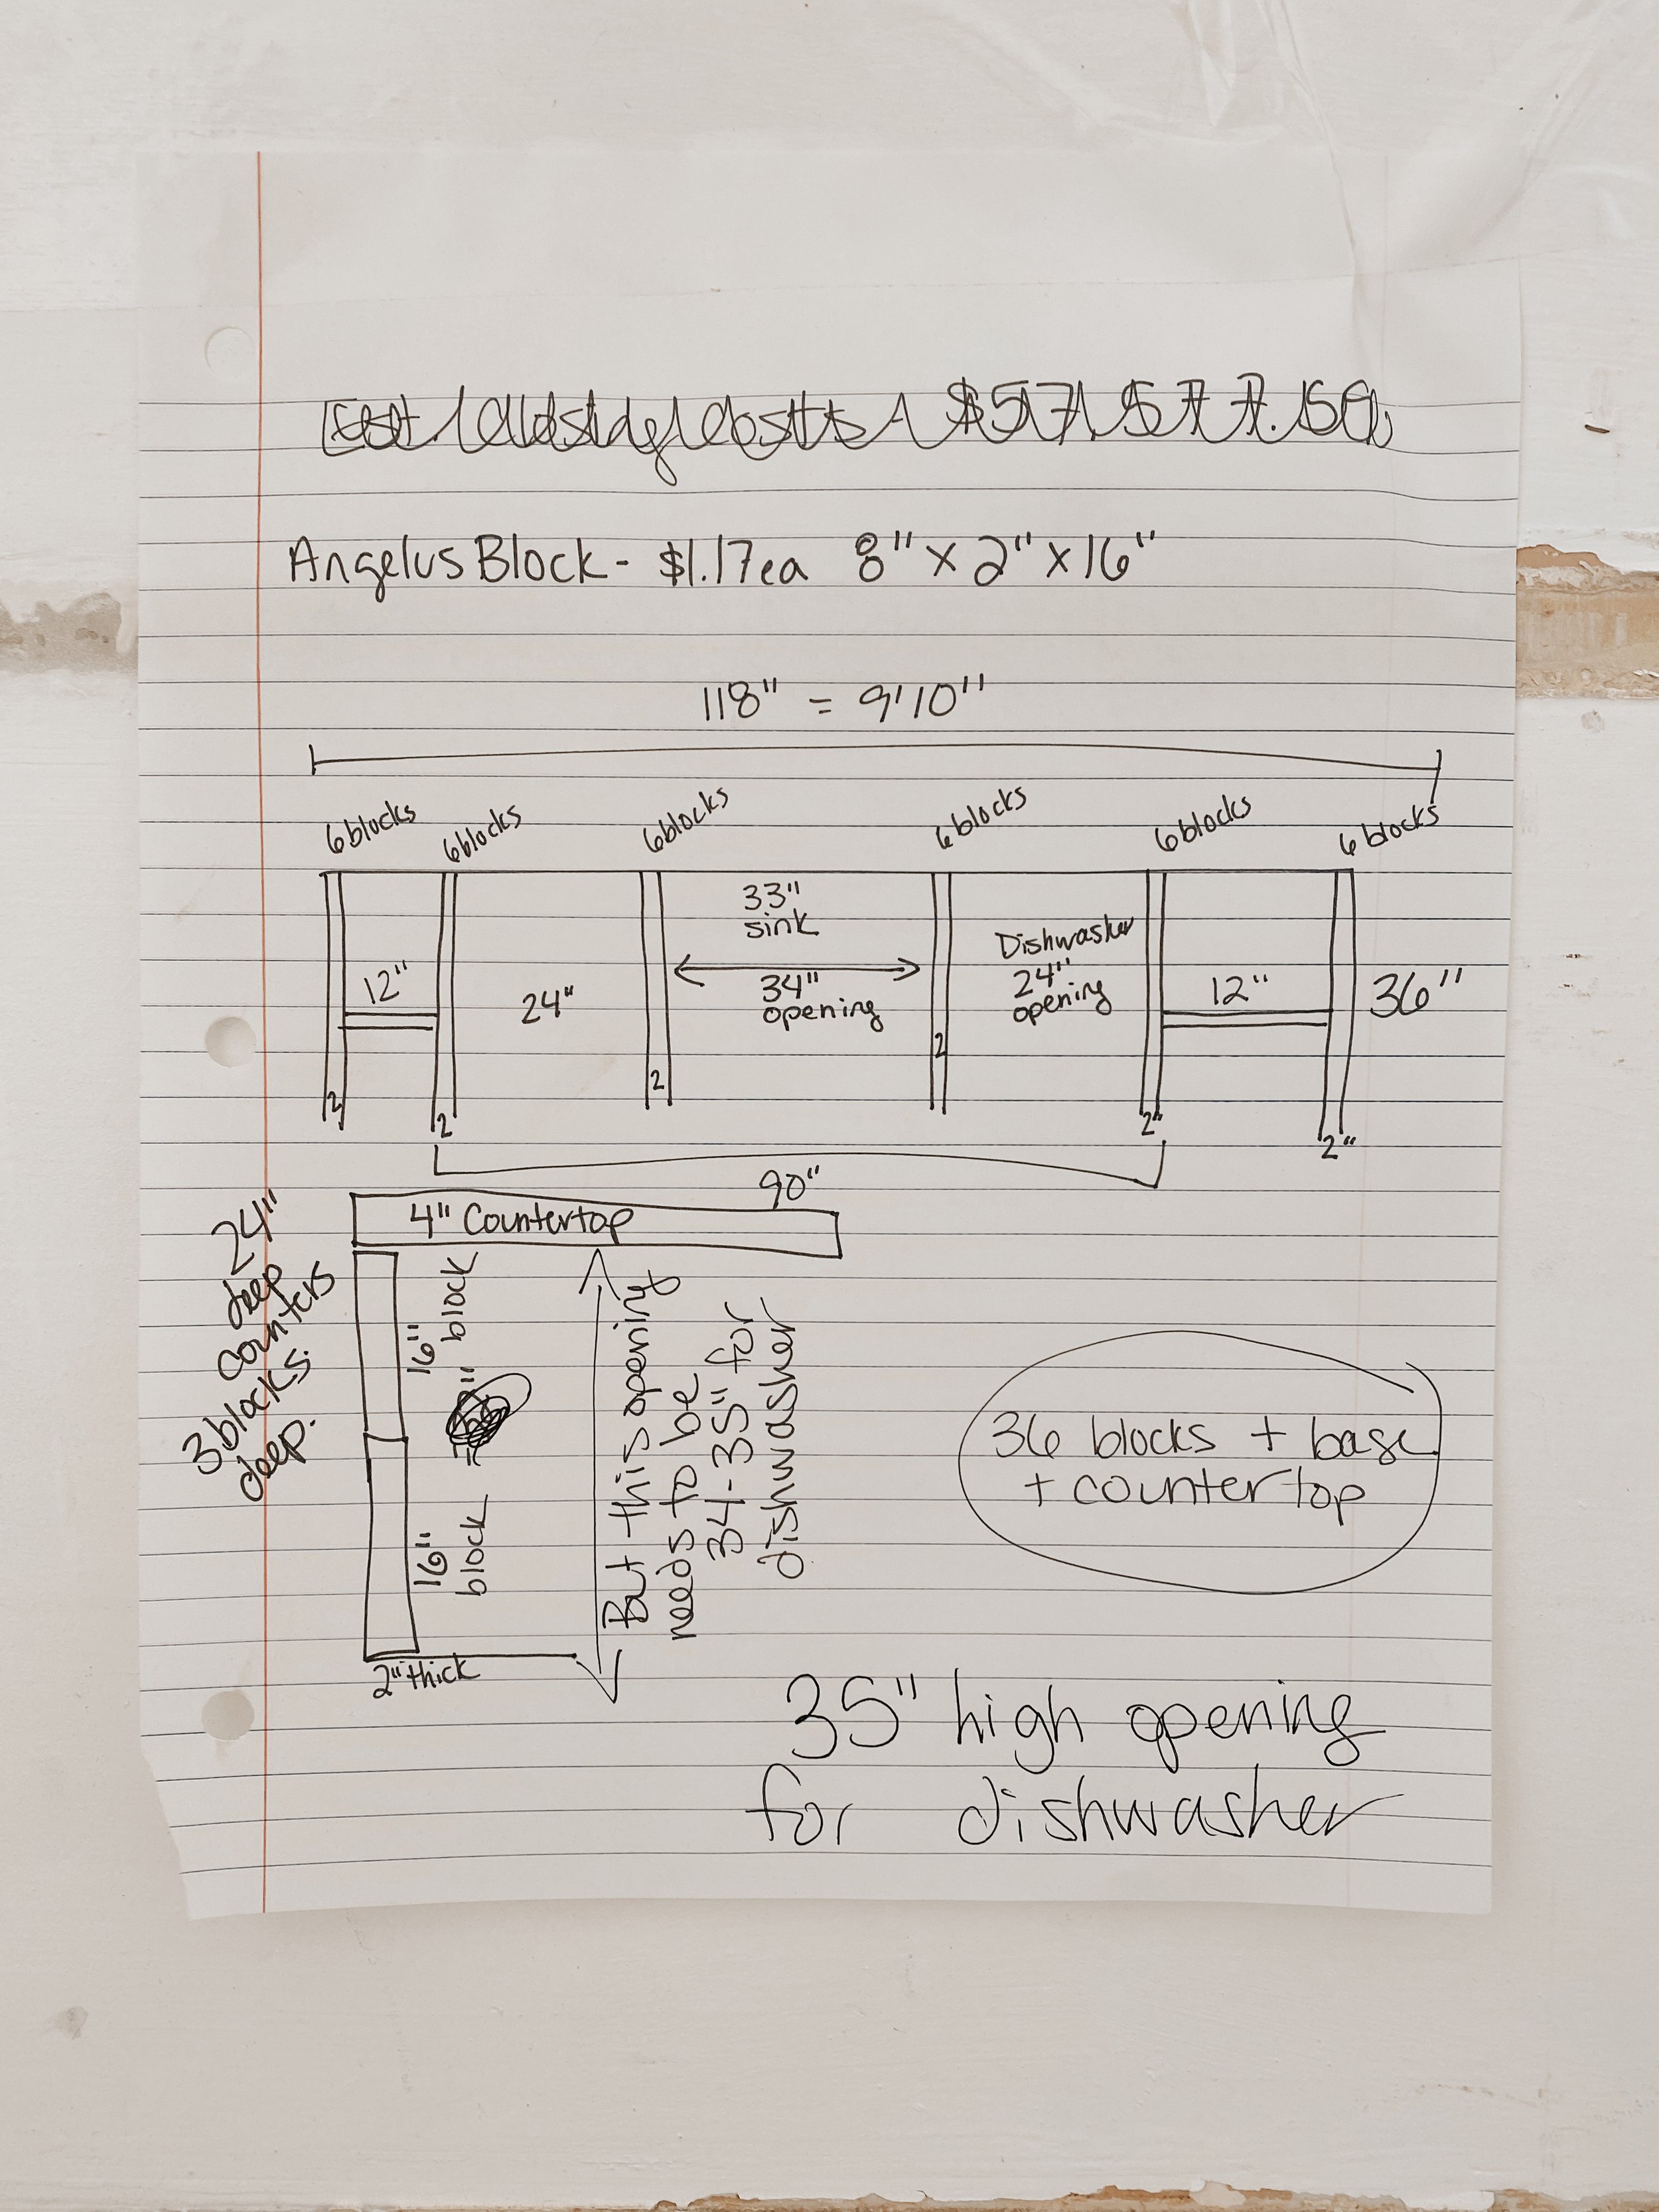
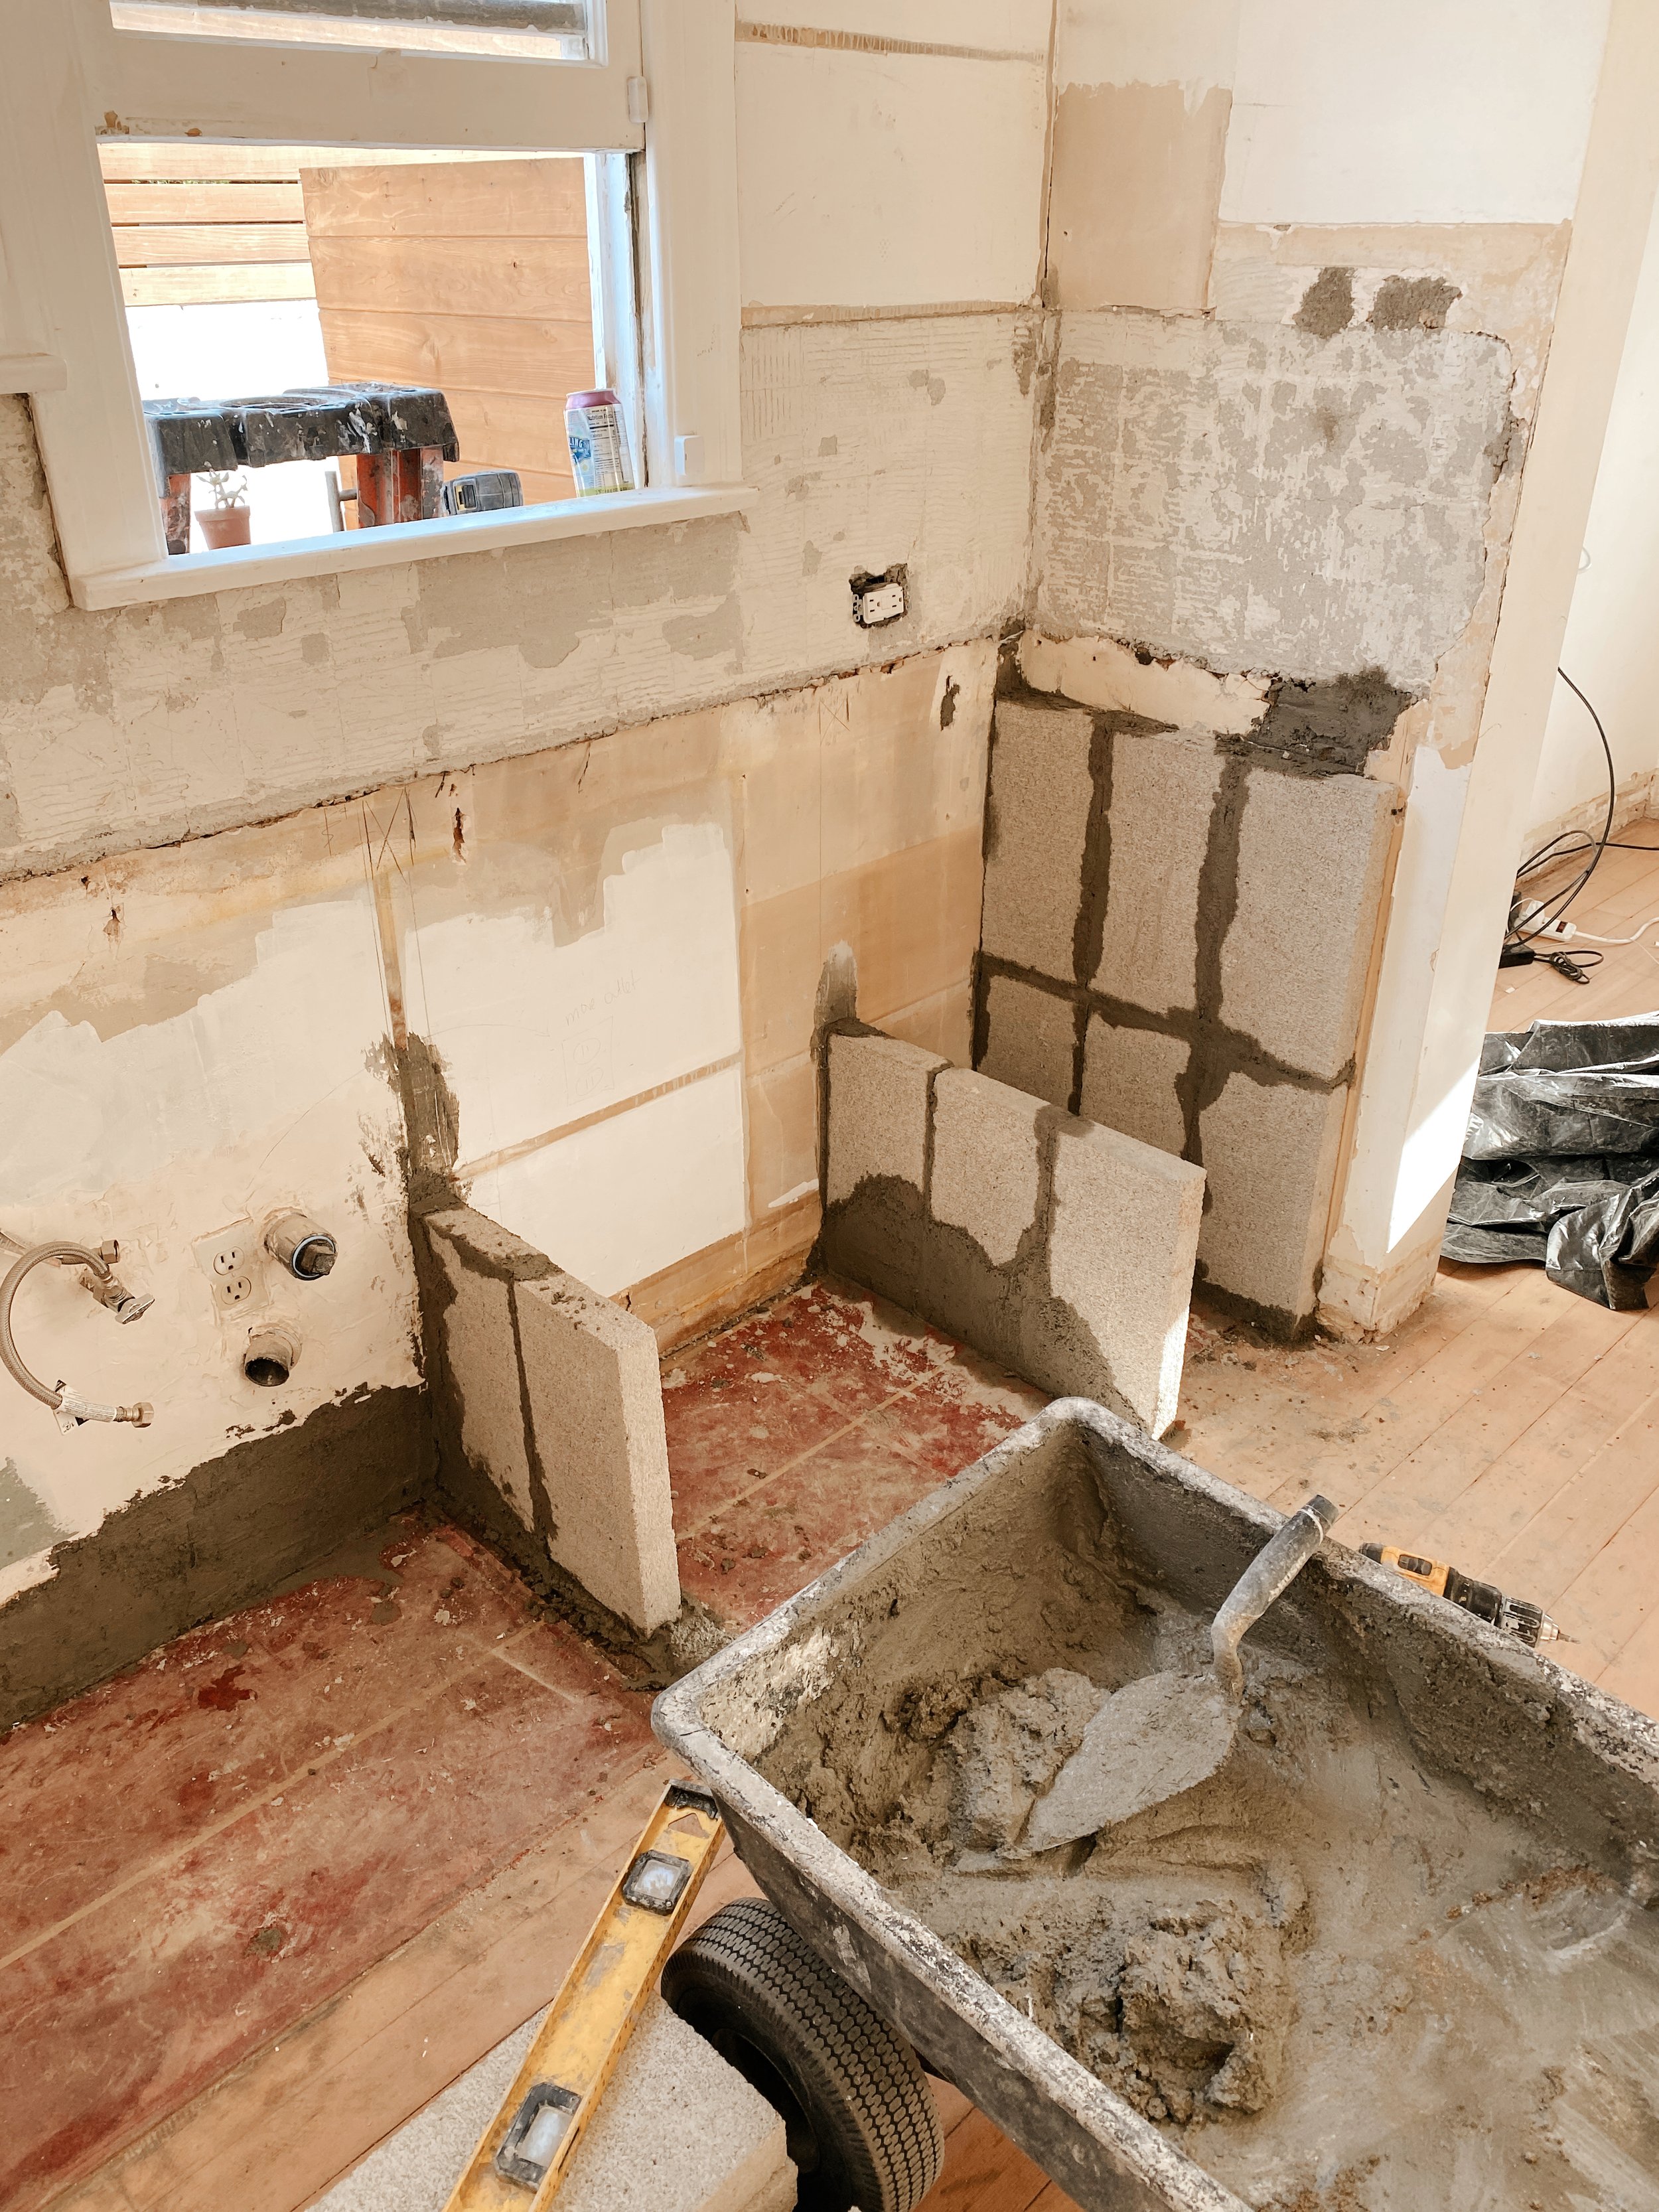
I found these cement blocks, and once I started measuring everything out, I was kind of shocked with how perfectly they would work. They measure 8” x 2” x 16”. Our counters are 24” deep, so stacking them three deep is exactly 24”!! The only tricky part is that we need a 35” clearance for the dishwasher, and two bricks high is only 32”, so we had to figure out how to make up that extra 3”, but I knew we’d figure it out. So once we’d committed to the new design plan, it was time to demo.

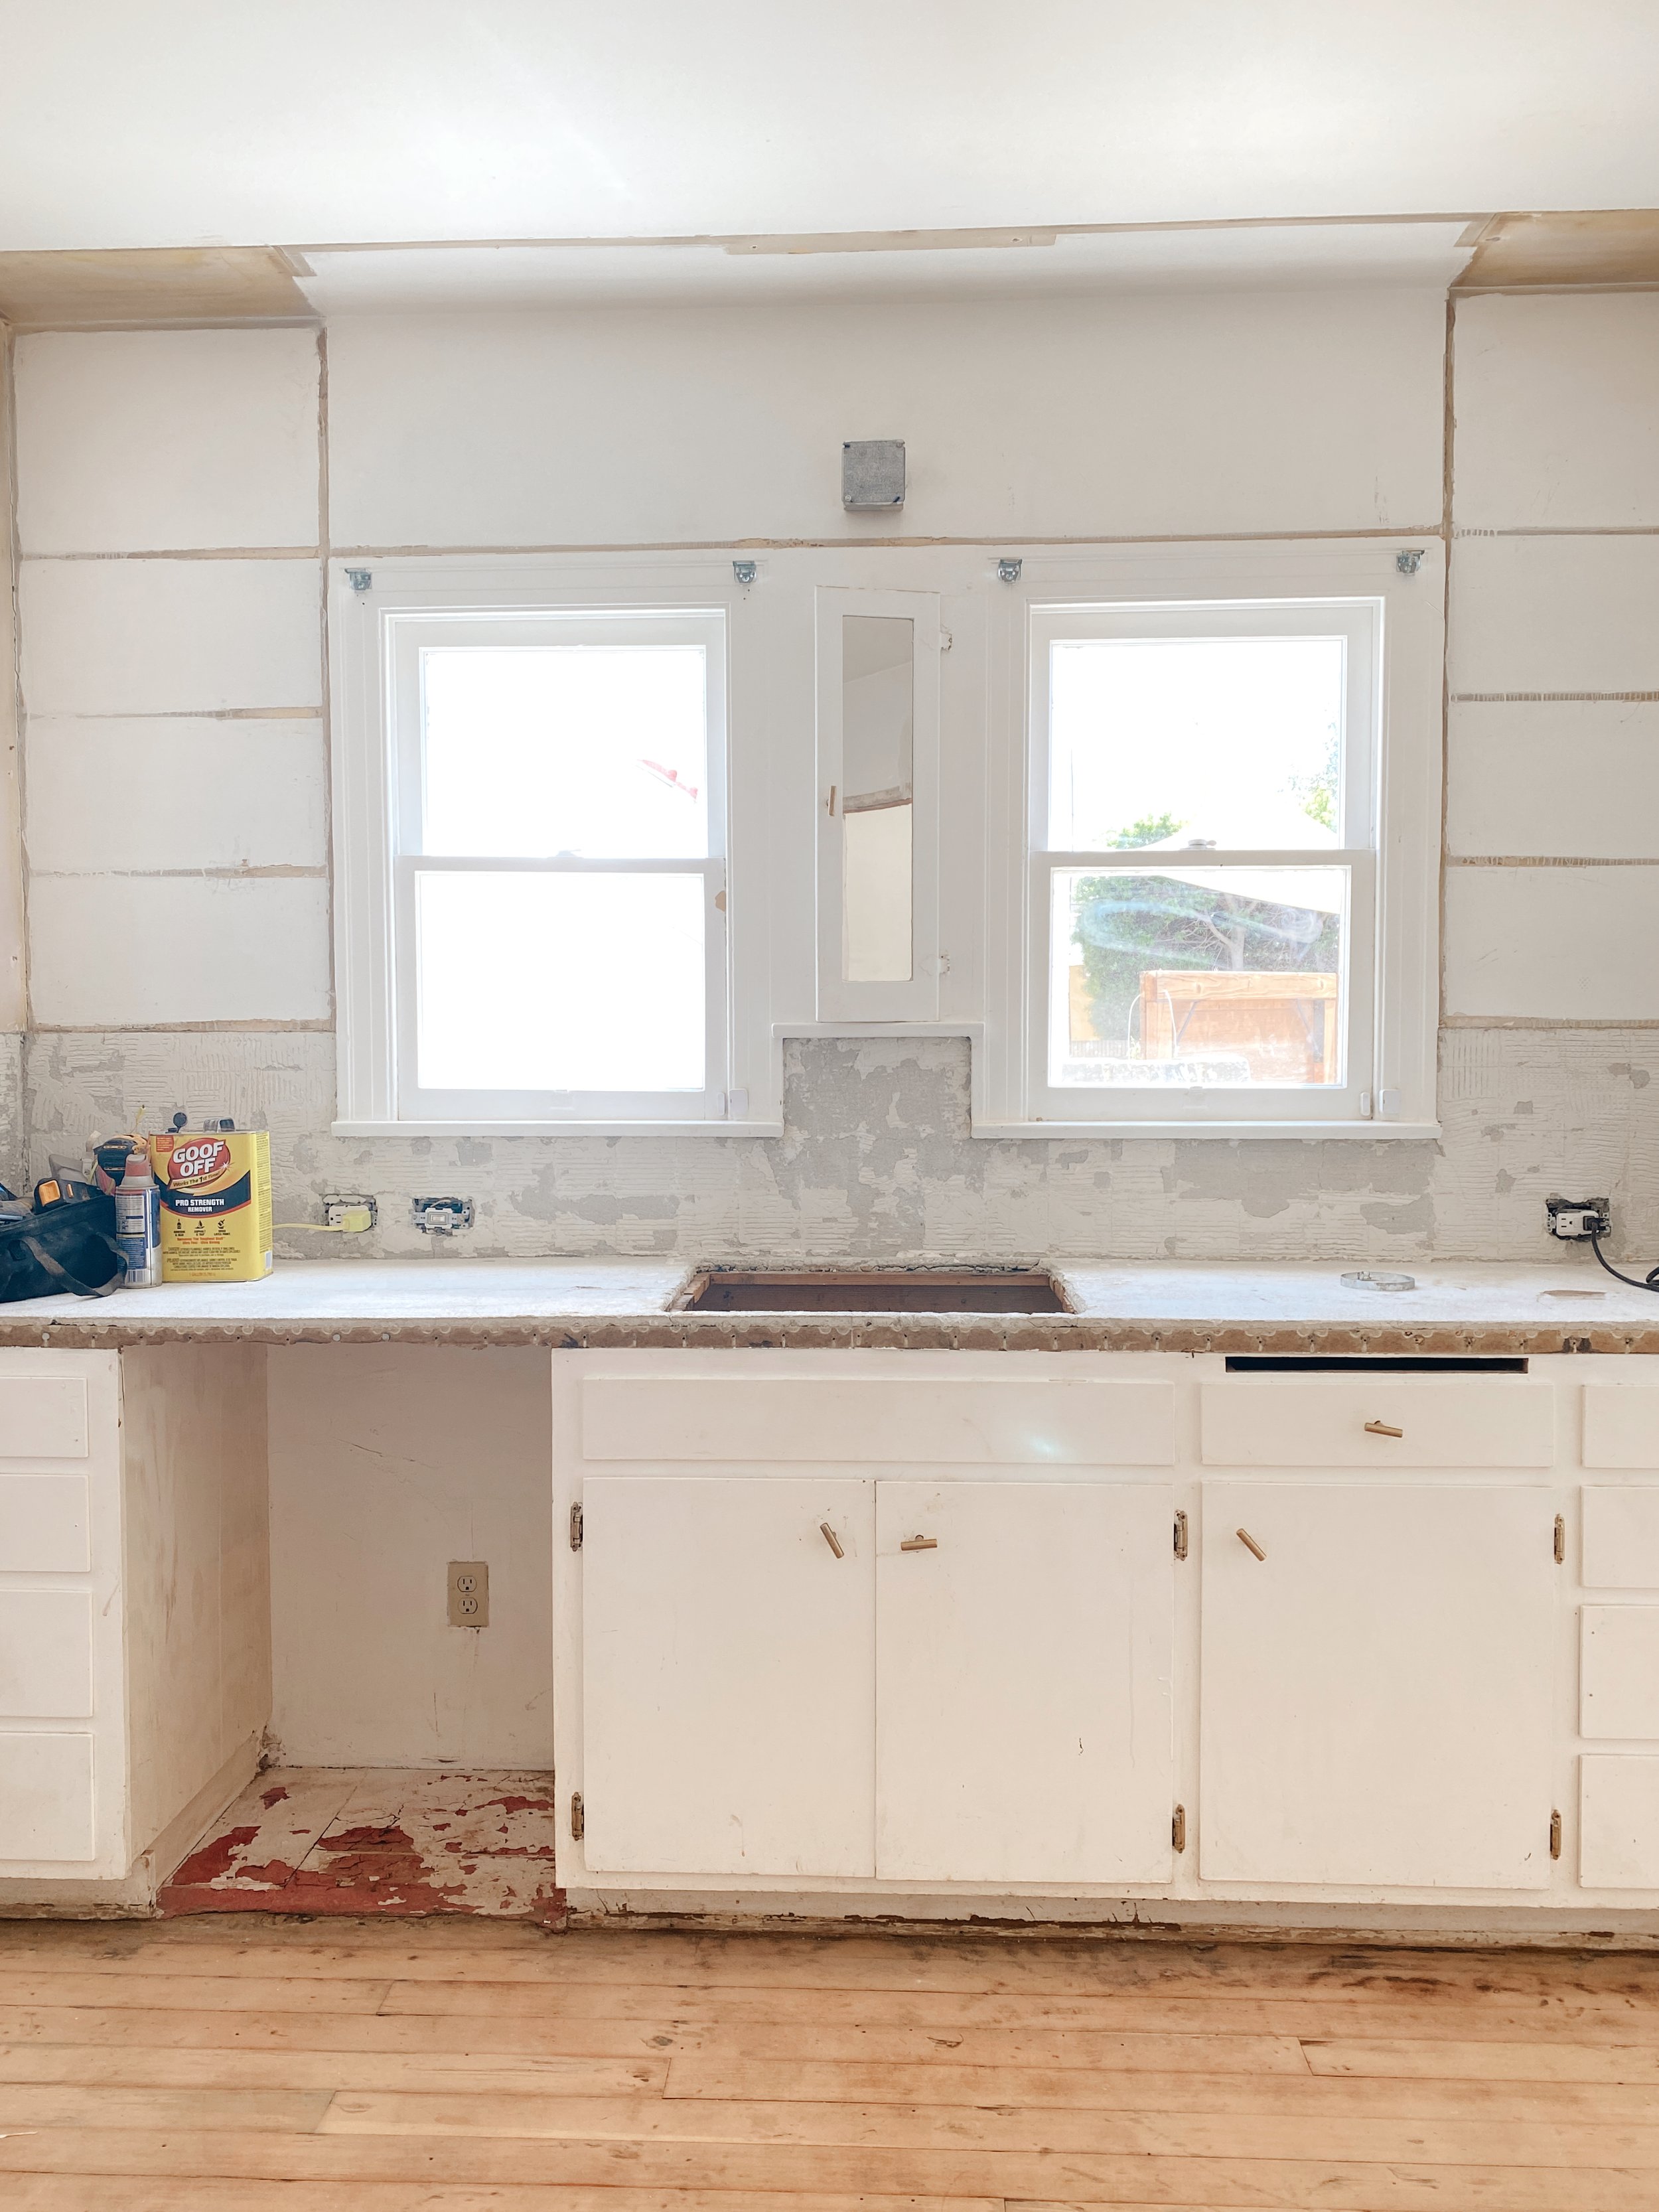
I kid you not when I tell you that this demo took literally 20 minutes. Like, why didn’t we just do this in the first place?

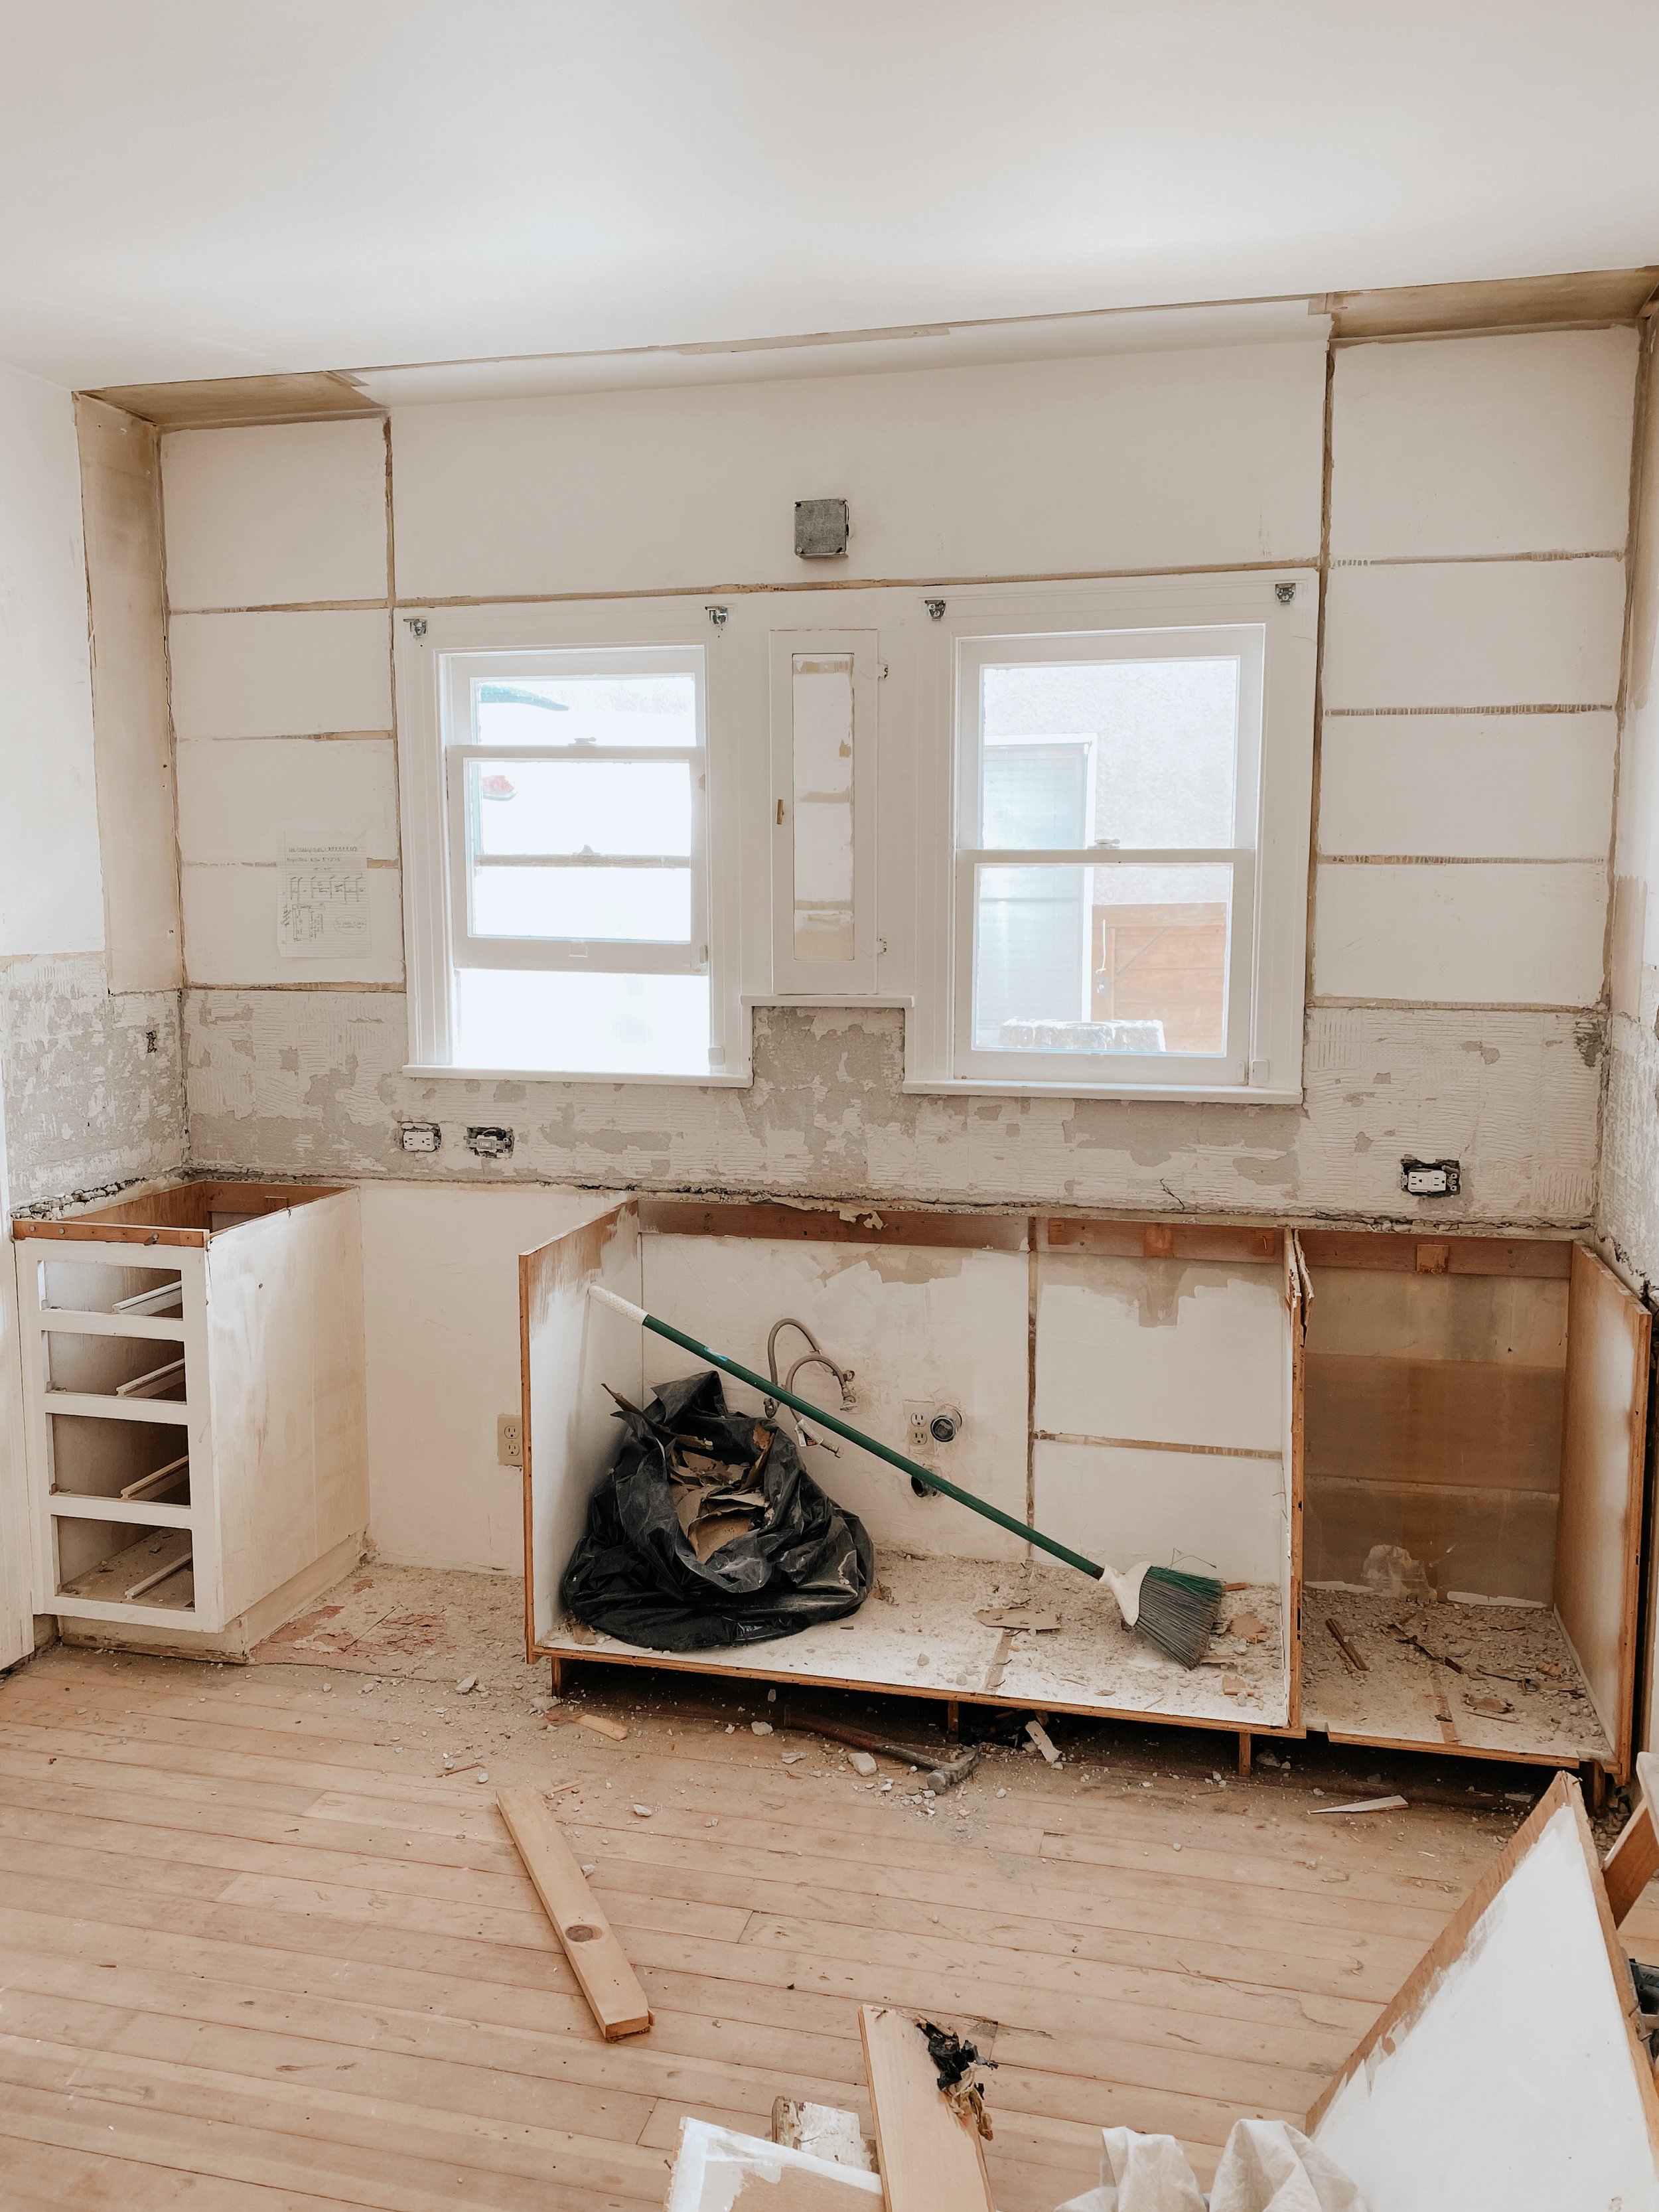
We also found this lovely hole behind the cabinets. Funny how it was right behind the cabinet where I opened our silverware drawer a few months ago, to find a cockroach staring at me, chillin’ on a fork!!! I don’t think I’ve ever screamed so loud! We’d filled in every single crack and hole when we moved in, but we’d still get a disgusting roach every few months. I HATE roaches! Even typing the word r-o-a-c-h, gives me chills up my spine! I knew there had to be something like this we couldn’t see or access, and I was right! Ugh! GROSS! I was just grateful I’d finally found the source!

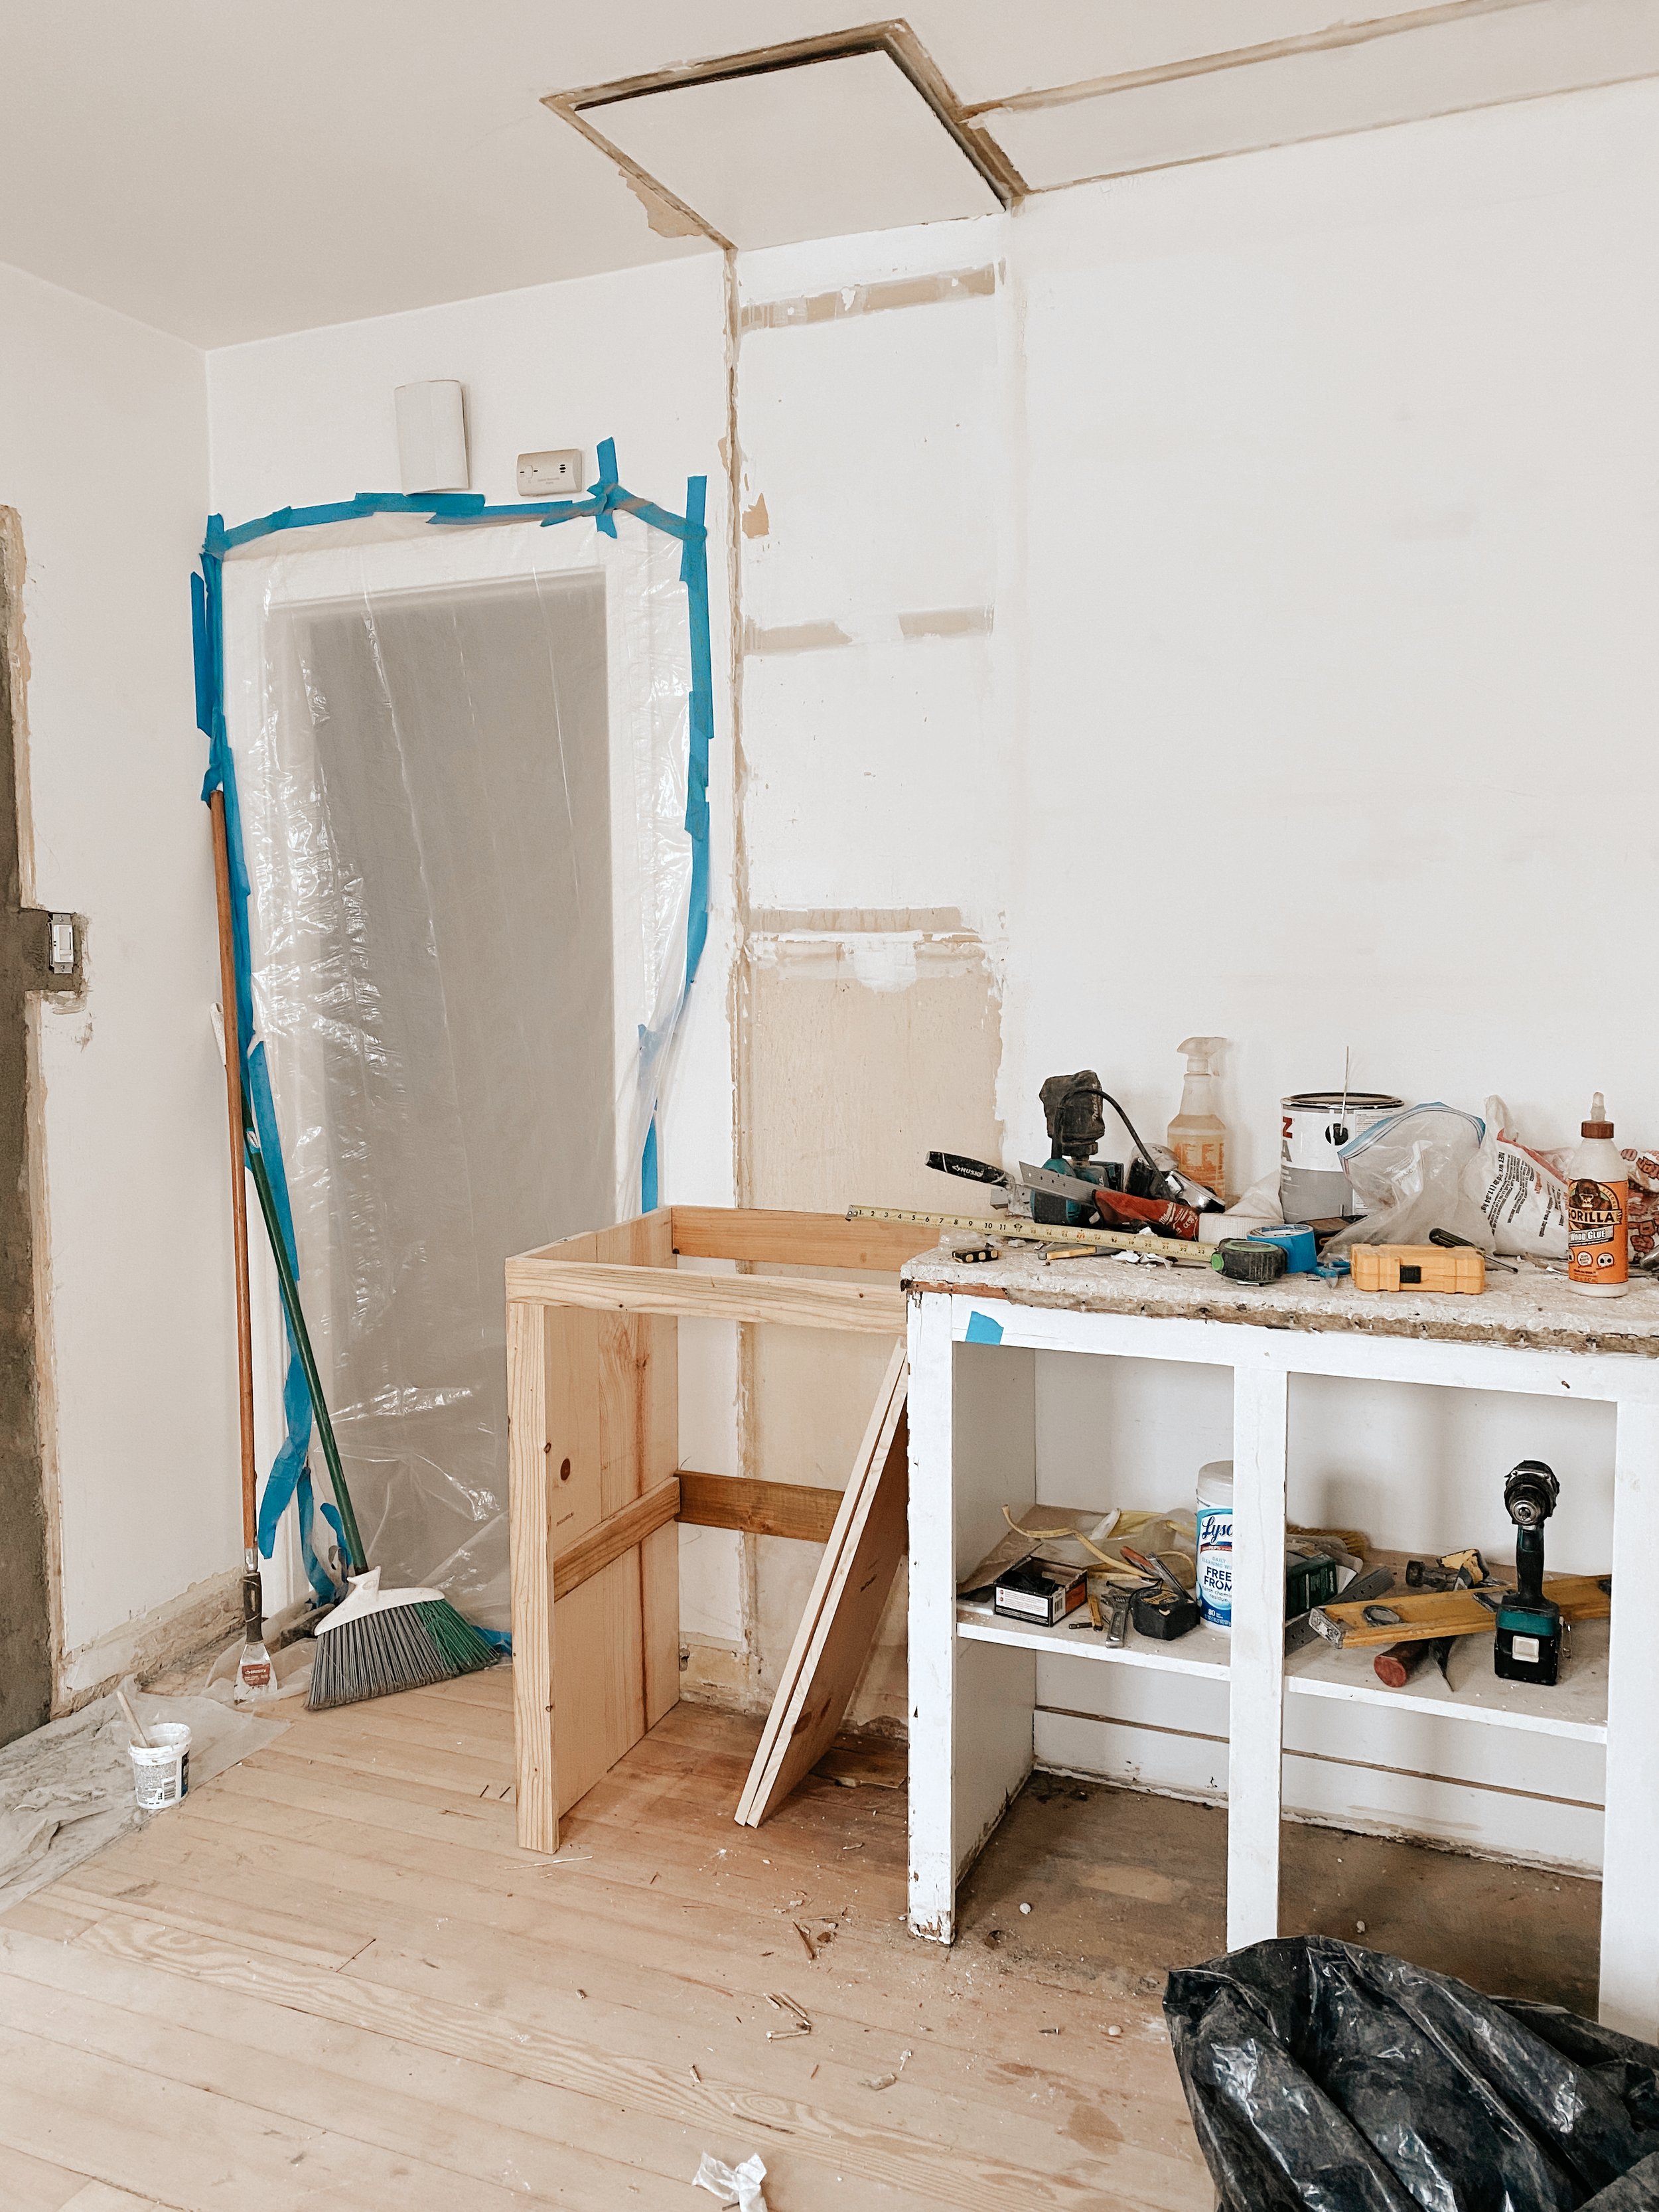
But once I got past my horror from the hole in the floor, it was time to visualize my design. We experimented stacking the bricks, measuring and drawing out the plan on the wall. Once we were good, we got to work.
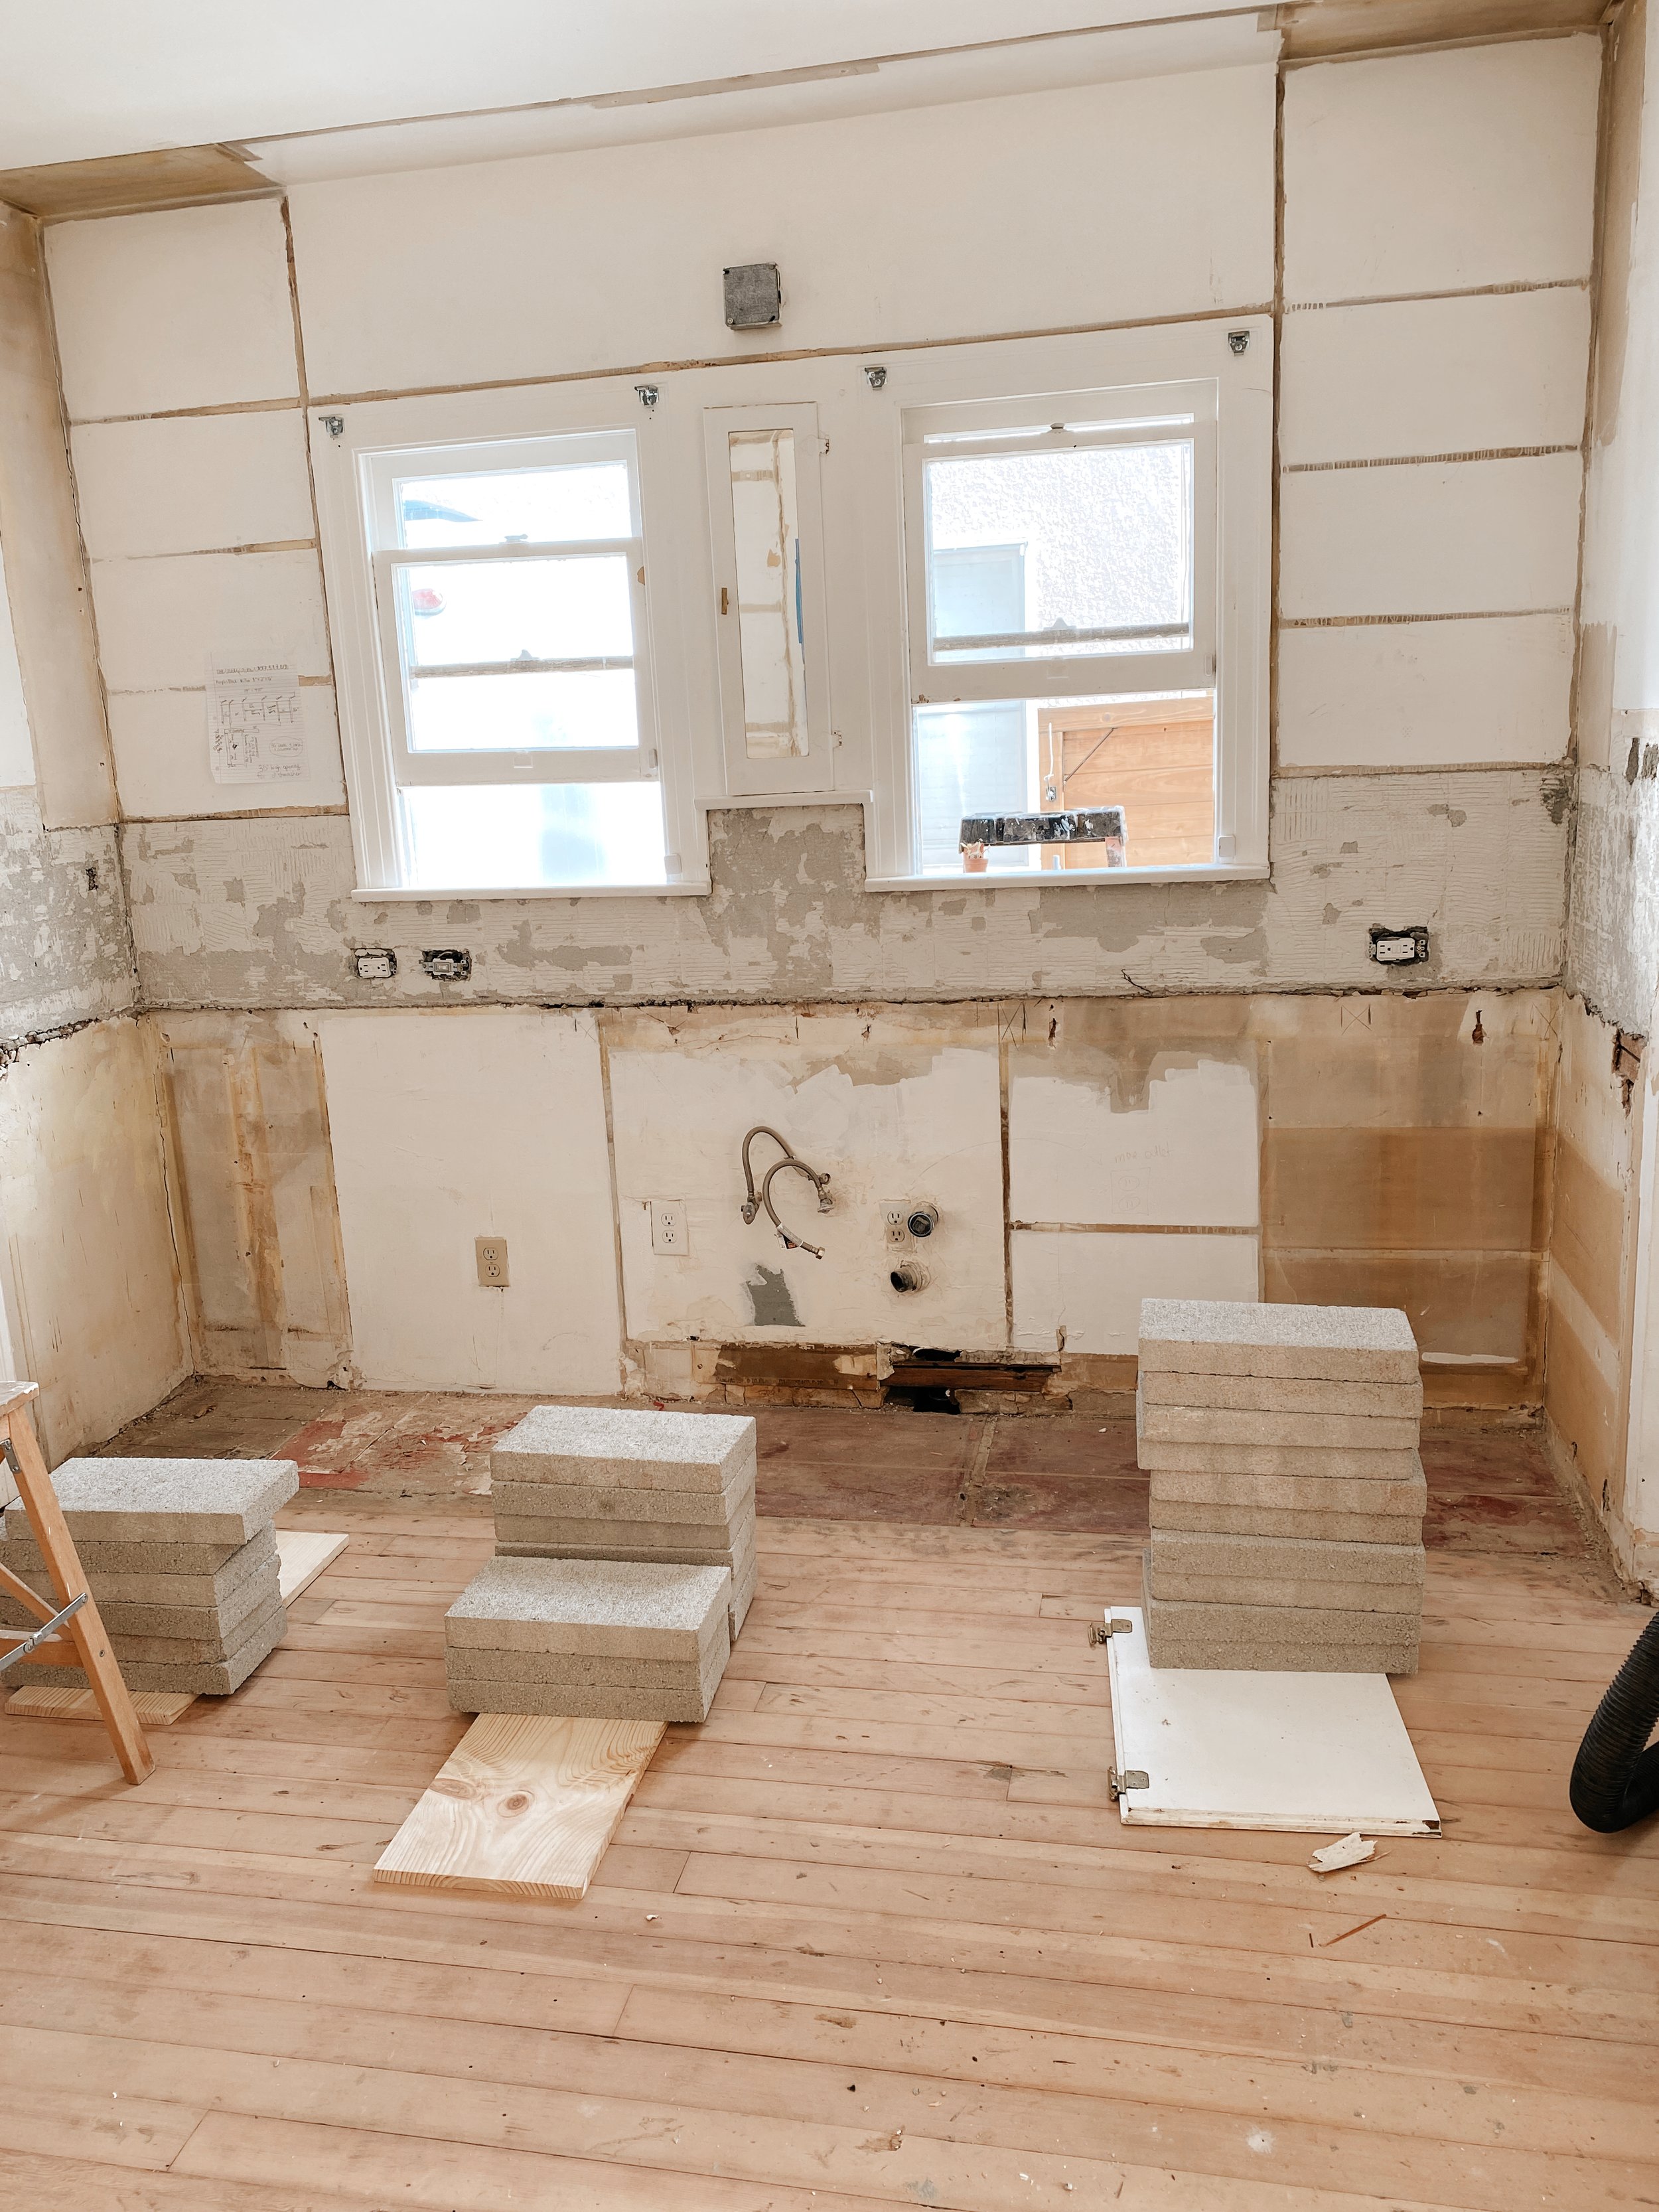
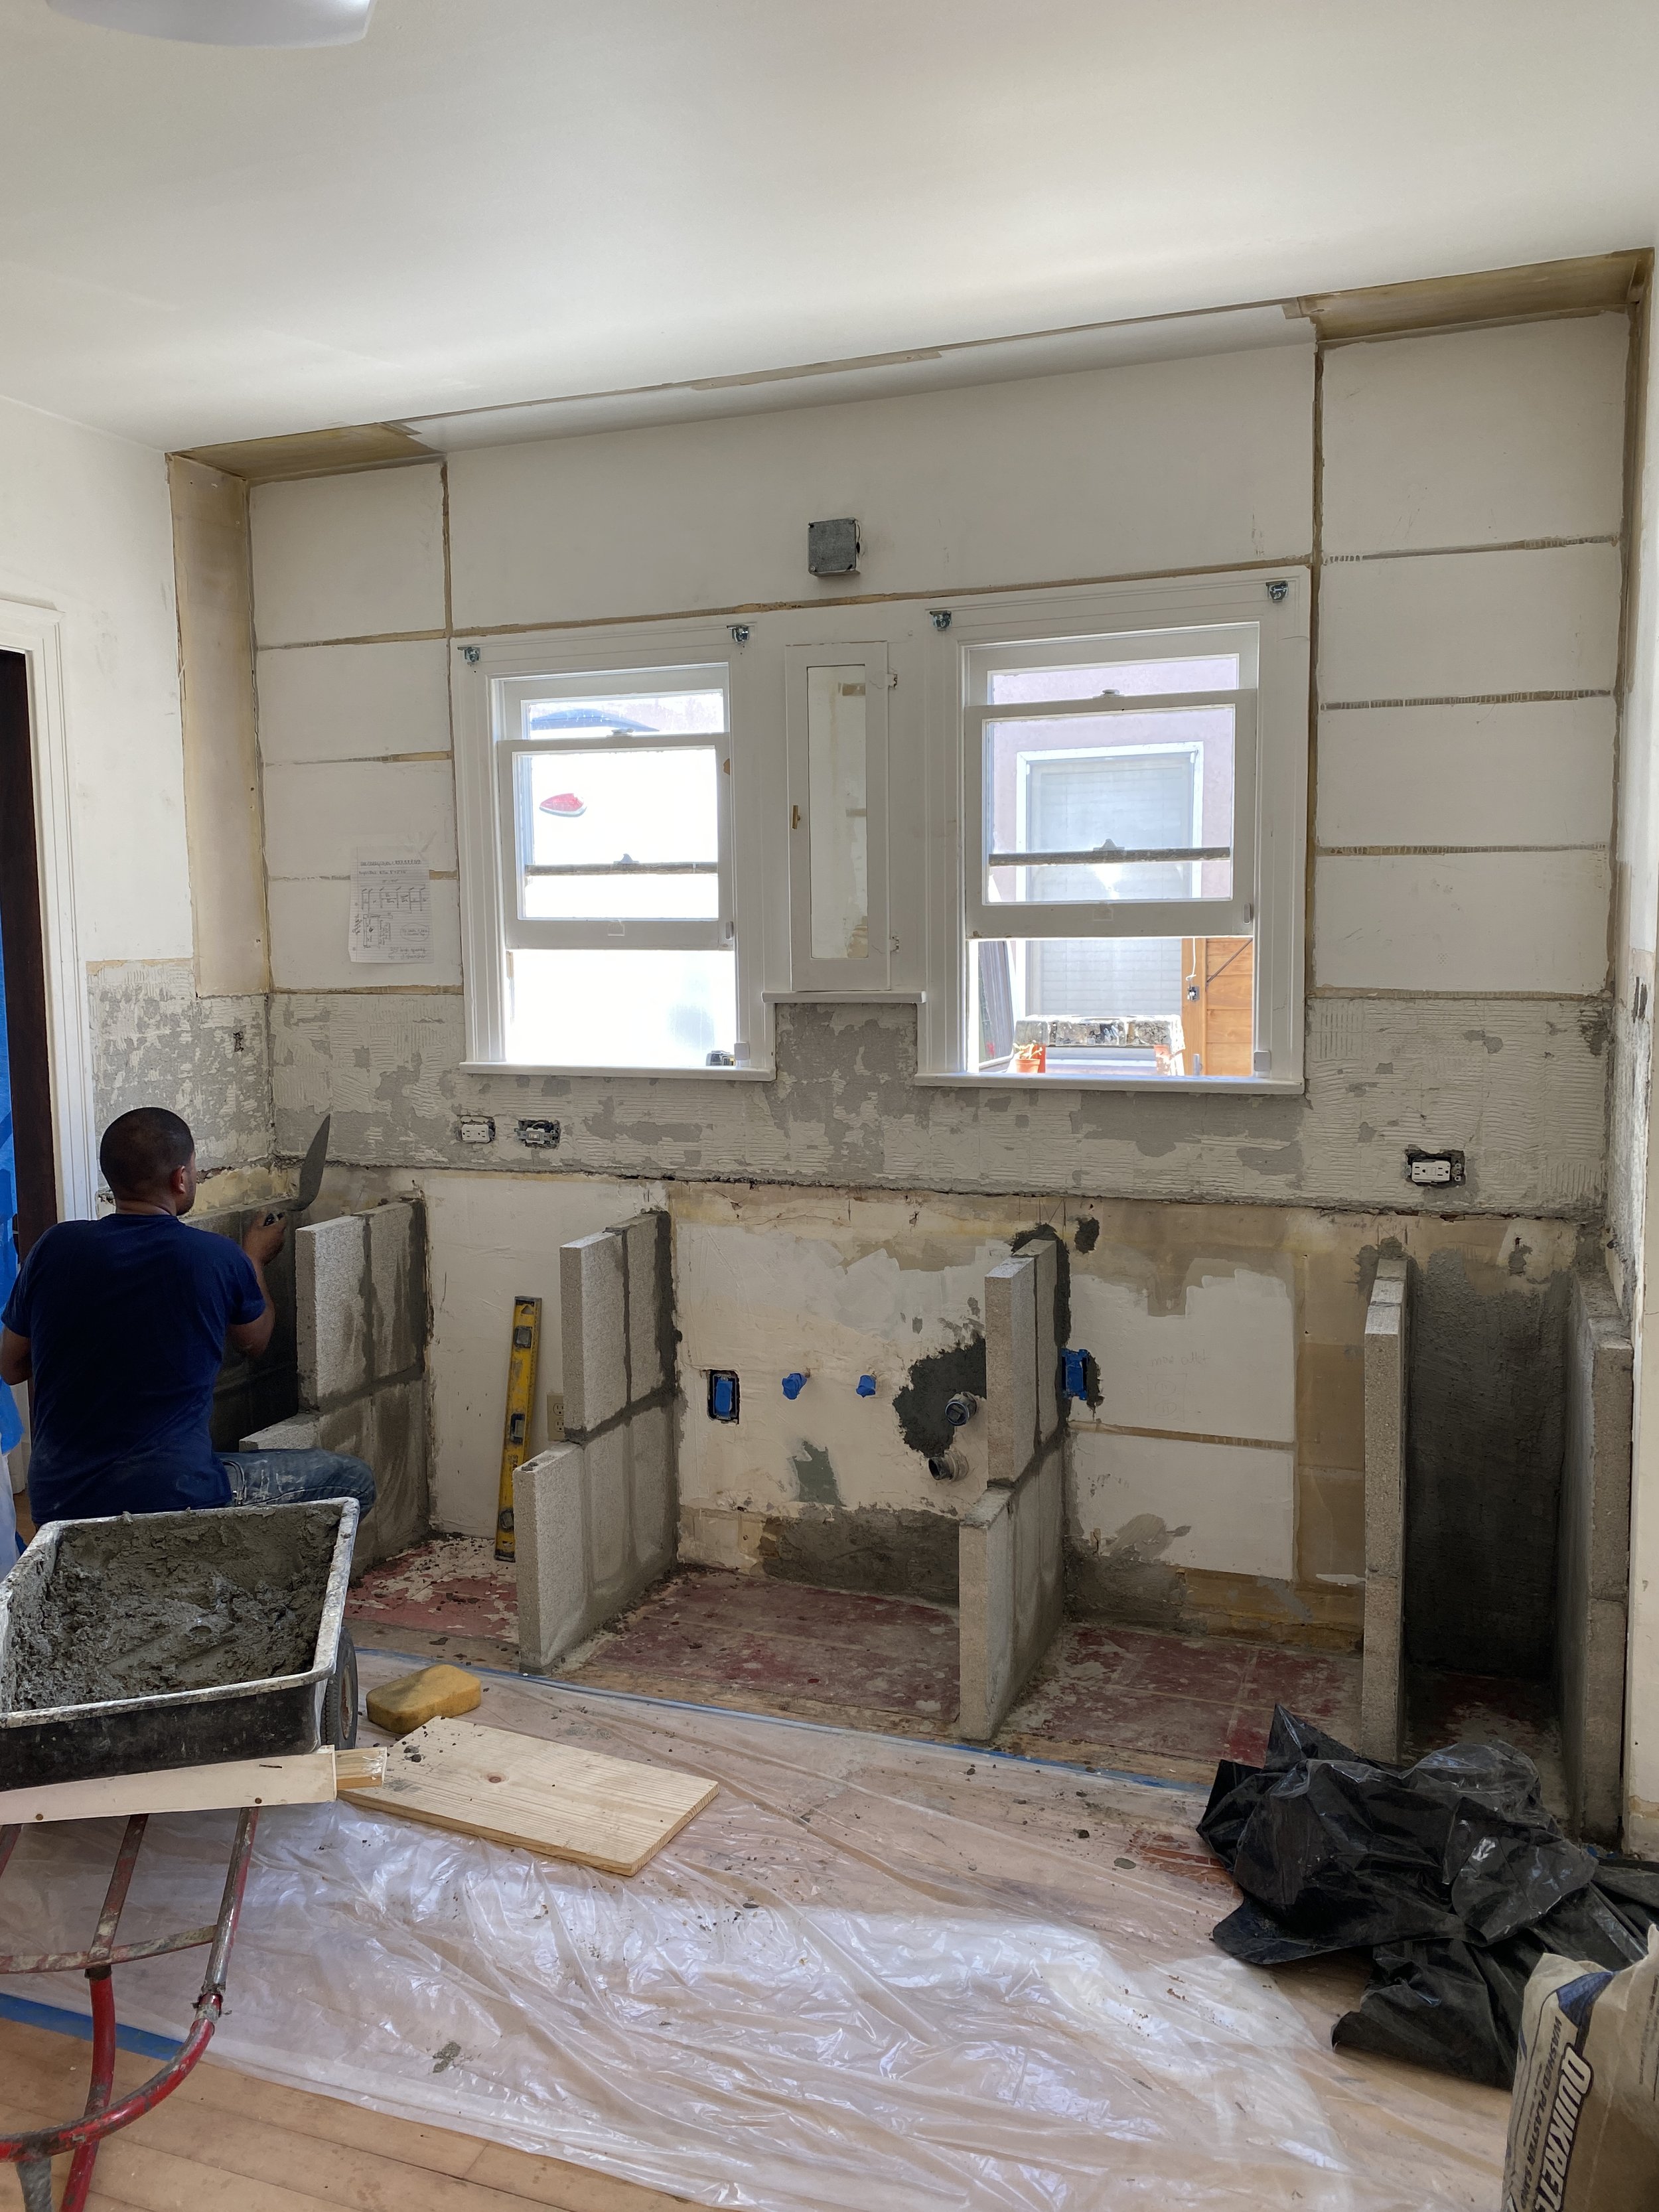
We stacked the blocks, leveled them out and cemented them together.
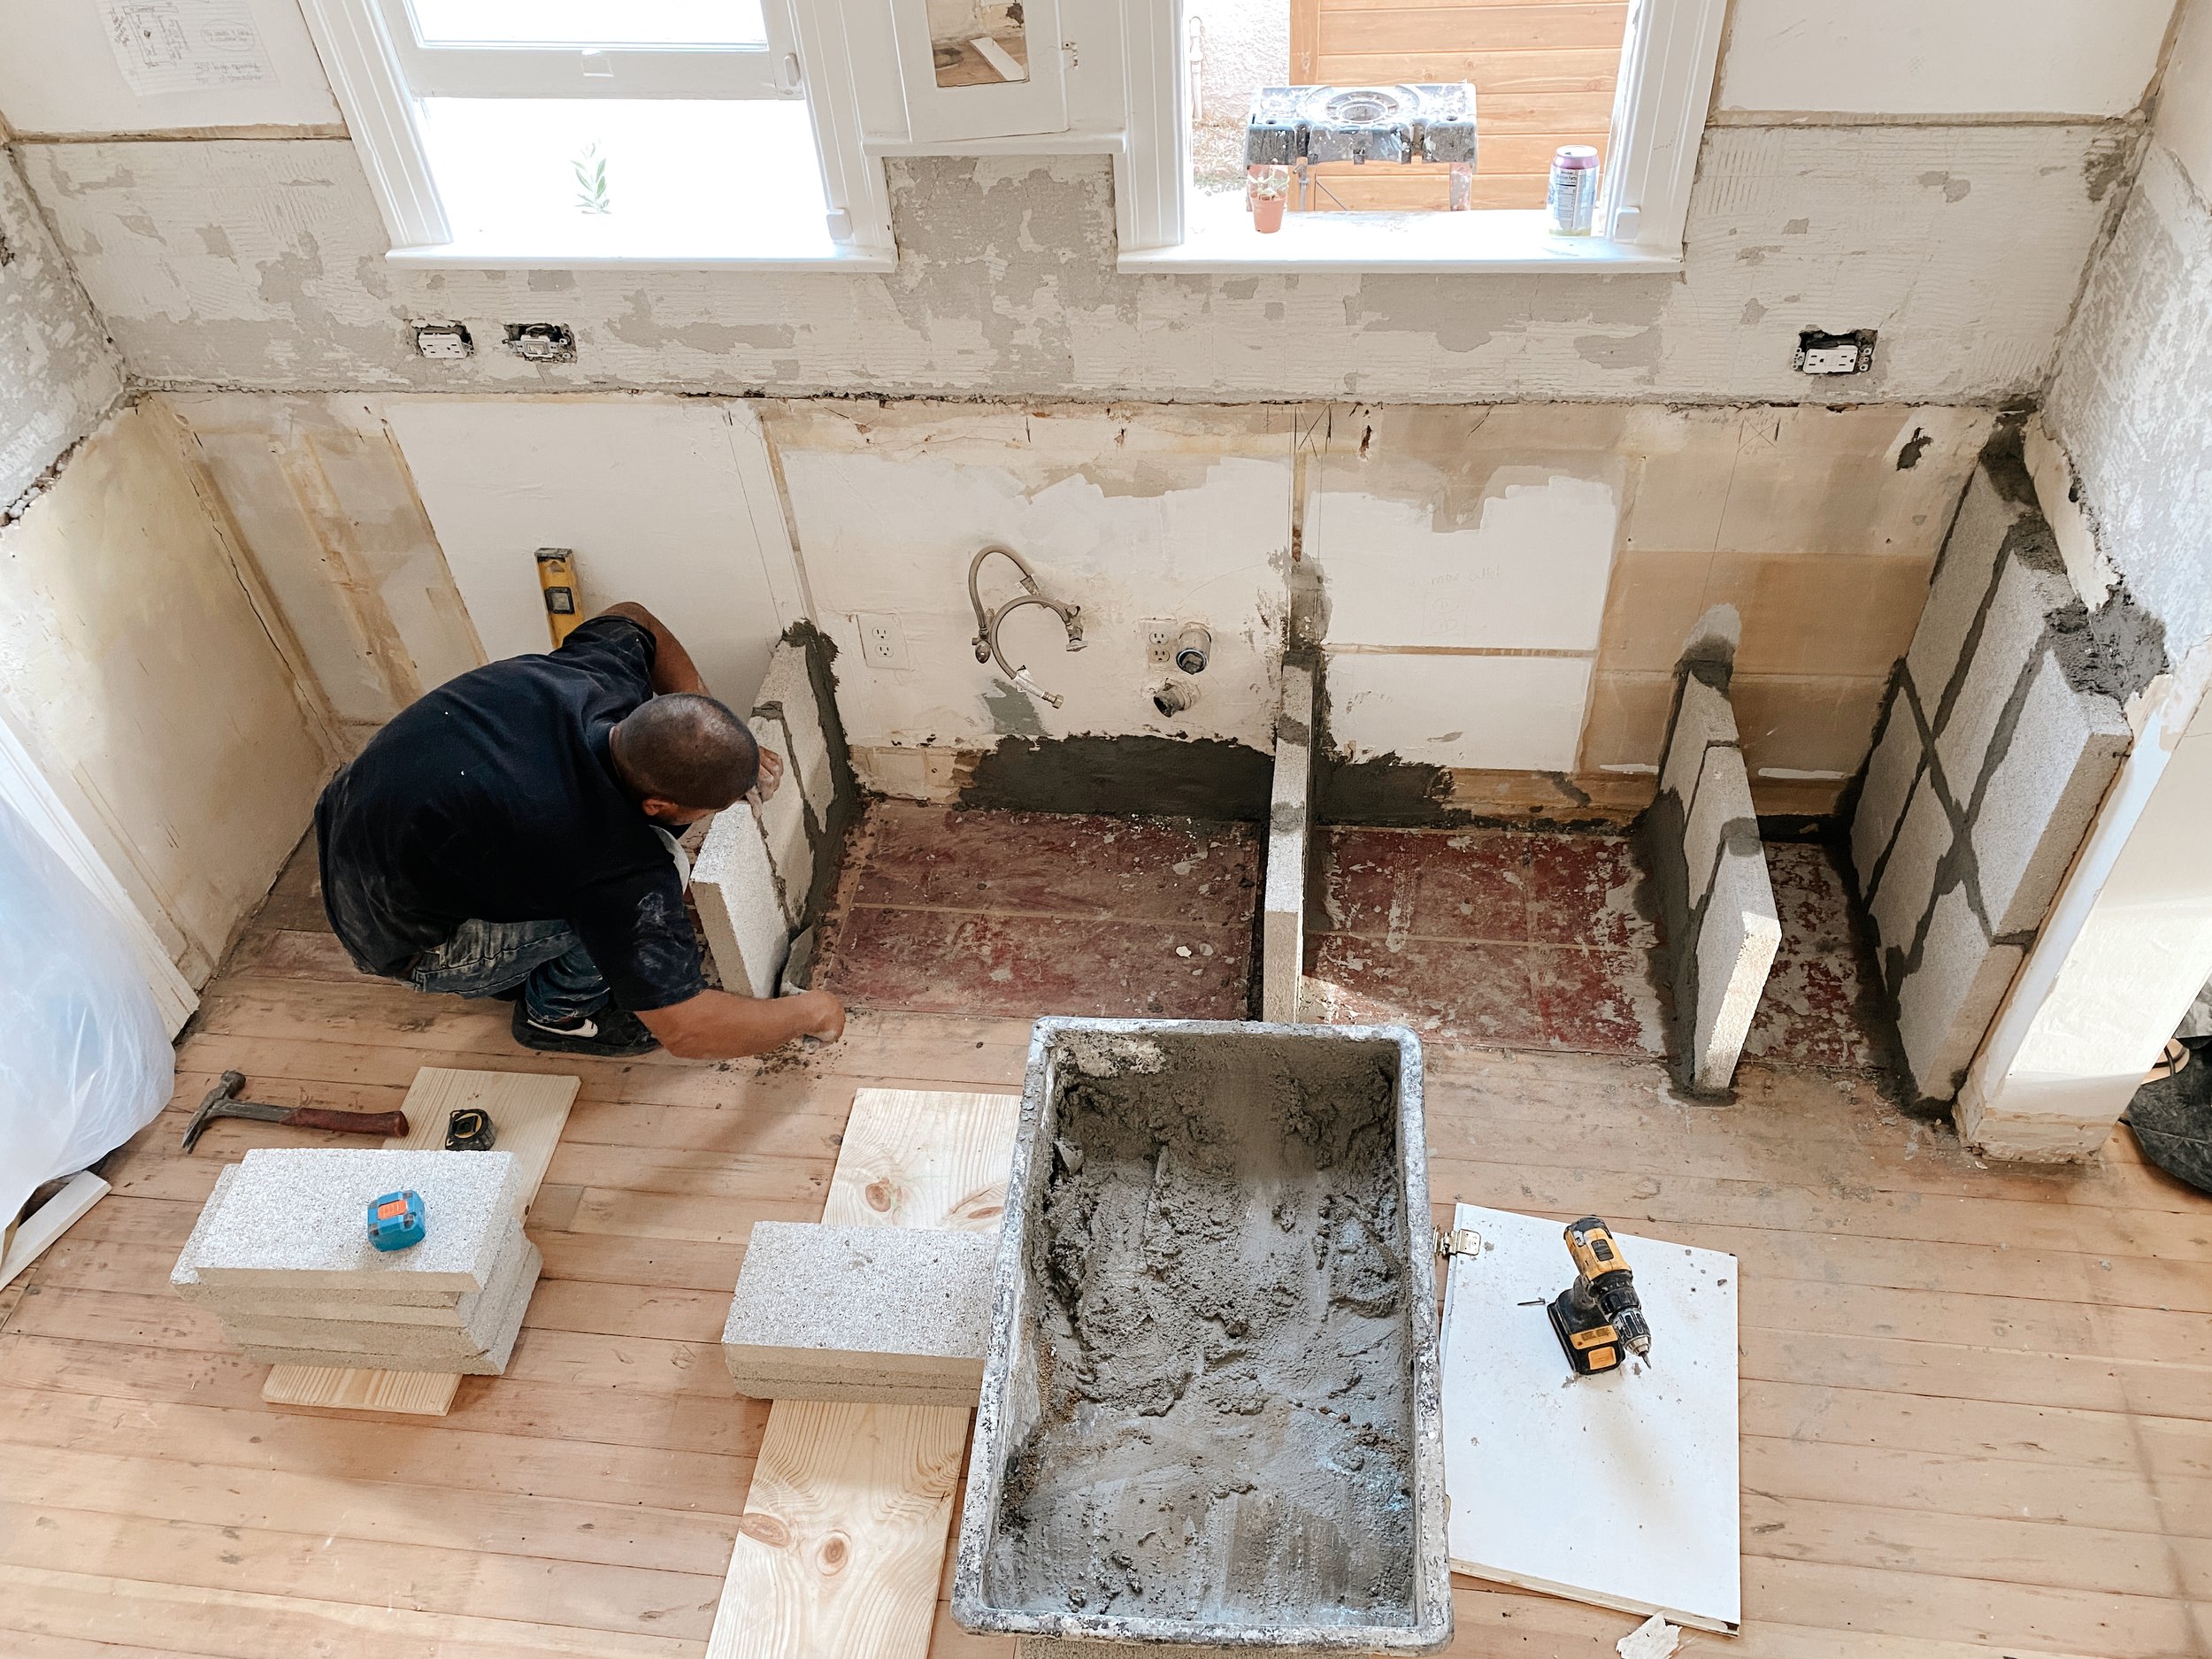


Oh, and remember how I said we weren’t sure how we’d make up those four extra inches in height we needed? Bardo came up with the genius idea to use regular bricks.


Once he finished the construction of the columns, he covered them with a thin layer of concrete.
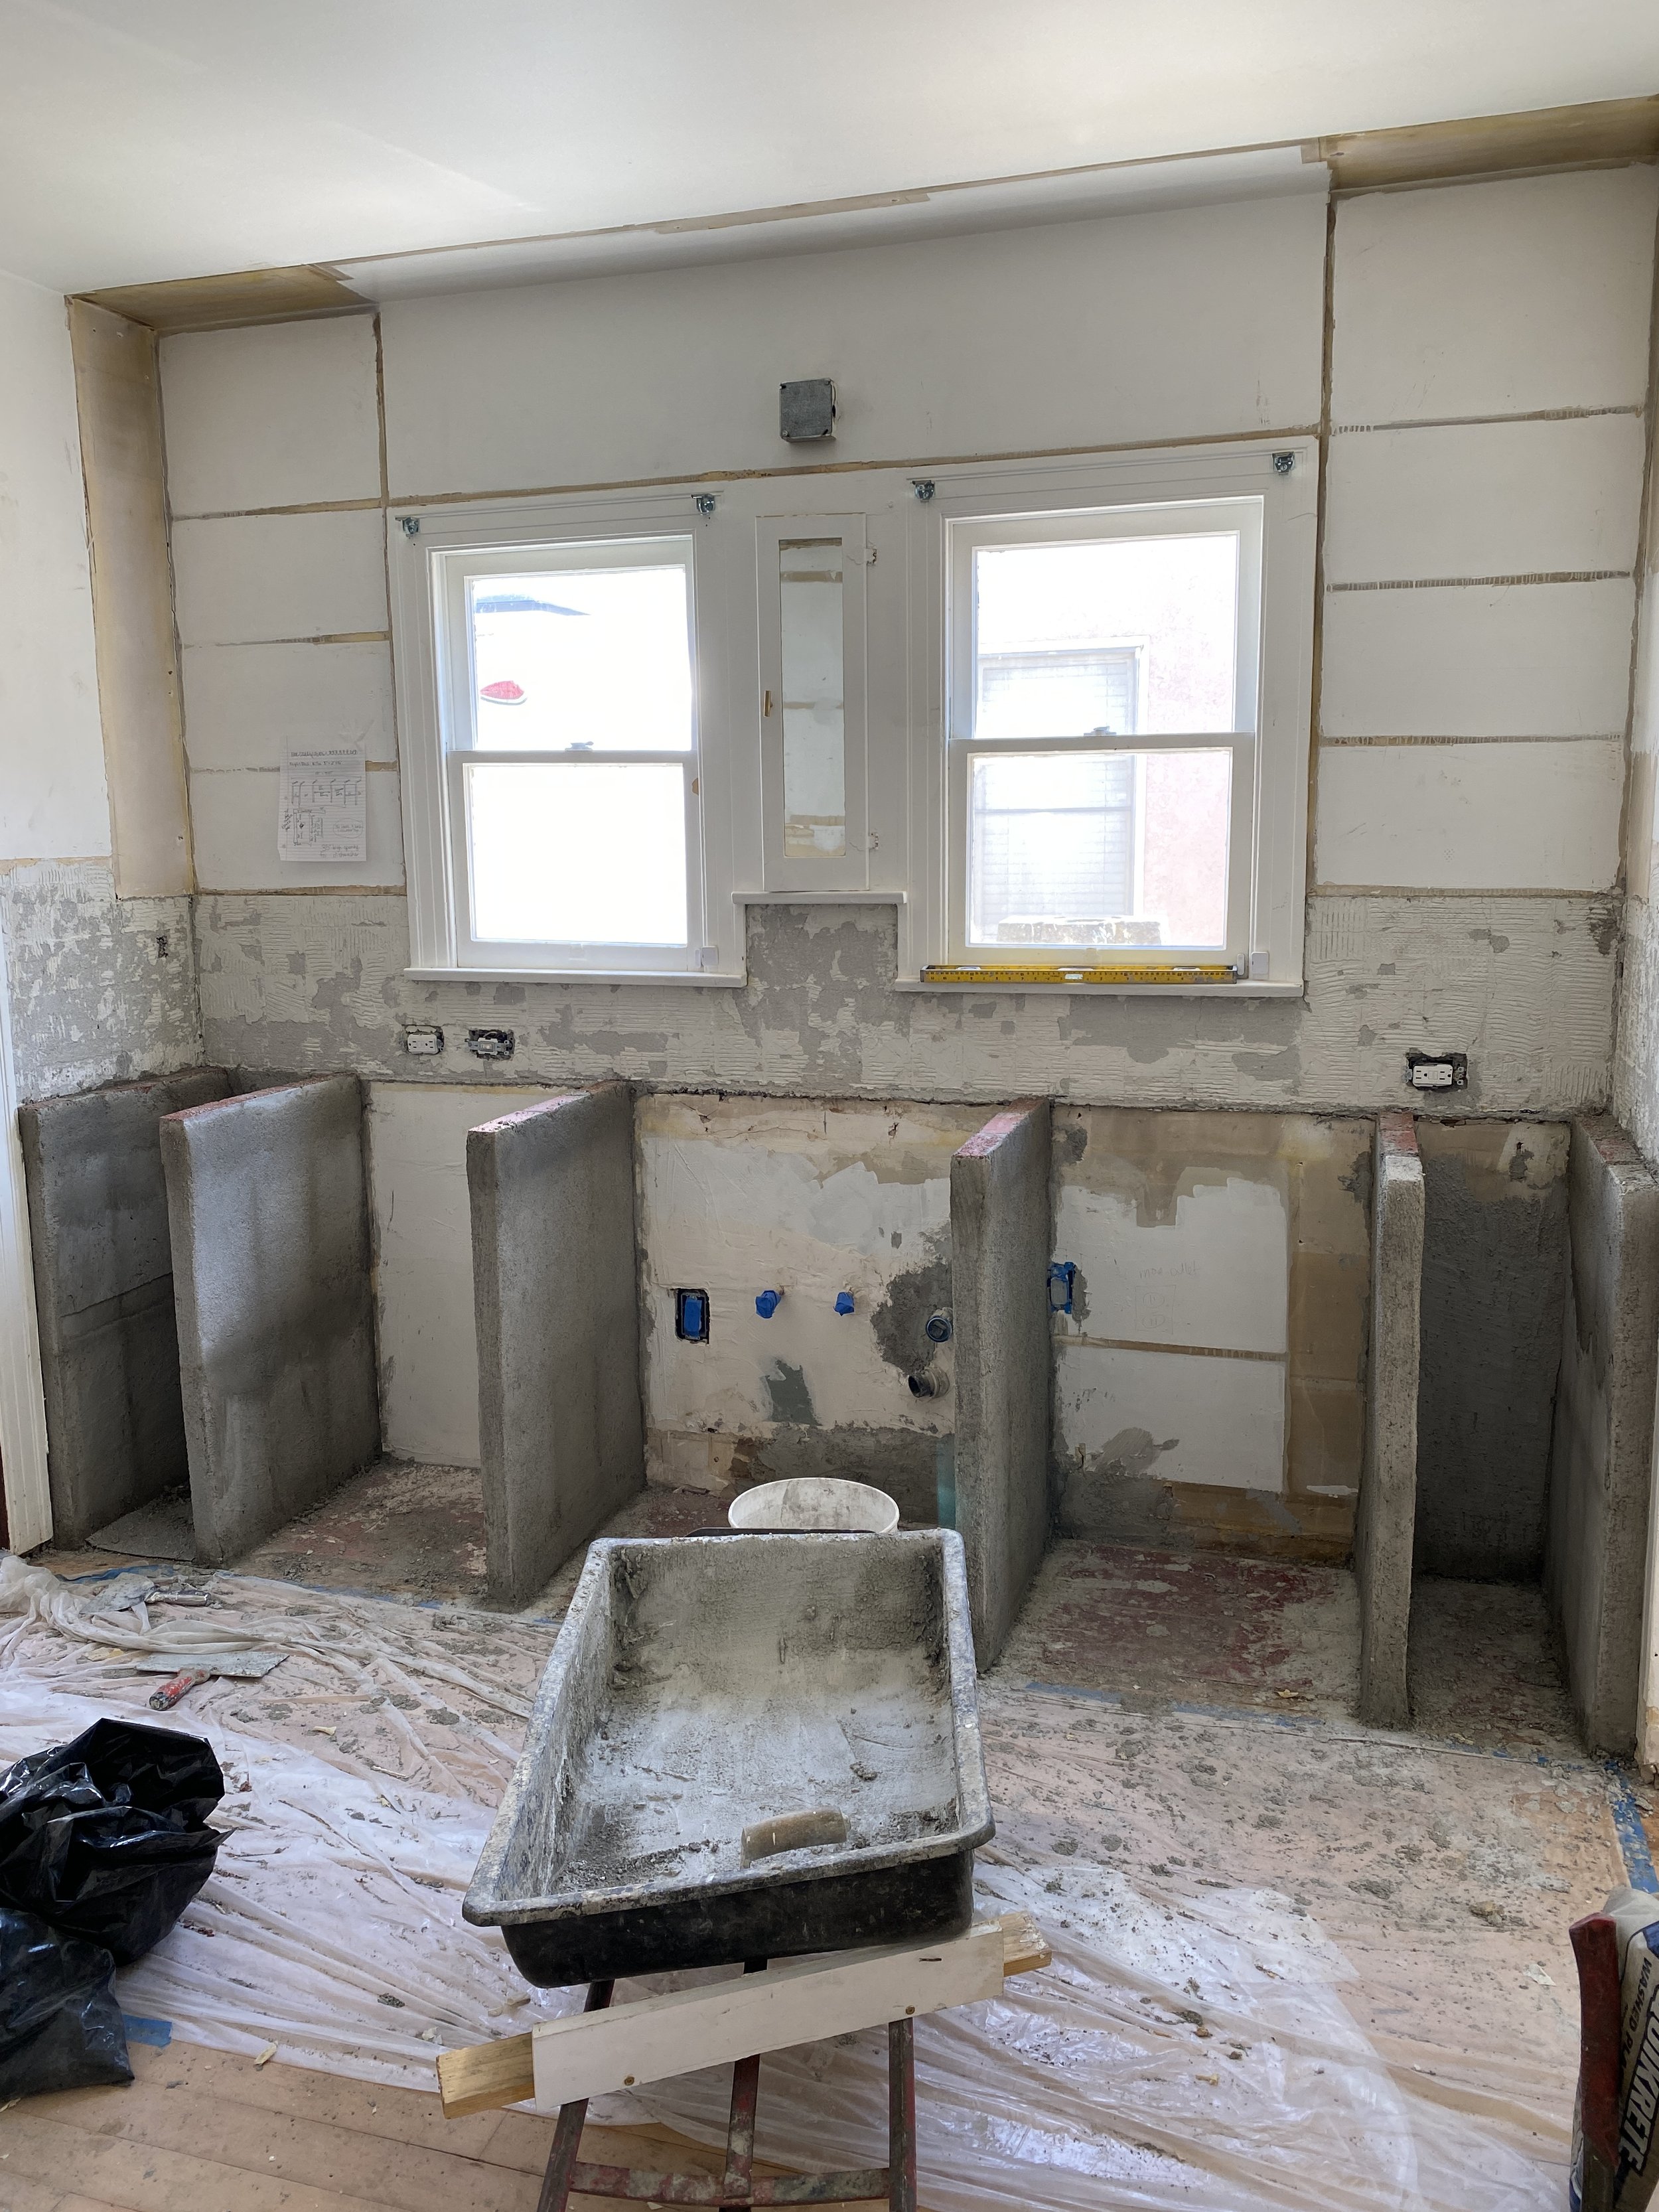
And voila! That’s as far as we got for week 2 on the kitchen. I may not have mentioned it, but we also decided to put in an outdoor pizza kitchen. We own LITTLE COYOTE here in Long Beach, and our backyard just didn’t feel complete without an outdoor pizza oven! The pizza oven is arriving on Tuesday, so we had to put a hault to the indoor kitchen, and start building the outdoor kitchen.

This wall had a hideous “faux'“ garage door that always bothered me, so when Strader ripped it off, we decided what better place for the pizza oven. So stay tuned until next week! We’ll hopefully have an outdoor pizza kitchen and progress on our actual kitchen:)
SHOP MY KITCHEN DESIGN PICKS