

DIY: How To Build a Modern Wood Gate
*This post is in partnership with National Hardware, all ideas and opinions are 100% my own.
For this project, I use the word “DIY” loosely. Why? Because I could not have built this on my own. However, I do believe you could totally build one yourself if you had the right tools and experience. For me though, this was definitely out of my wheelhouse.
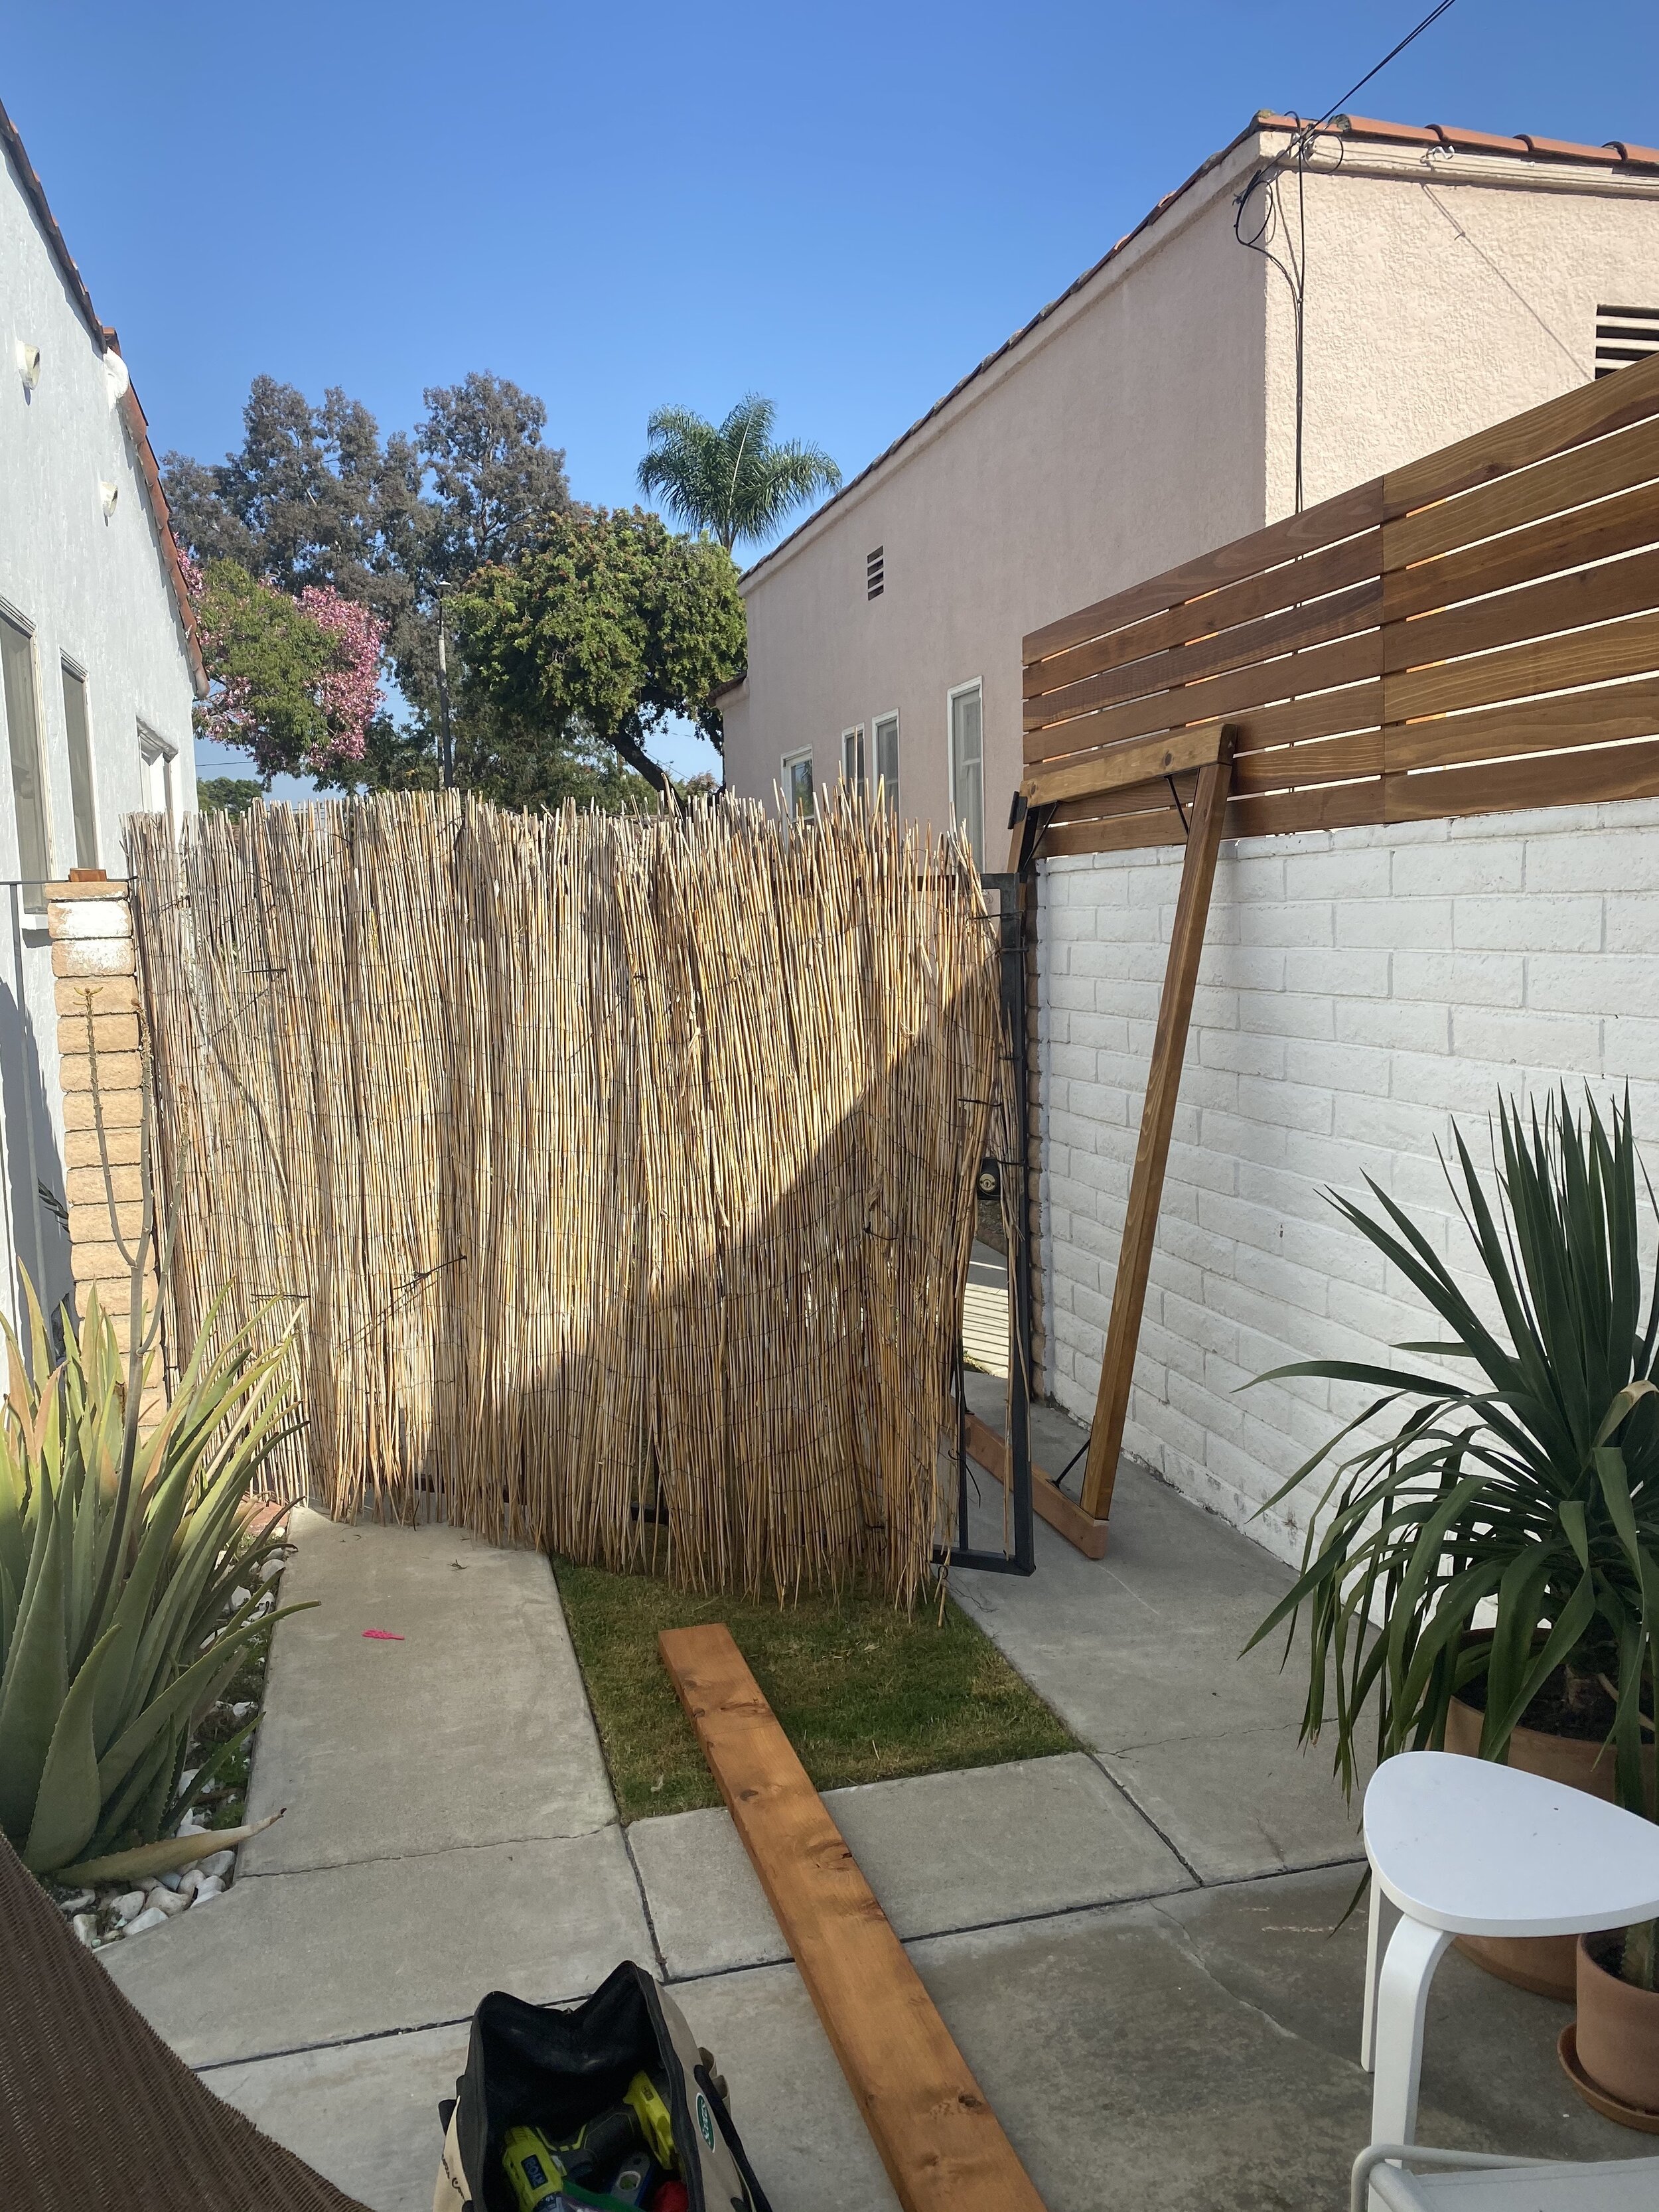
Our fence, prior to this project, was a sad and rusty old wrought iron gate with zip tied bamboo. The bamboo was our temporary fix for added privacy. It was disgusting. Every time the mailman walked by, our dog would pee on it, it was falling off, and hanging on by a thread. I wanted a sleek modern wood gate that would match our crisp white exterior.

Here’s what it looked like before. I wish I had a better pic, but I always get so excited when I start a project, that I usually forget to take a good before pic.
The one below is better.

And here’s a little gem from before we moved in. I love seeing these photos!

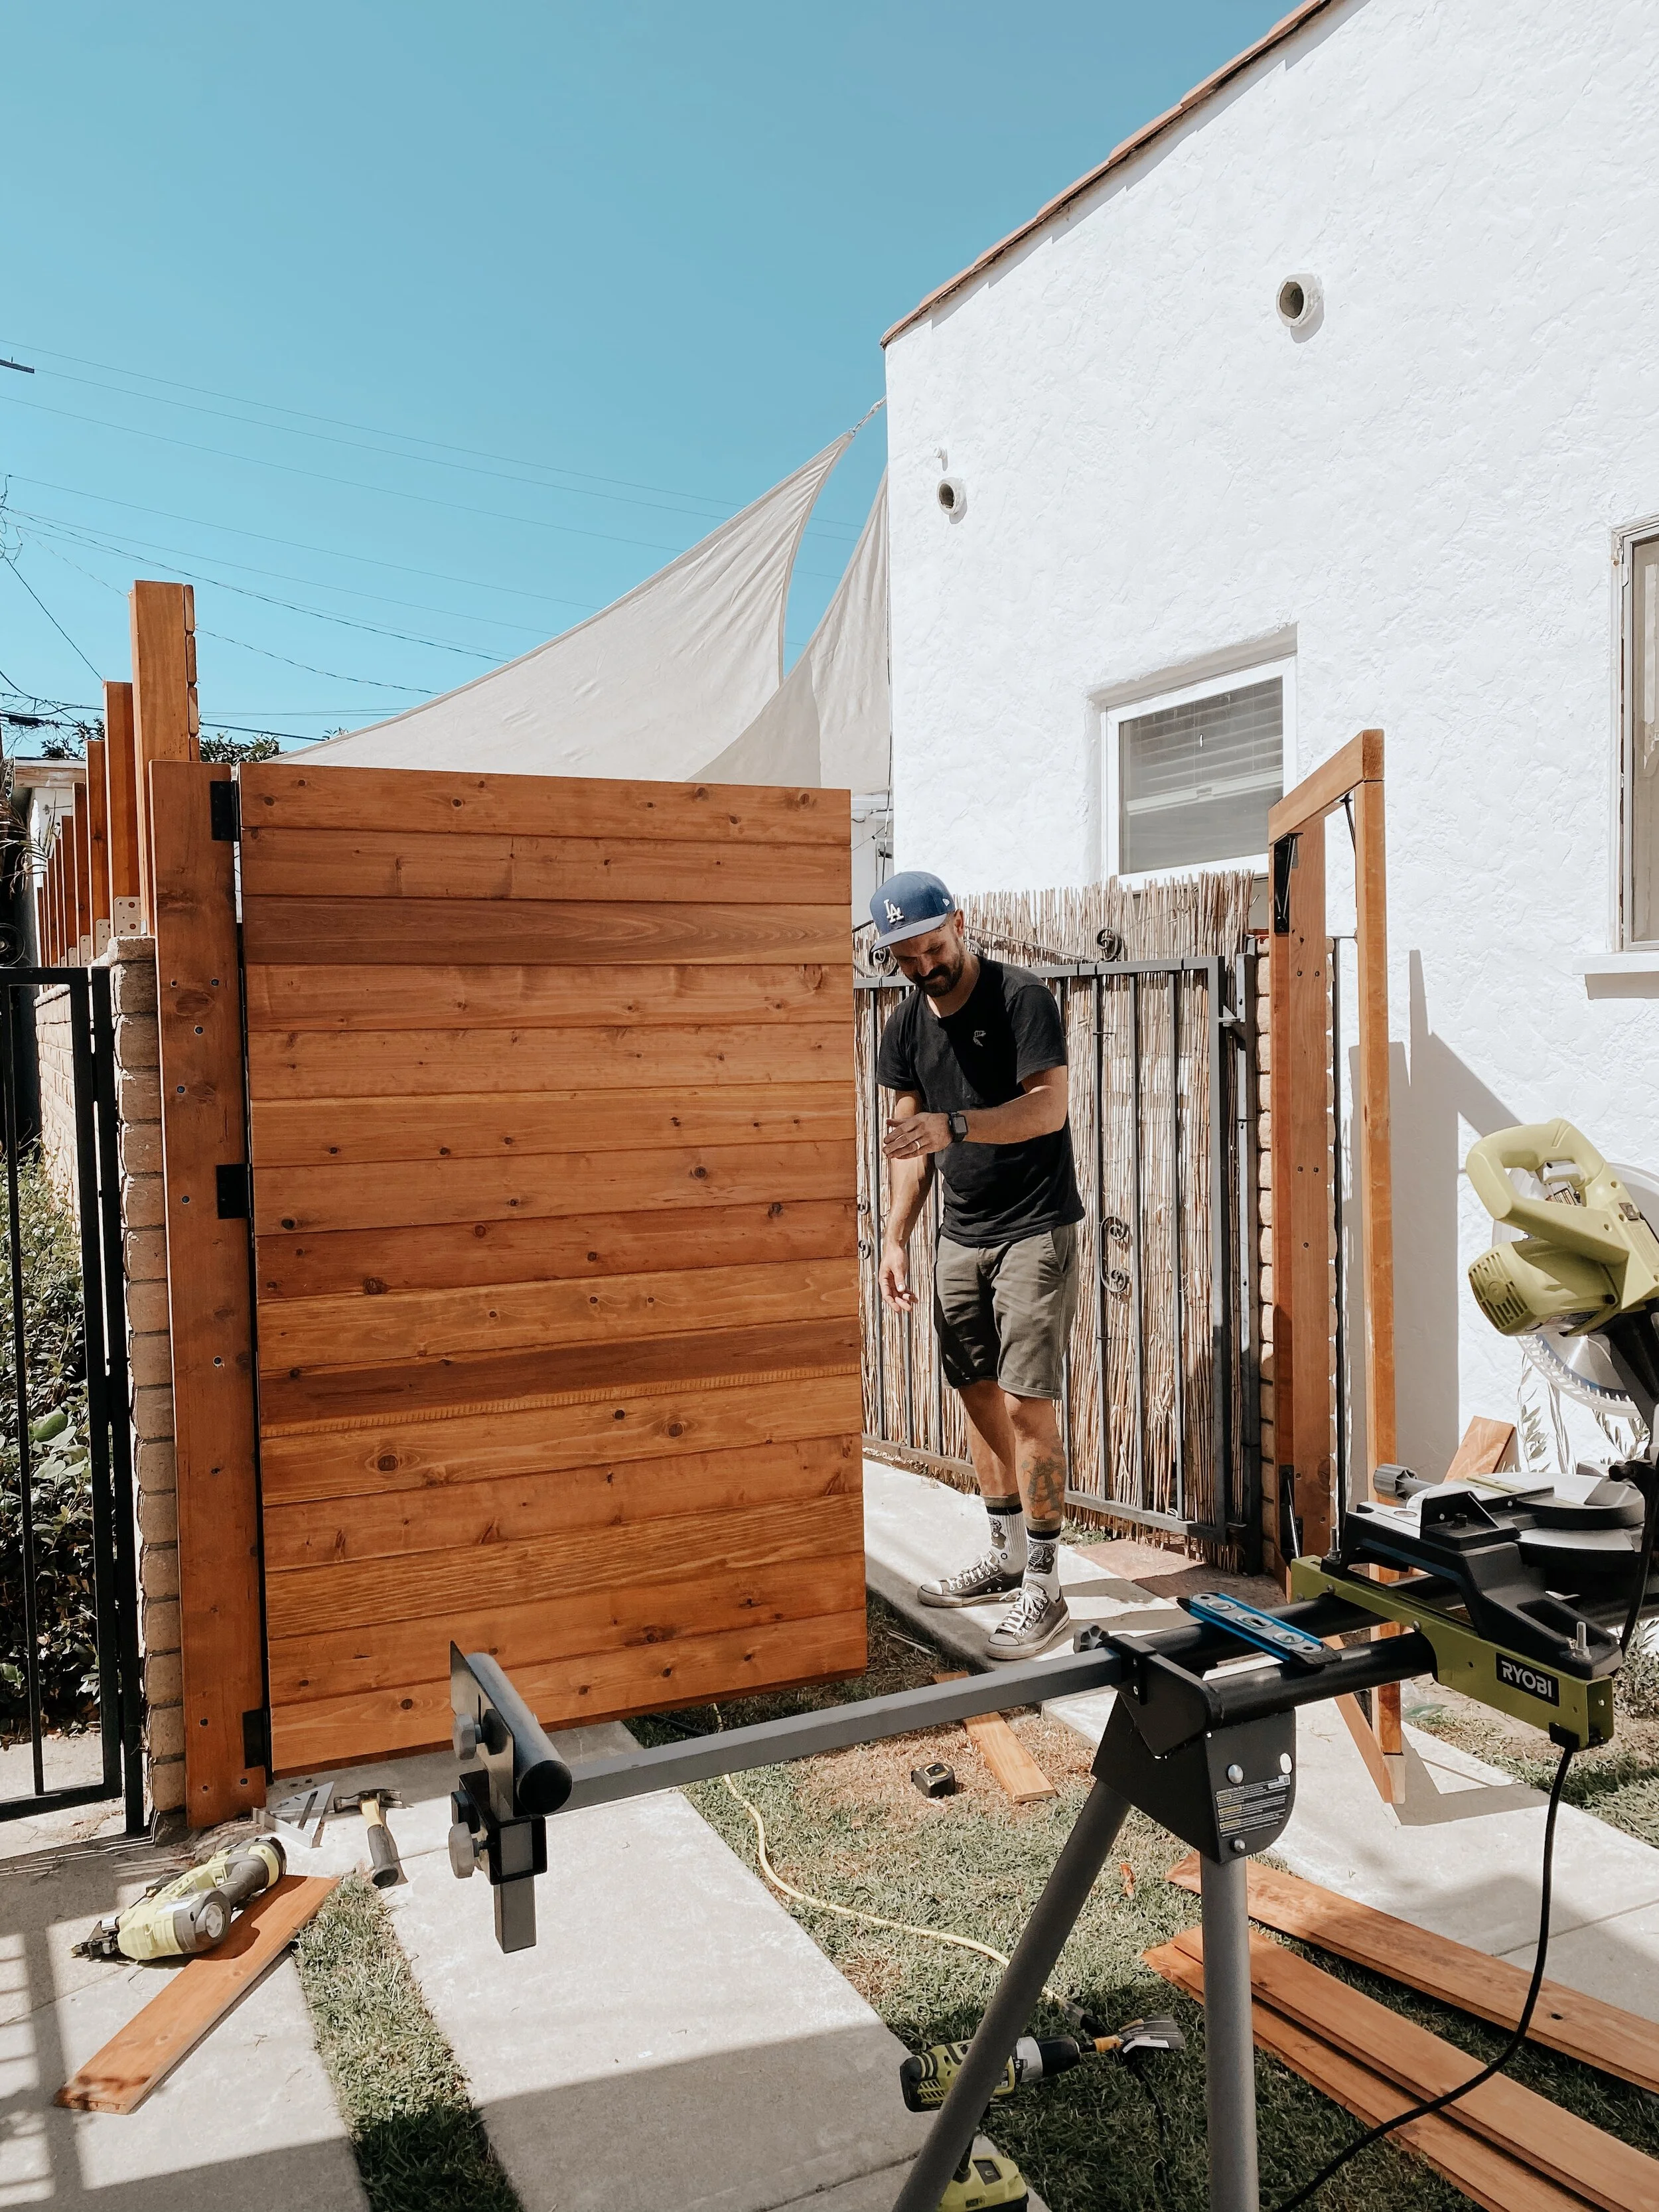
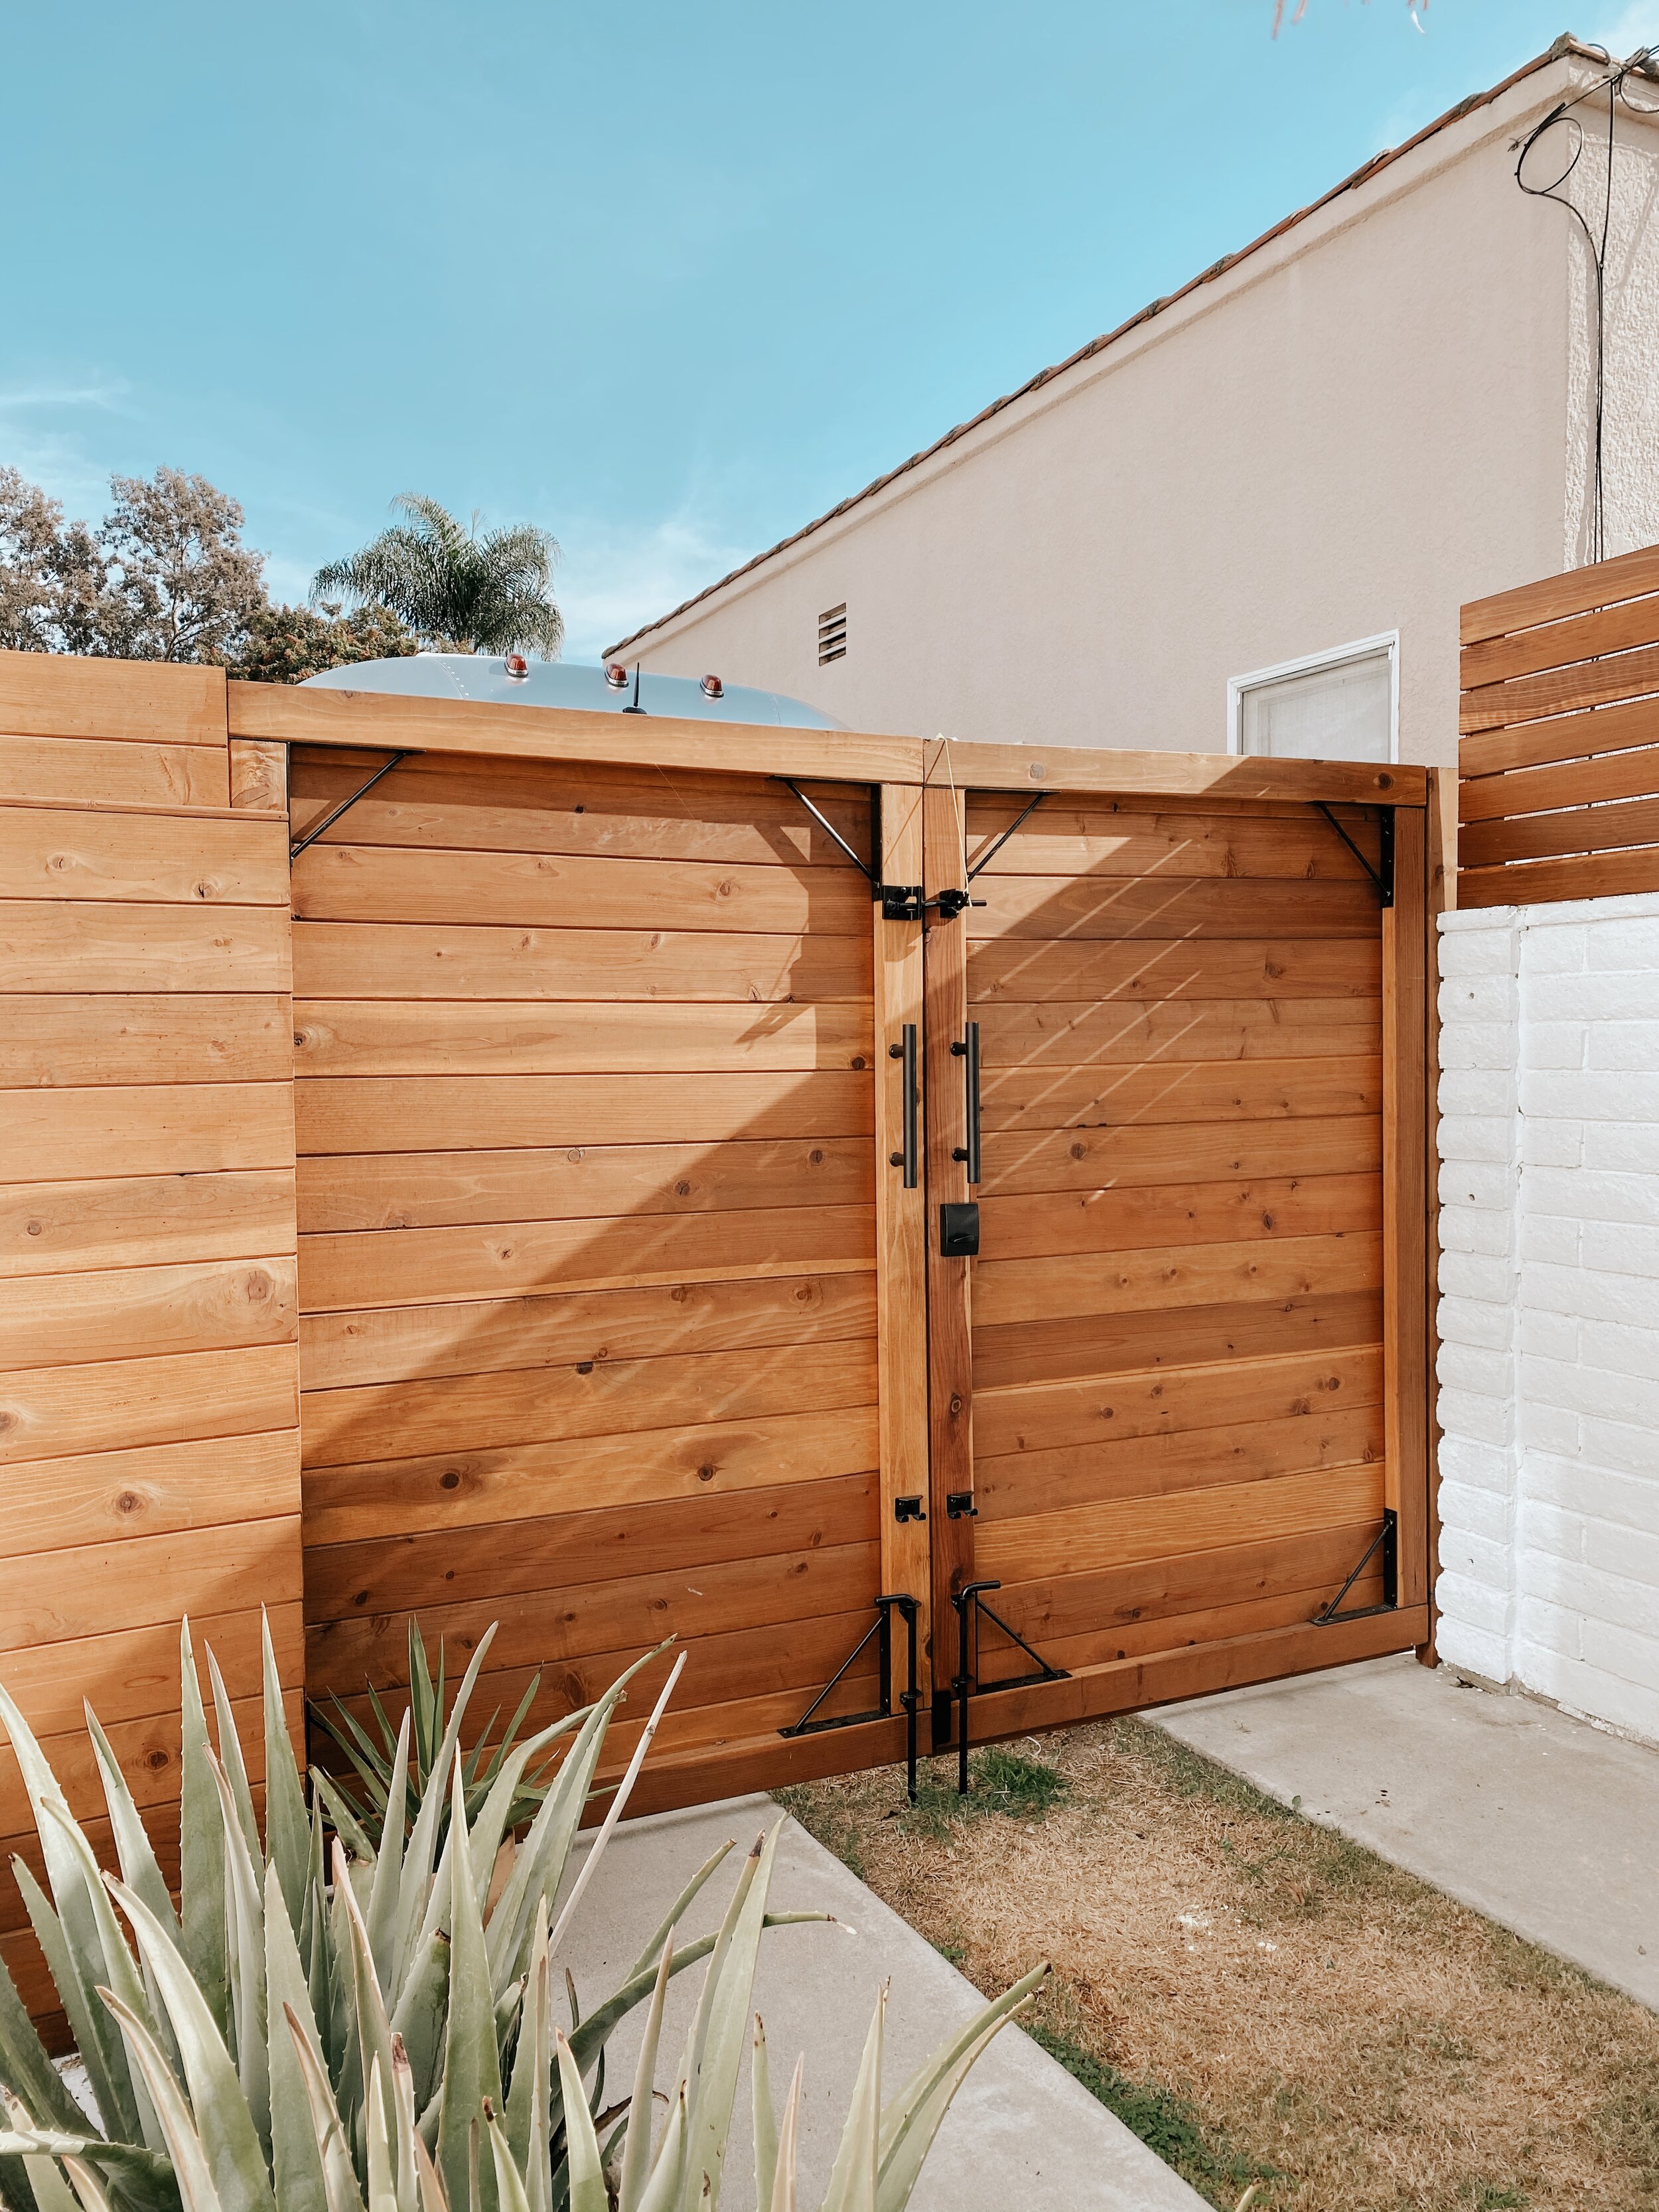
So first things first, we built the frame of the gate doors with 2x4’s that I pre-stained. We used two anti-sag kits from National Hardware. Since the the gate was going to be on the taller side, and we weren’t building the frame out of steel, we had to make sure we had as little sag as possible. These anti-sag kits did the trick.

There was an existing brick column to the right, that we debated whether or not to demo, but it ended up being easier to attach that side of the gate to the column and wrap it in wood after. It made the gate stronger, and we used less labor, therefore making it cheaper.

I LOVE these pics of the new frame next to the old bamboo gate. I mean… look at the difference!


We attached 2x8’s to the existing brick columns with masonry screws.

Then attached the gate door frames to the 2x8’s with the National Hardware heavy auto-close hinges.

For the wood slats, I decided to go with tongue and groove, because it was cheaper and lighter. Gate sag is my biggest fear without using steel, so I wanted it to be as lightweight as possible but still strong and sturdy. We cut all of the boards the same length and started attached them with a nail gun. I wanted it to look as seamless as possible, and didn’t want to see big screws or anything.
I thought I’d want to do tongue and groove along the back of the gate as well, but once we finished the front, I didn’t mind the way it looked.


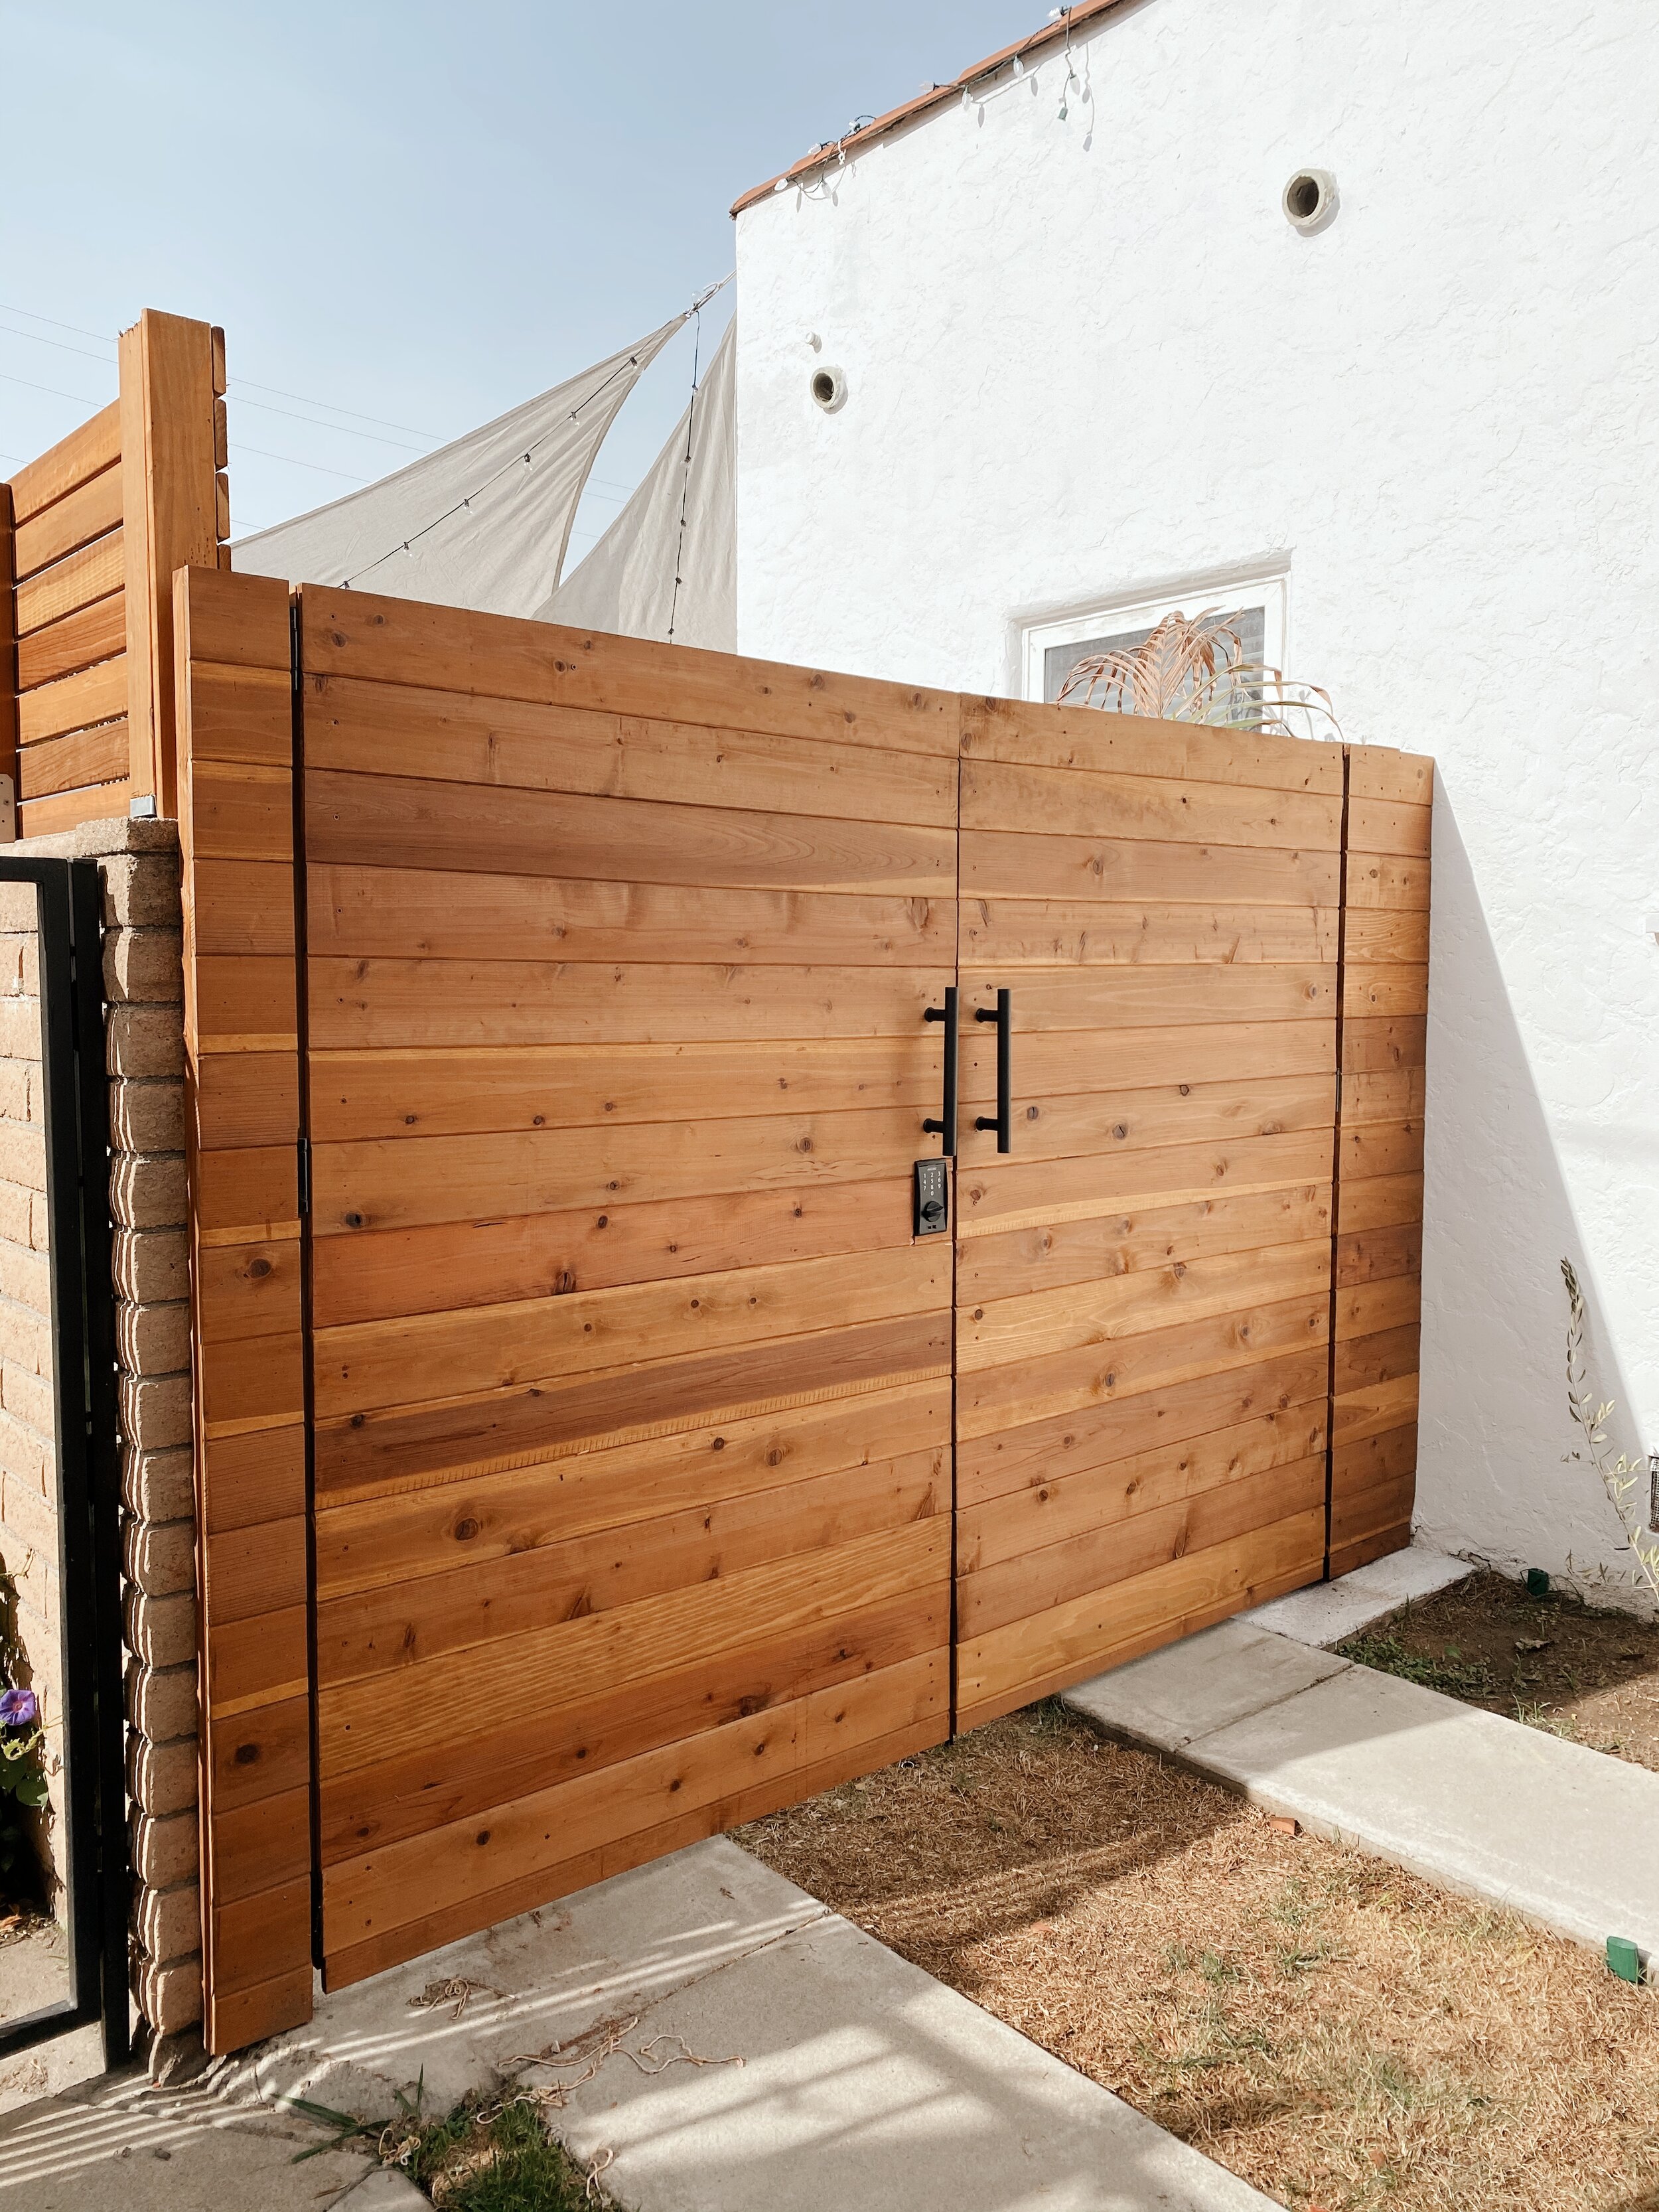
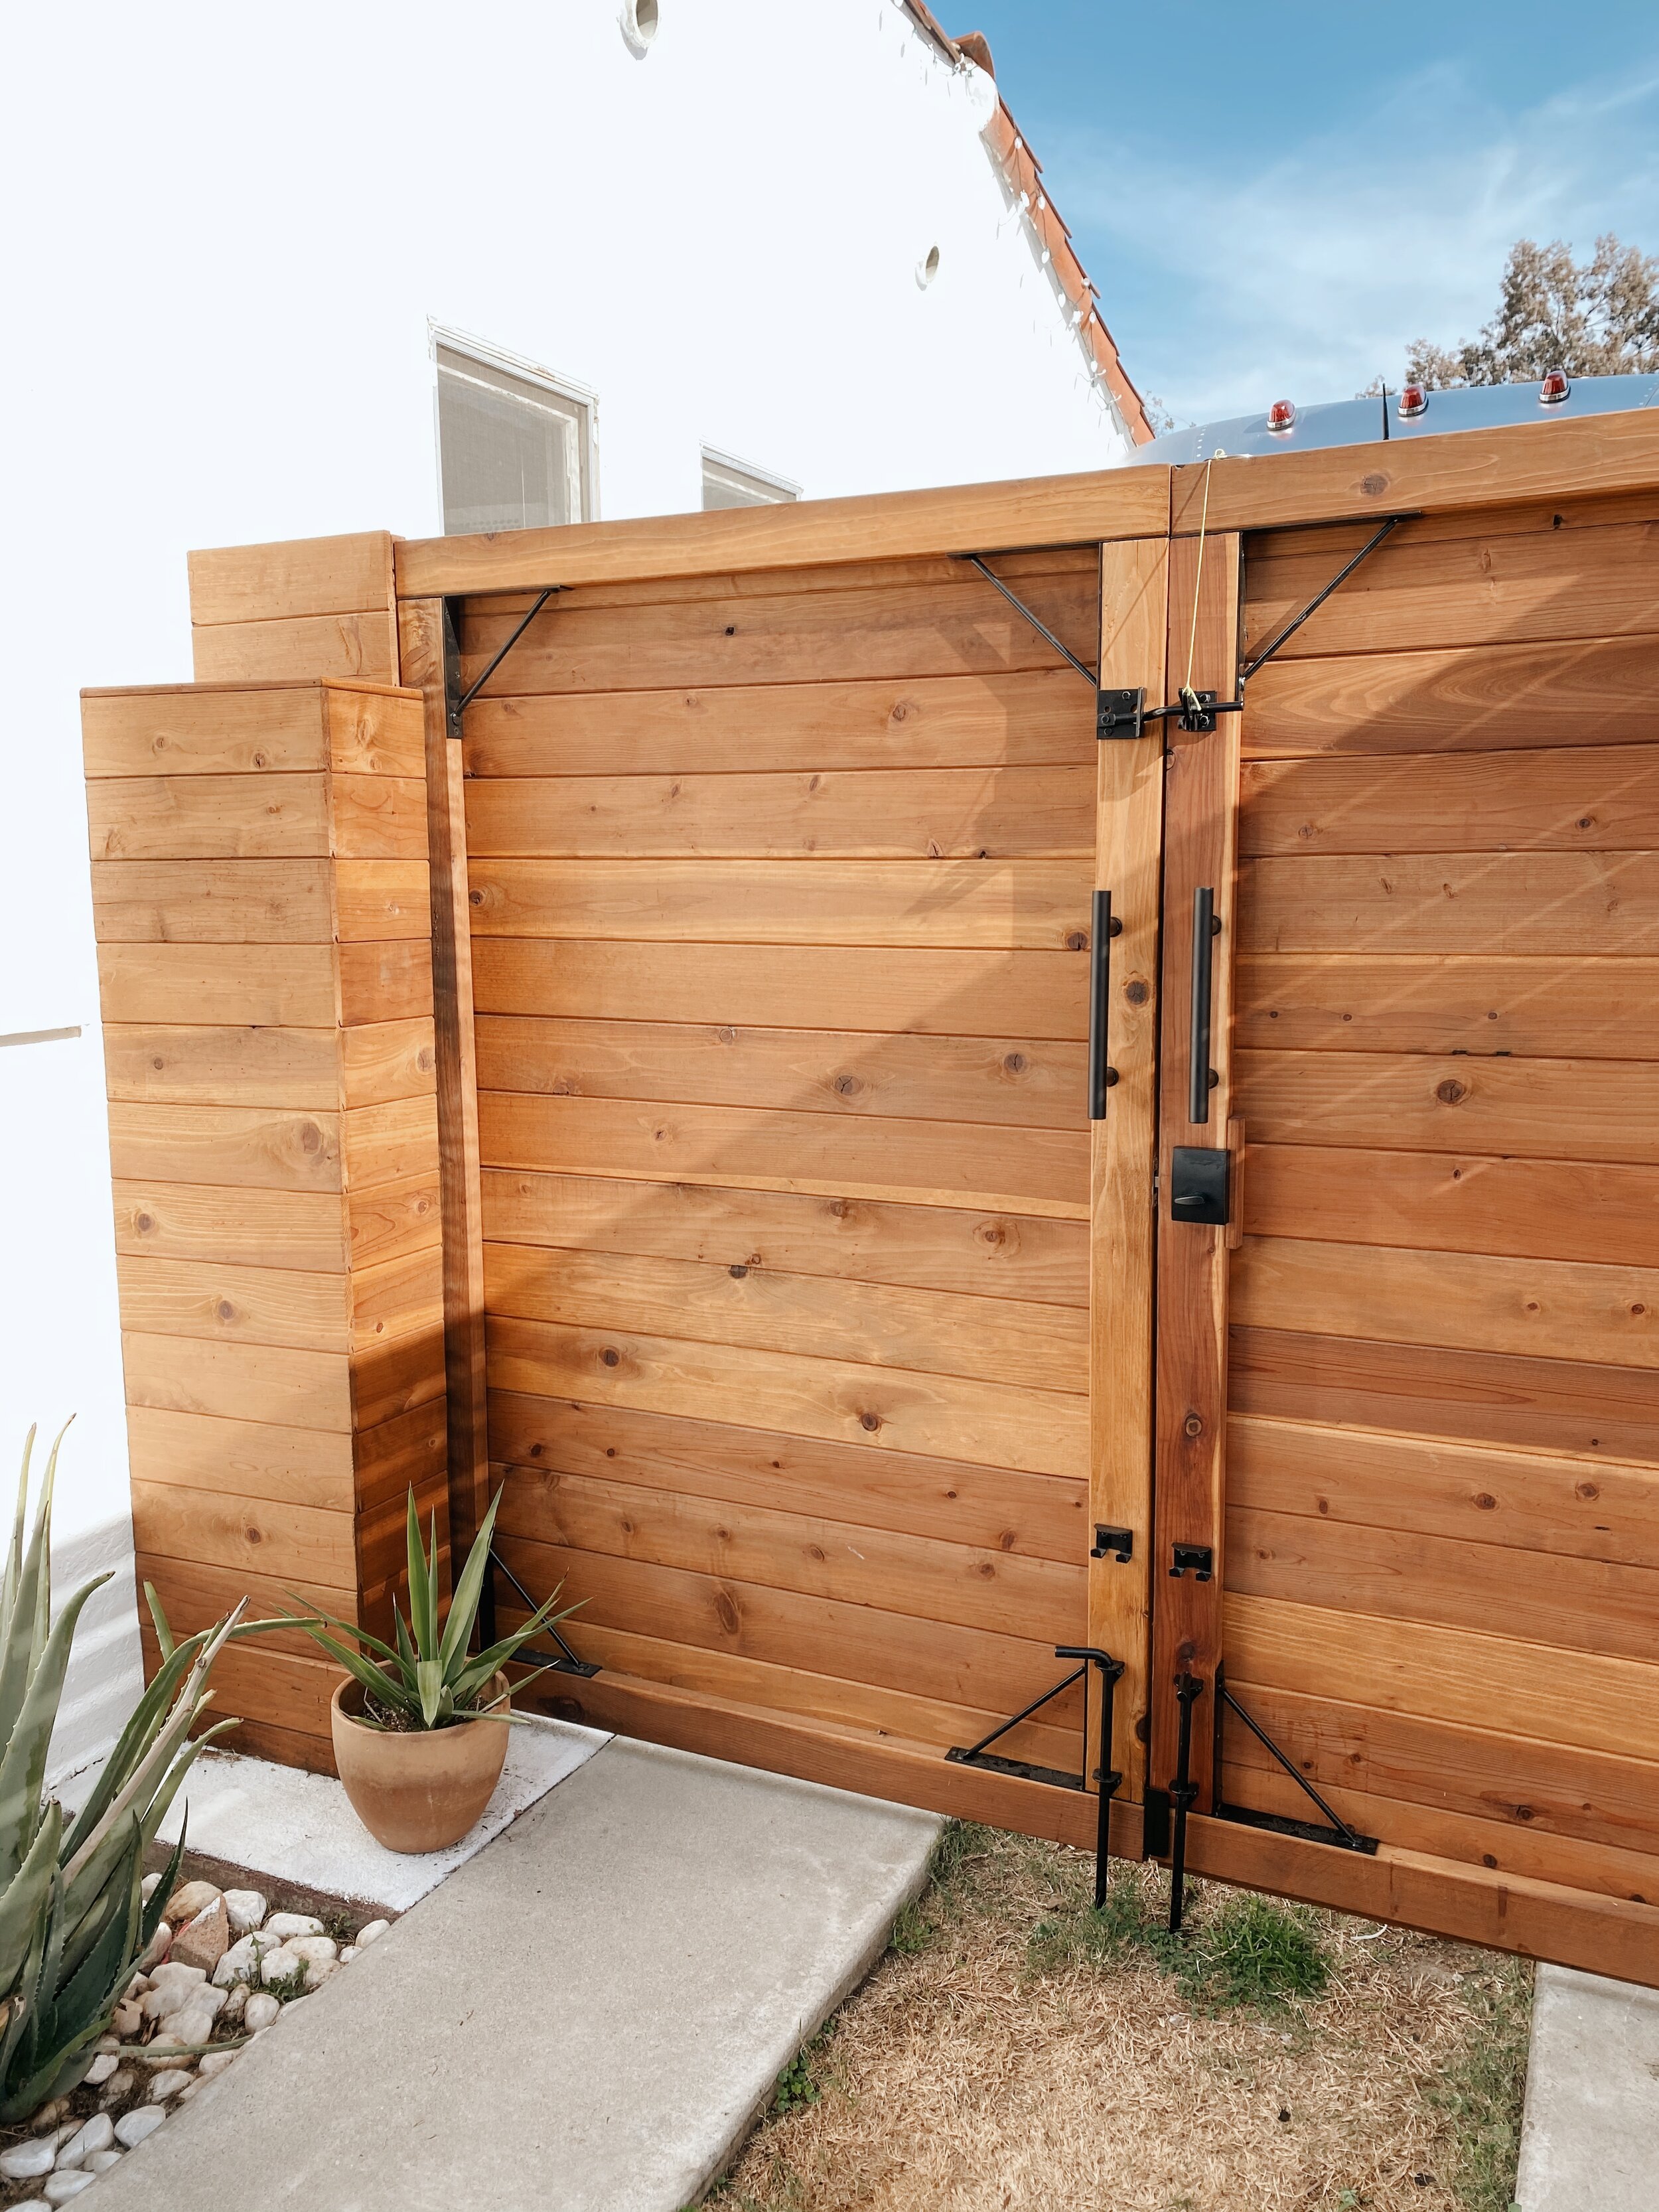
Next up, hardware. We added a latch and a cane bolt from National Hardware in Black, and took a break for the night.
Back at it, and time to wrap the brick columns. We cut the leftover tongue and groove boards and attached them along the columns on each side of the gate to match. This also covered the hinges, so my seamless gate aesthetic could be achieved.


Almost finished….
Last thing to do is paint the newly exposed bricks white, and then I think I’m finished.


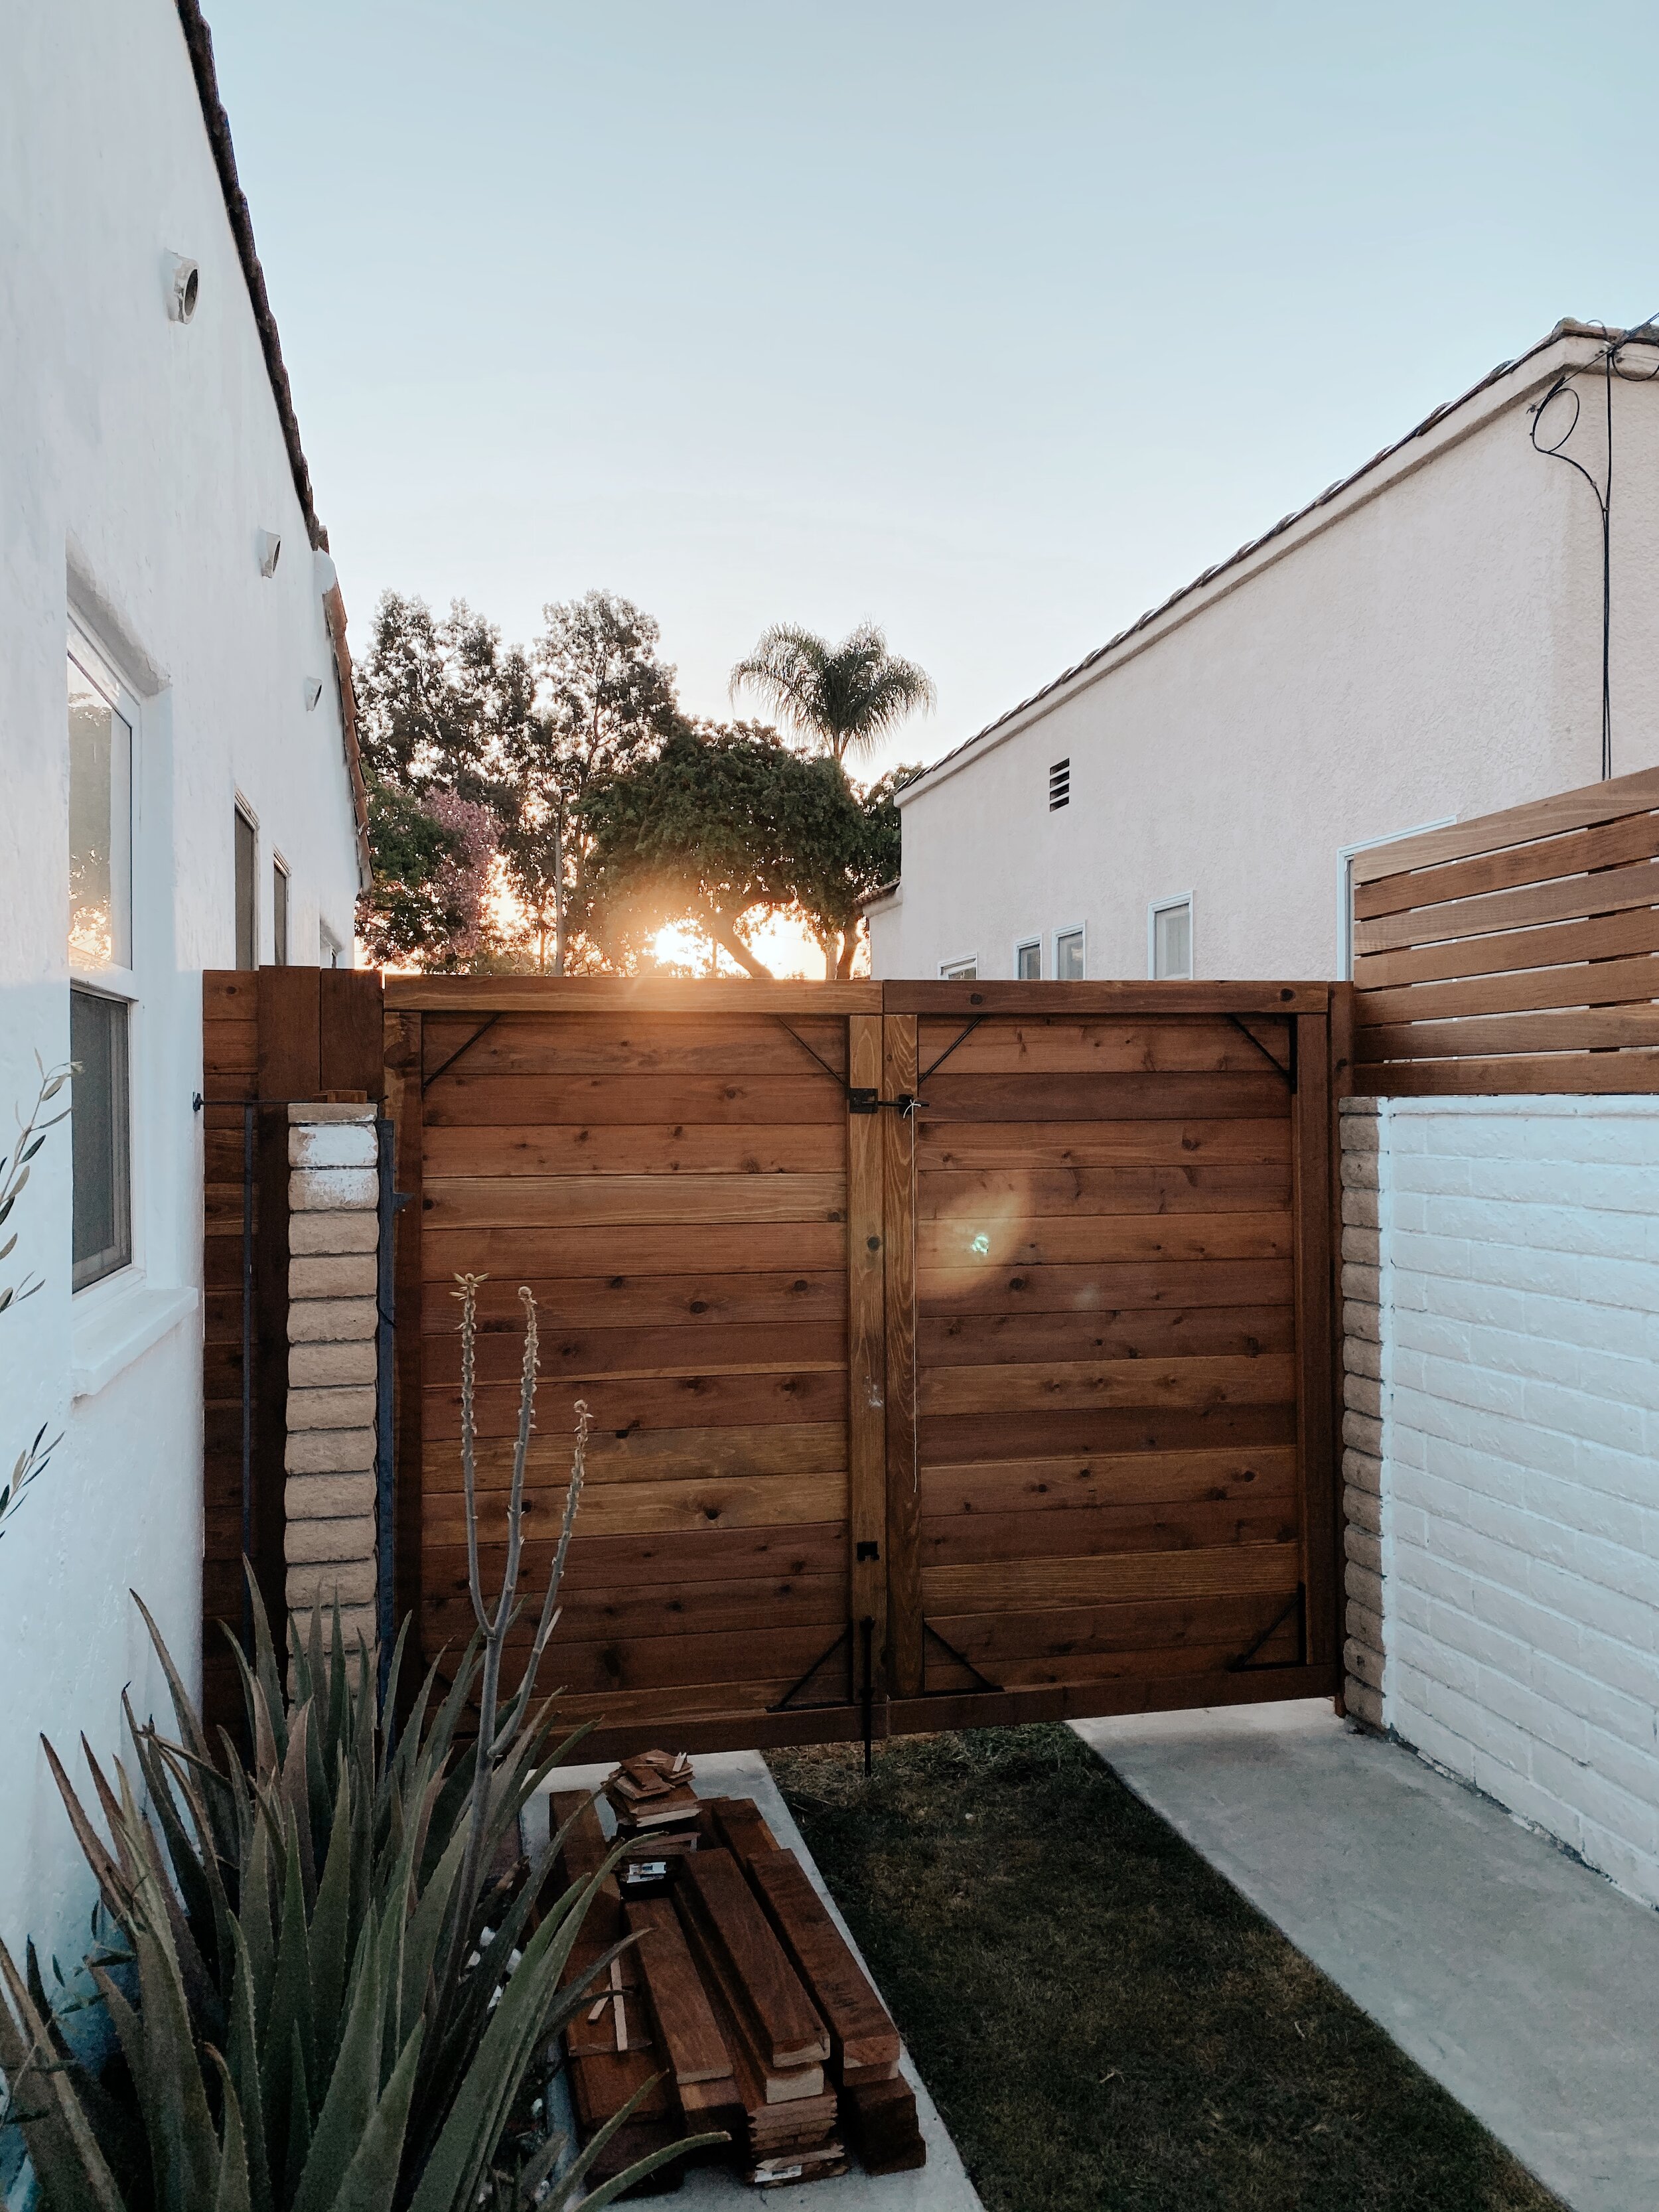
And finished!
BEFORE
AFTER!
Please don’t judge the dead grass, don’t worry, it’s next on the list!

BEFORE

AFTER

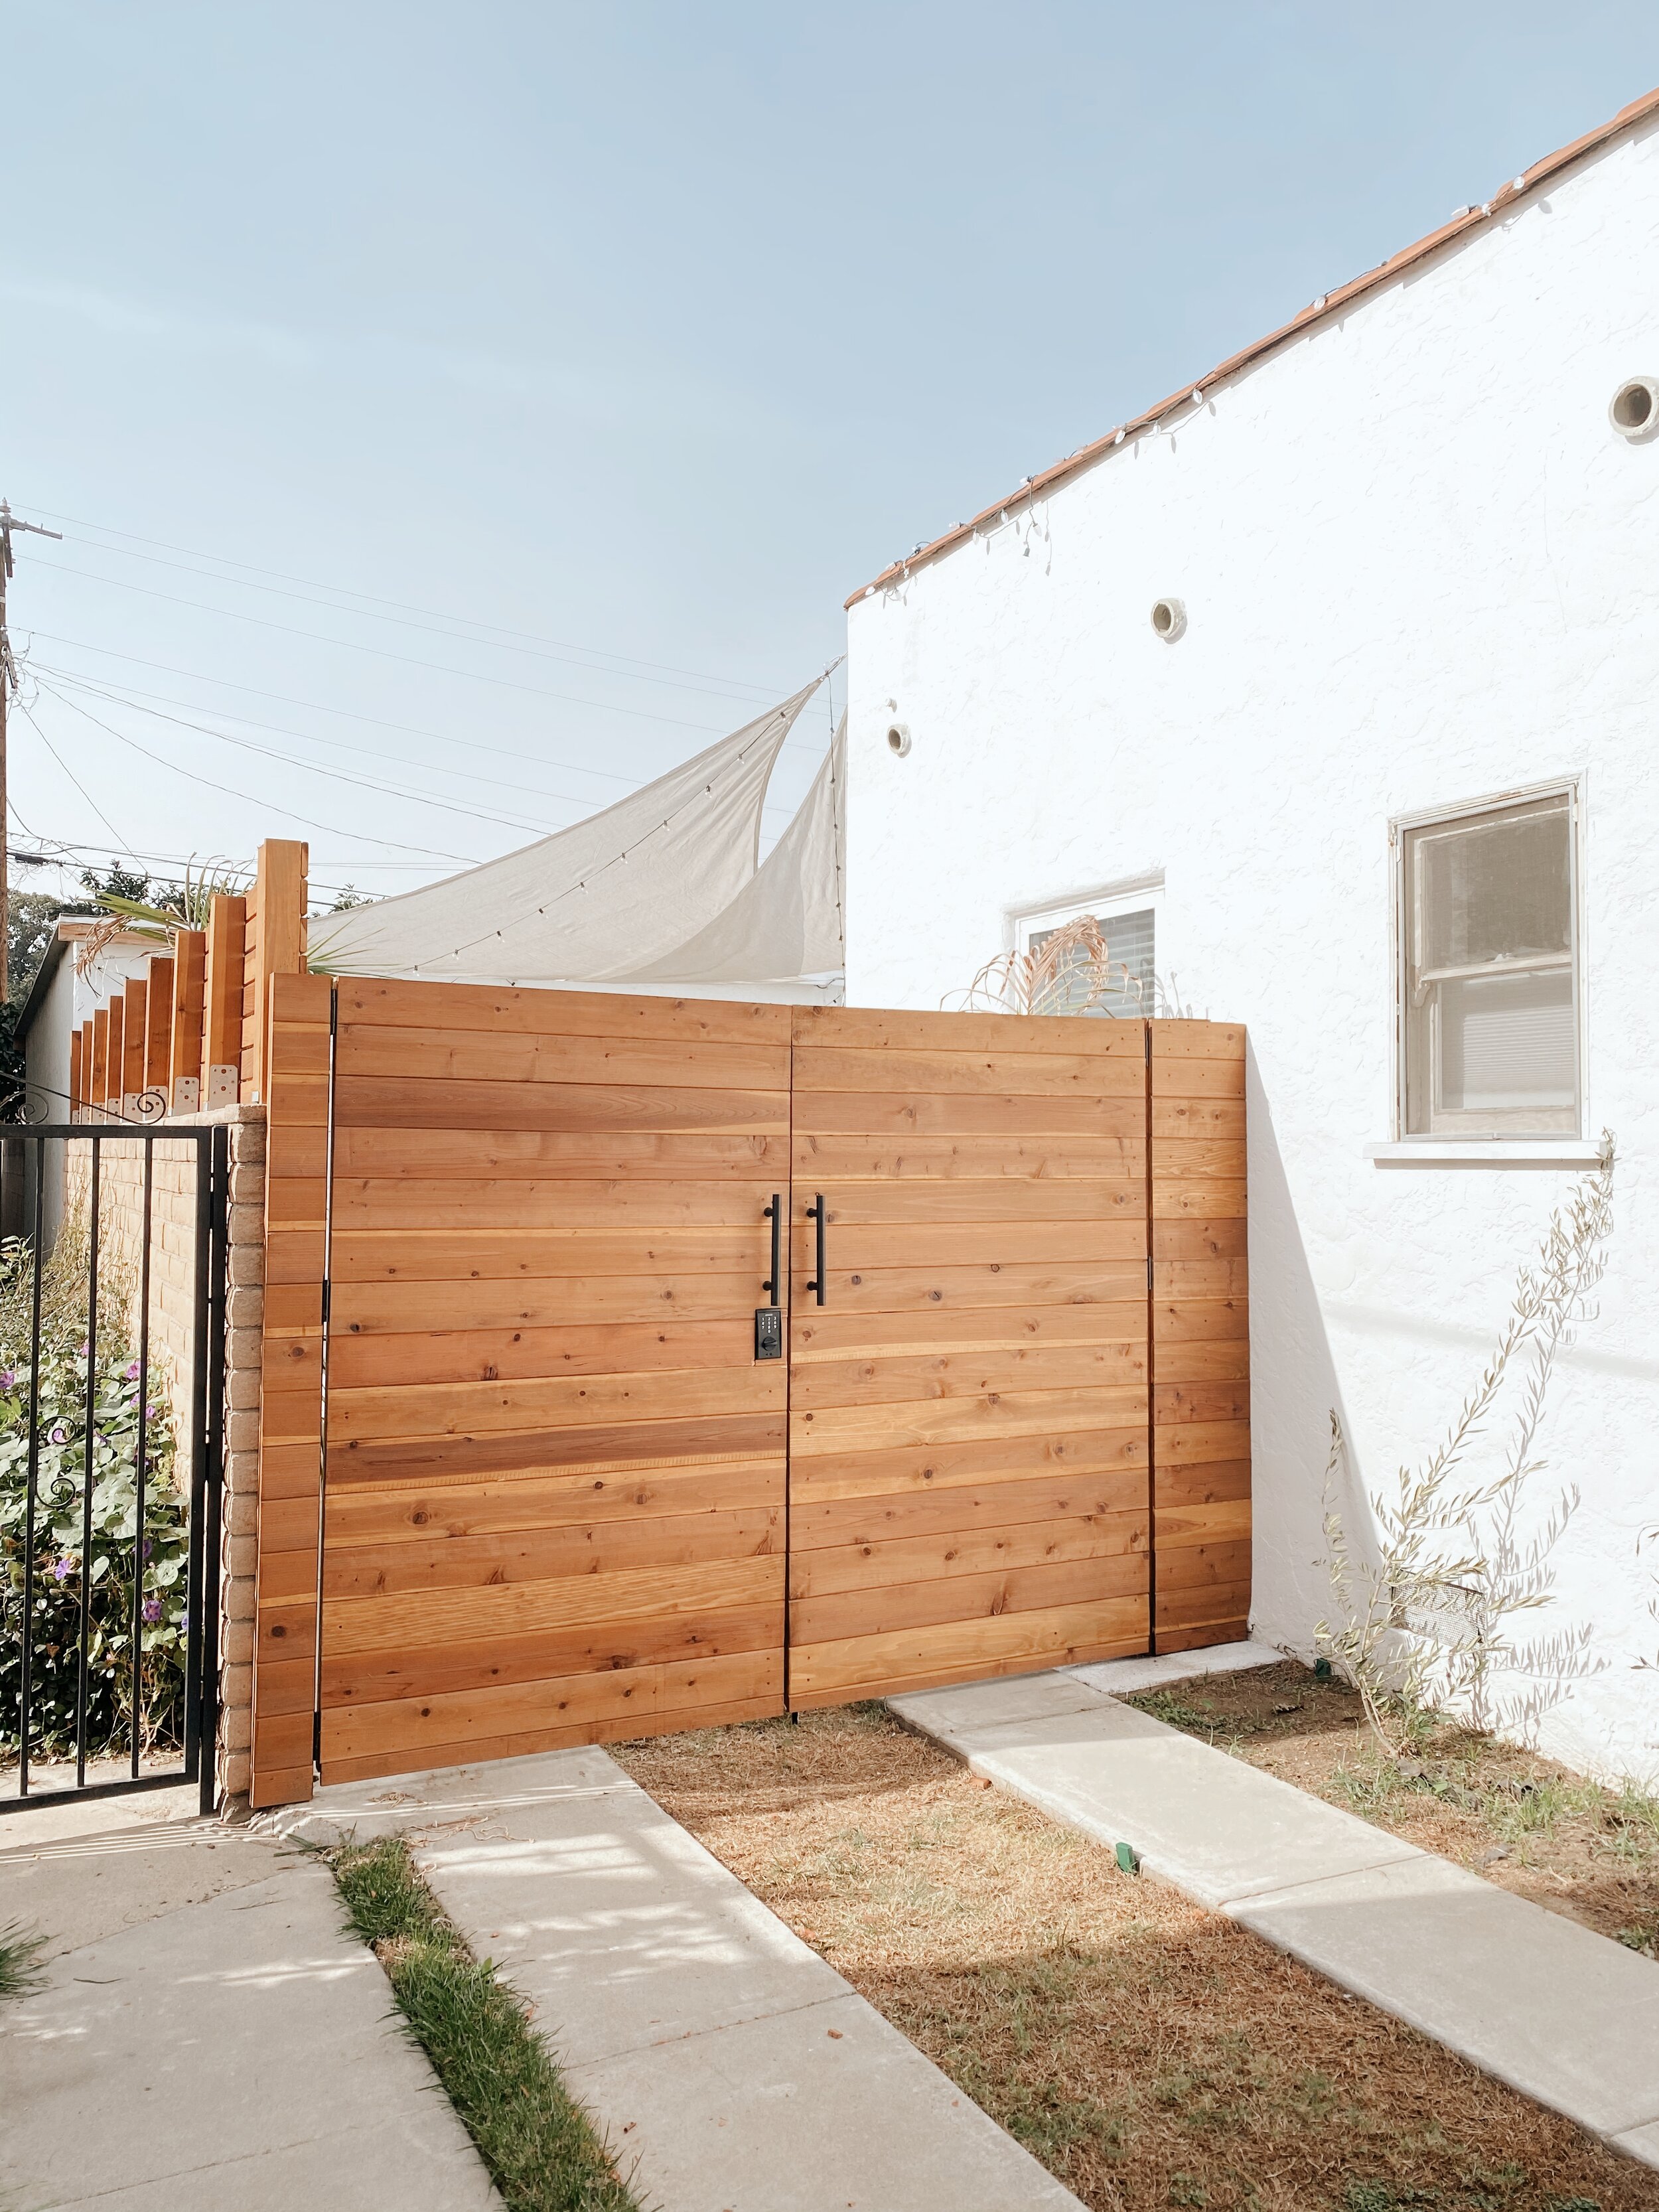

How much better does our new gate look!?! I’m so happy with how it turned out. I’d love to hear your thoughts. Comment below and let me know what you think.
MATERIALS & EQUIPMENT LIST: Redwood: Tongue and Groove, 2x8’s, and 2x4’s. Mider Saw, Hammer Drill with Masonry Bit. Masonery Screws, Nail Gun & Nails. Orbital Sander, Honey Teak Stain from Cabot.
HARDWARE LIST: Anti-Sag Gate Kit x2 in Black, Extra Heavy Auto Close Gate Hinge Set in Black, Cane Bolt in Black x2, Black Gate Latch. (All from National Hardware)
Special thanks to National Hardware and my amazing neighbor Matt, for helping me complete this project.